Introduction
In today’s fast-paced digital world, automating repetitive tasks saves time and minimizes the risk of error. This is especially true for document generation. Imagine having a spreadsheet full of data and being able to automatically generate professional documents with minimal effort. In this tutorial, we’ll show you how to achieve this with three powerful tools: Google Sheets, Zapier, and DocuGenerate.
Google Sheets is a versatile tool for managing and organizing data. Zapier is an automation platform that connects your favorite apps, enabling them to work together seamlessly. DocuGenerate specializes in automated document generation, allowing you to create documents like invoices, contracts, and more.
This automation setup can be particularly useful in various scenarios:
- Sales and Invoicing: Automatically generate invoices from sales data stored in Google Sheets.
- HR and Recruitment: Create employment contracts or offer letters from candidate data.
- Legal Documentation: Produce legal agreements or contracts from structured data.
So let’s dive right in!
Importing the Data in Google Sheets
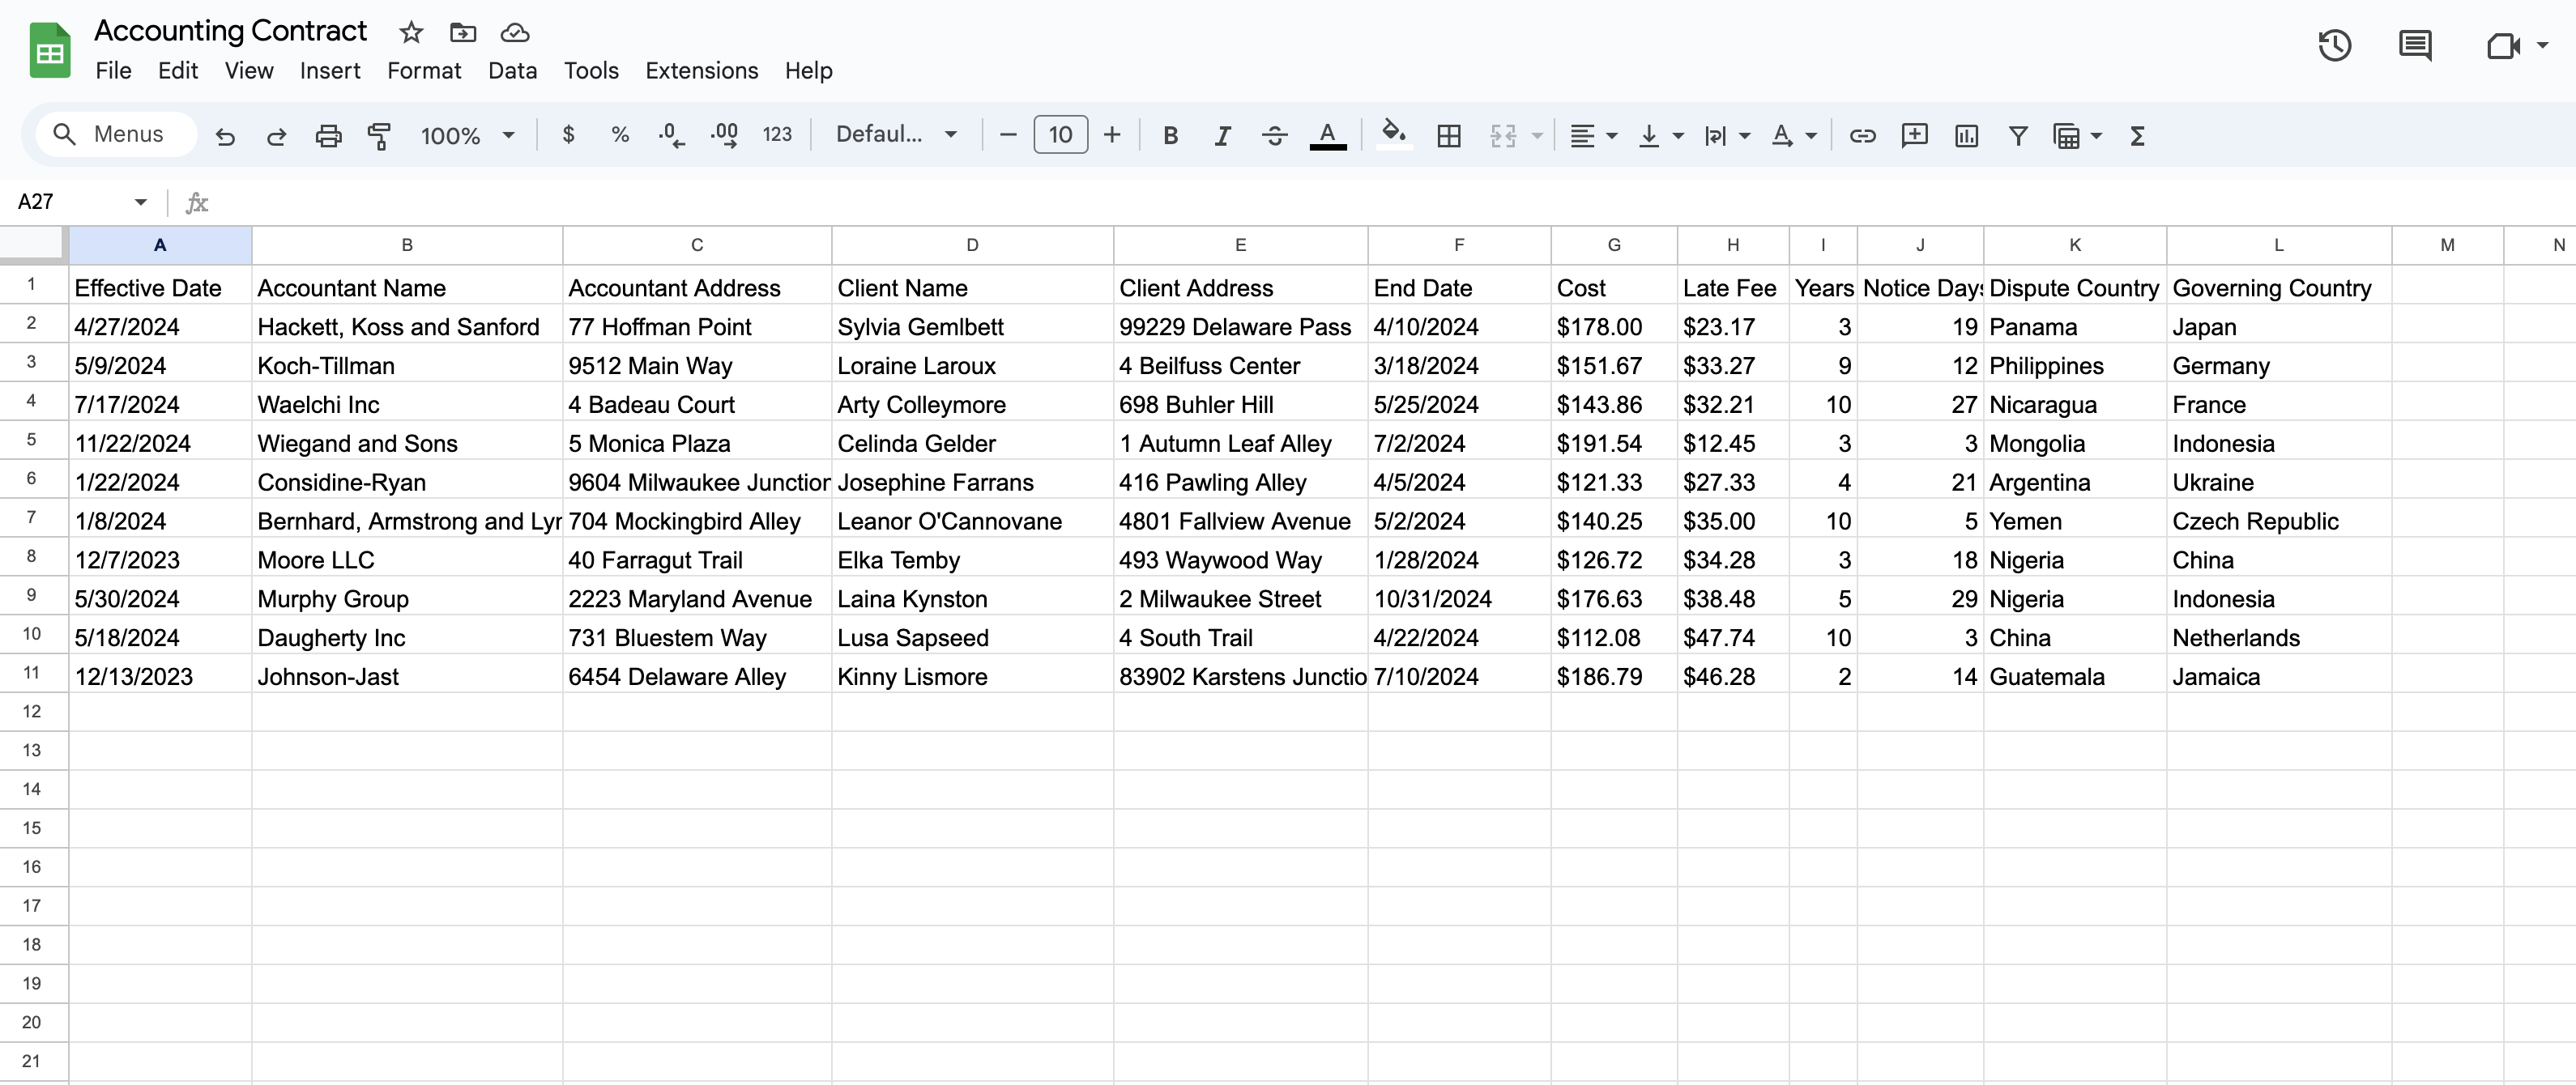
We’ll build a scenario where we generate contracts from data stored in Google Sheets. We will use the Accounting Contract asset from the DocuGenerate Template Library, which includes a Word template for the contract and a sample dataset in Excel format.
First, we need to import our Excel file with the sample data into Google Sheets. Open Google Sheets, create a new spreadsheet, and click on File -> Import.
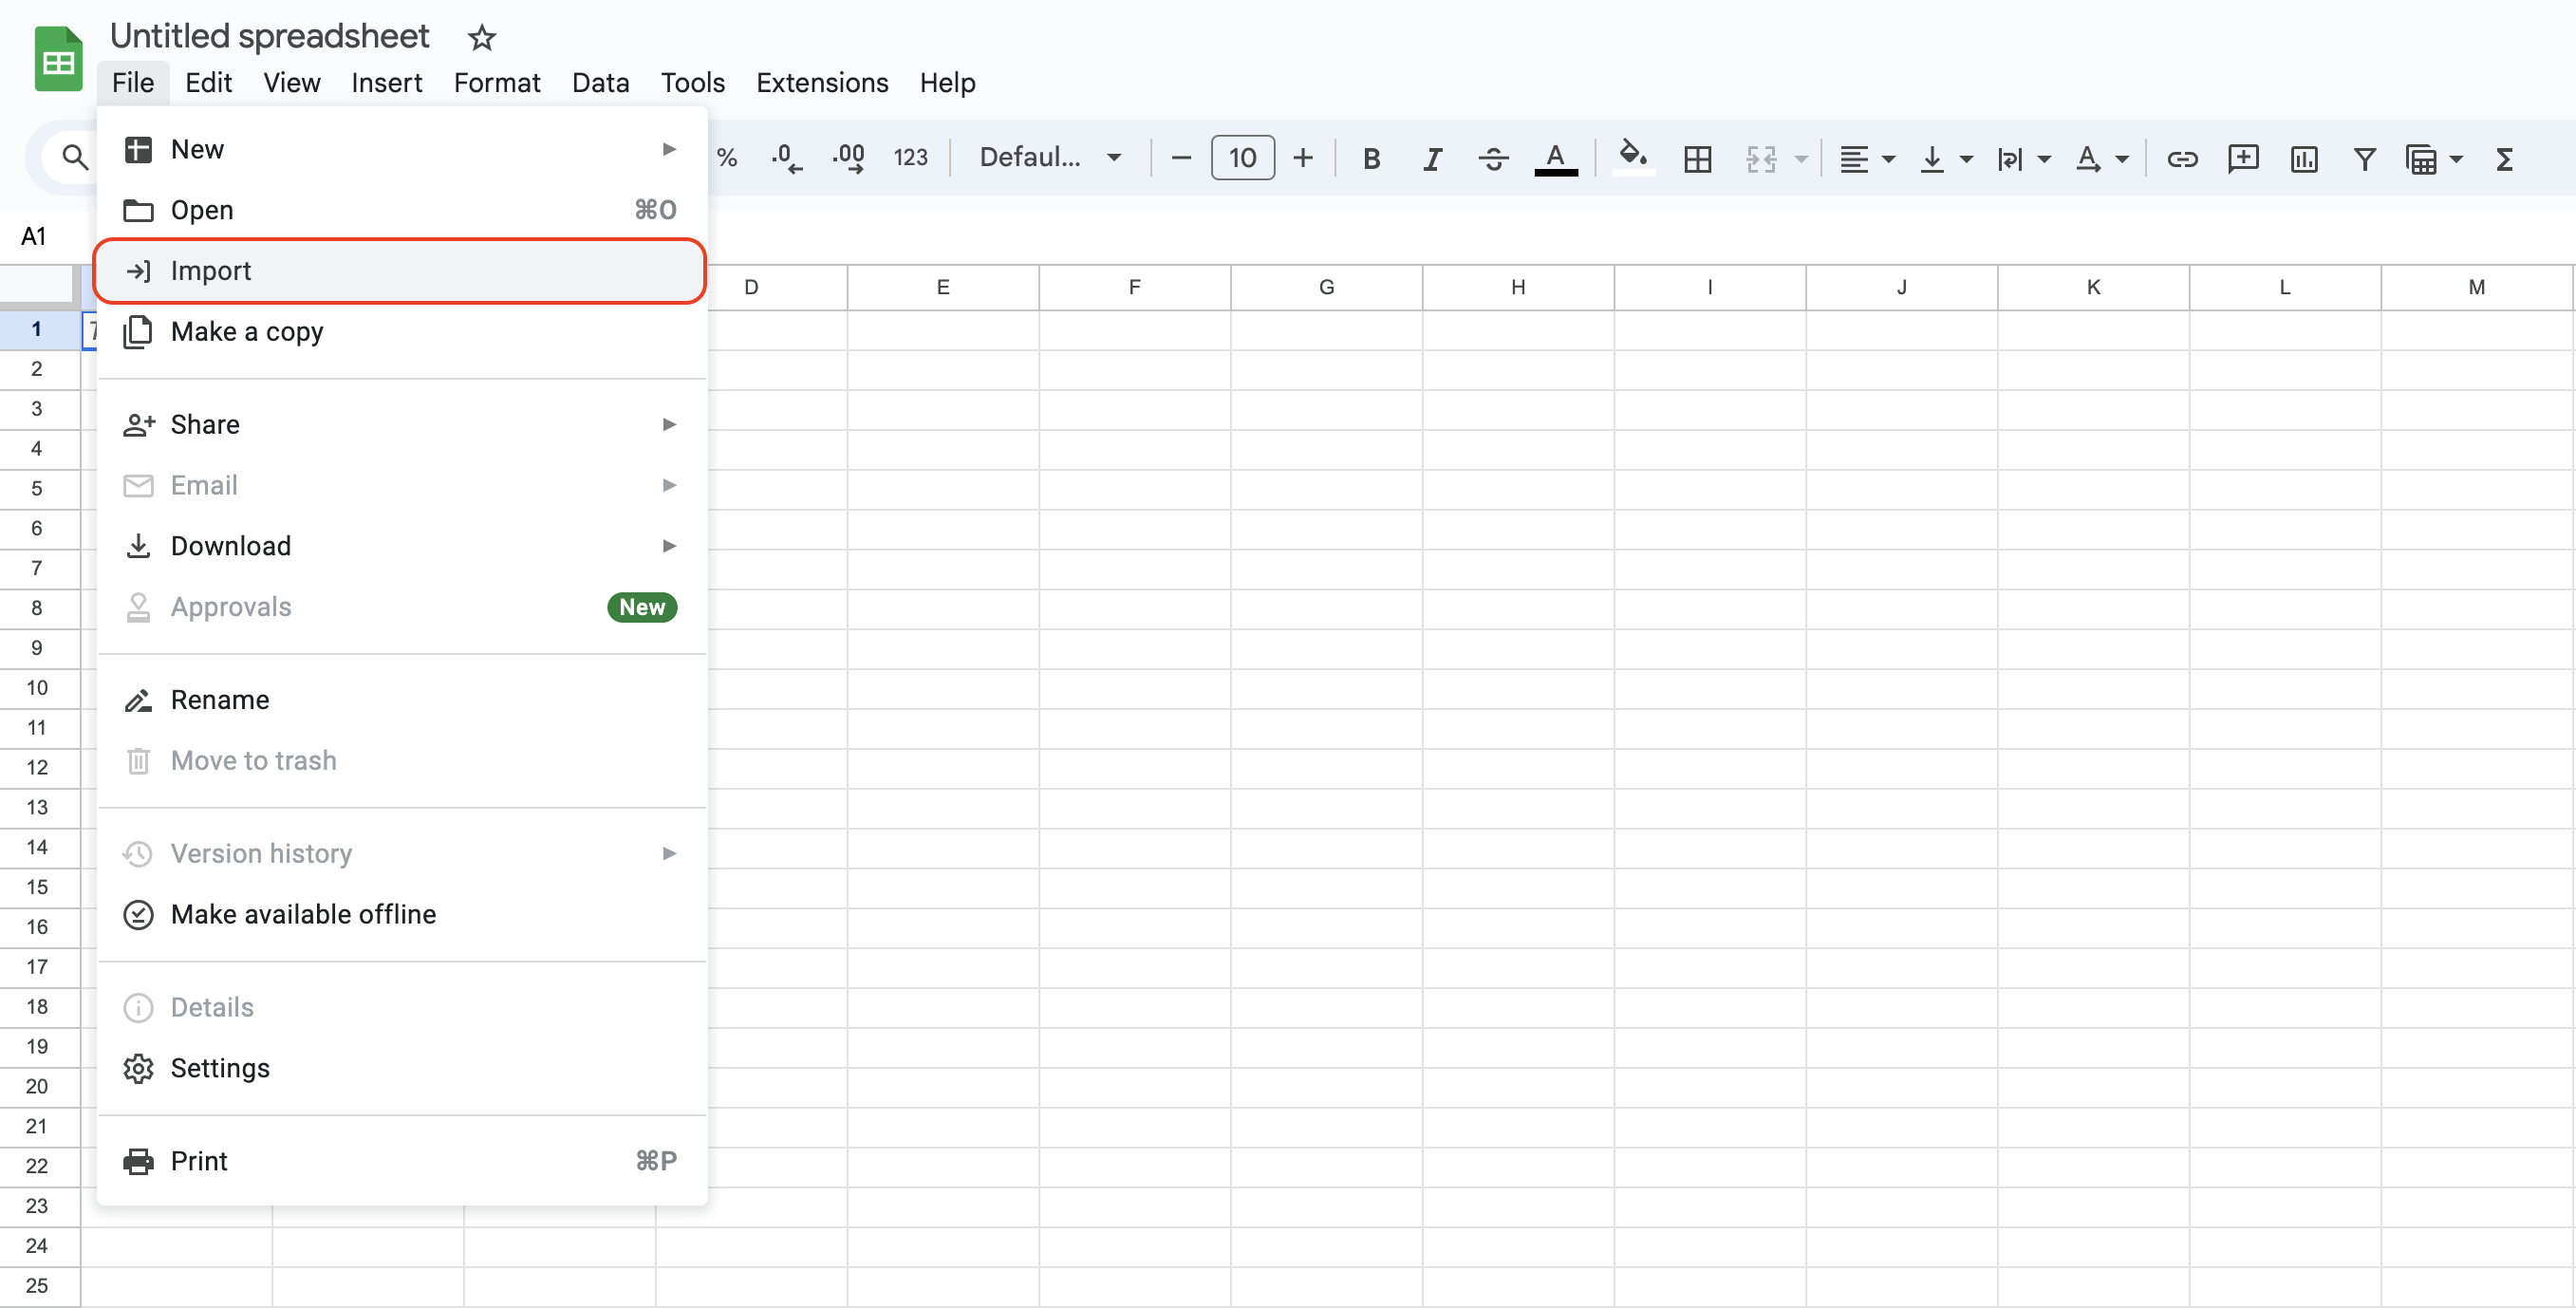
Choose the Upload tab, then select and upload the Accounting Contract.xlsx Excel file.
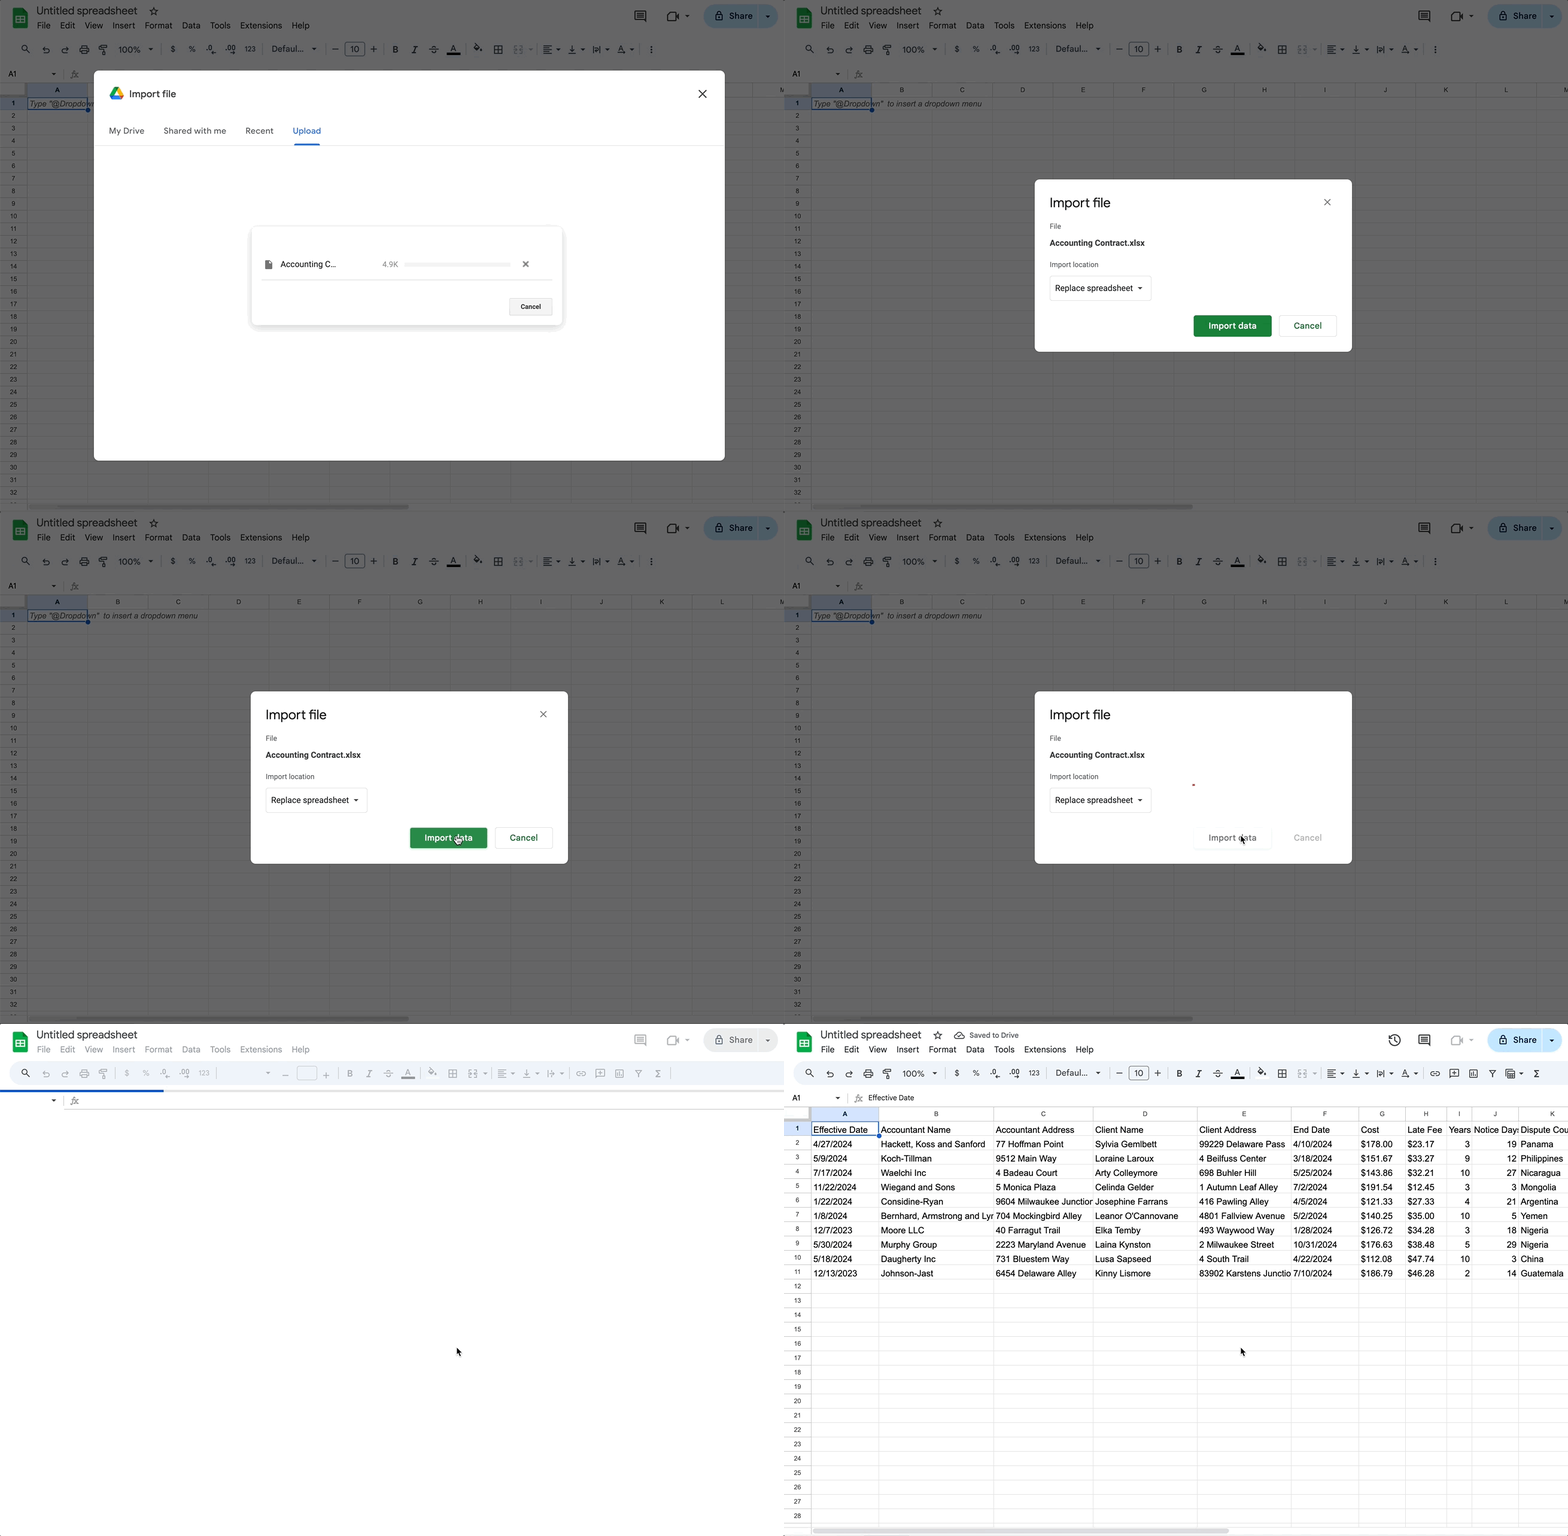
After the upload is complete, you should see your data in Google Sheets. Give the spreadsheet a name, like Accounting Contract for example, and you’re done!
Setting Up the Google Sheets Trigger
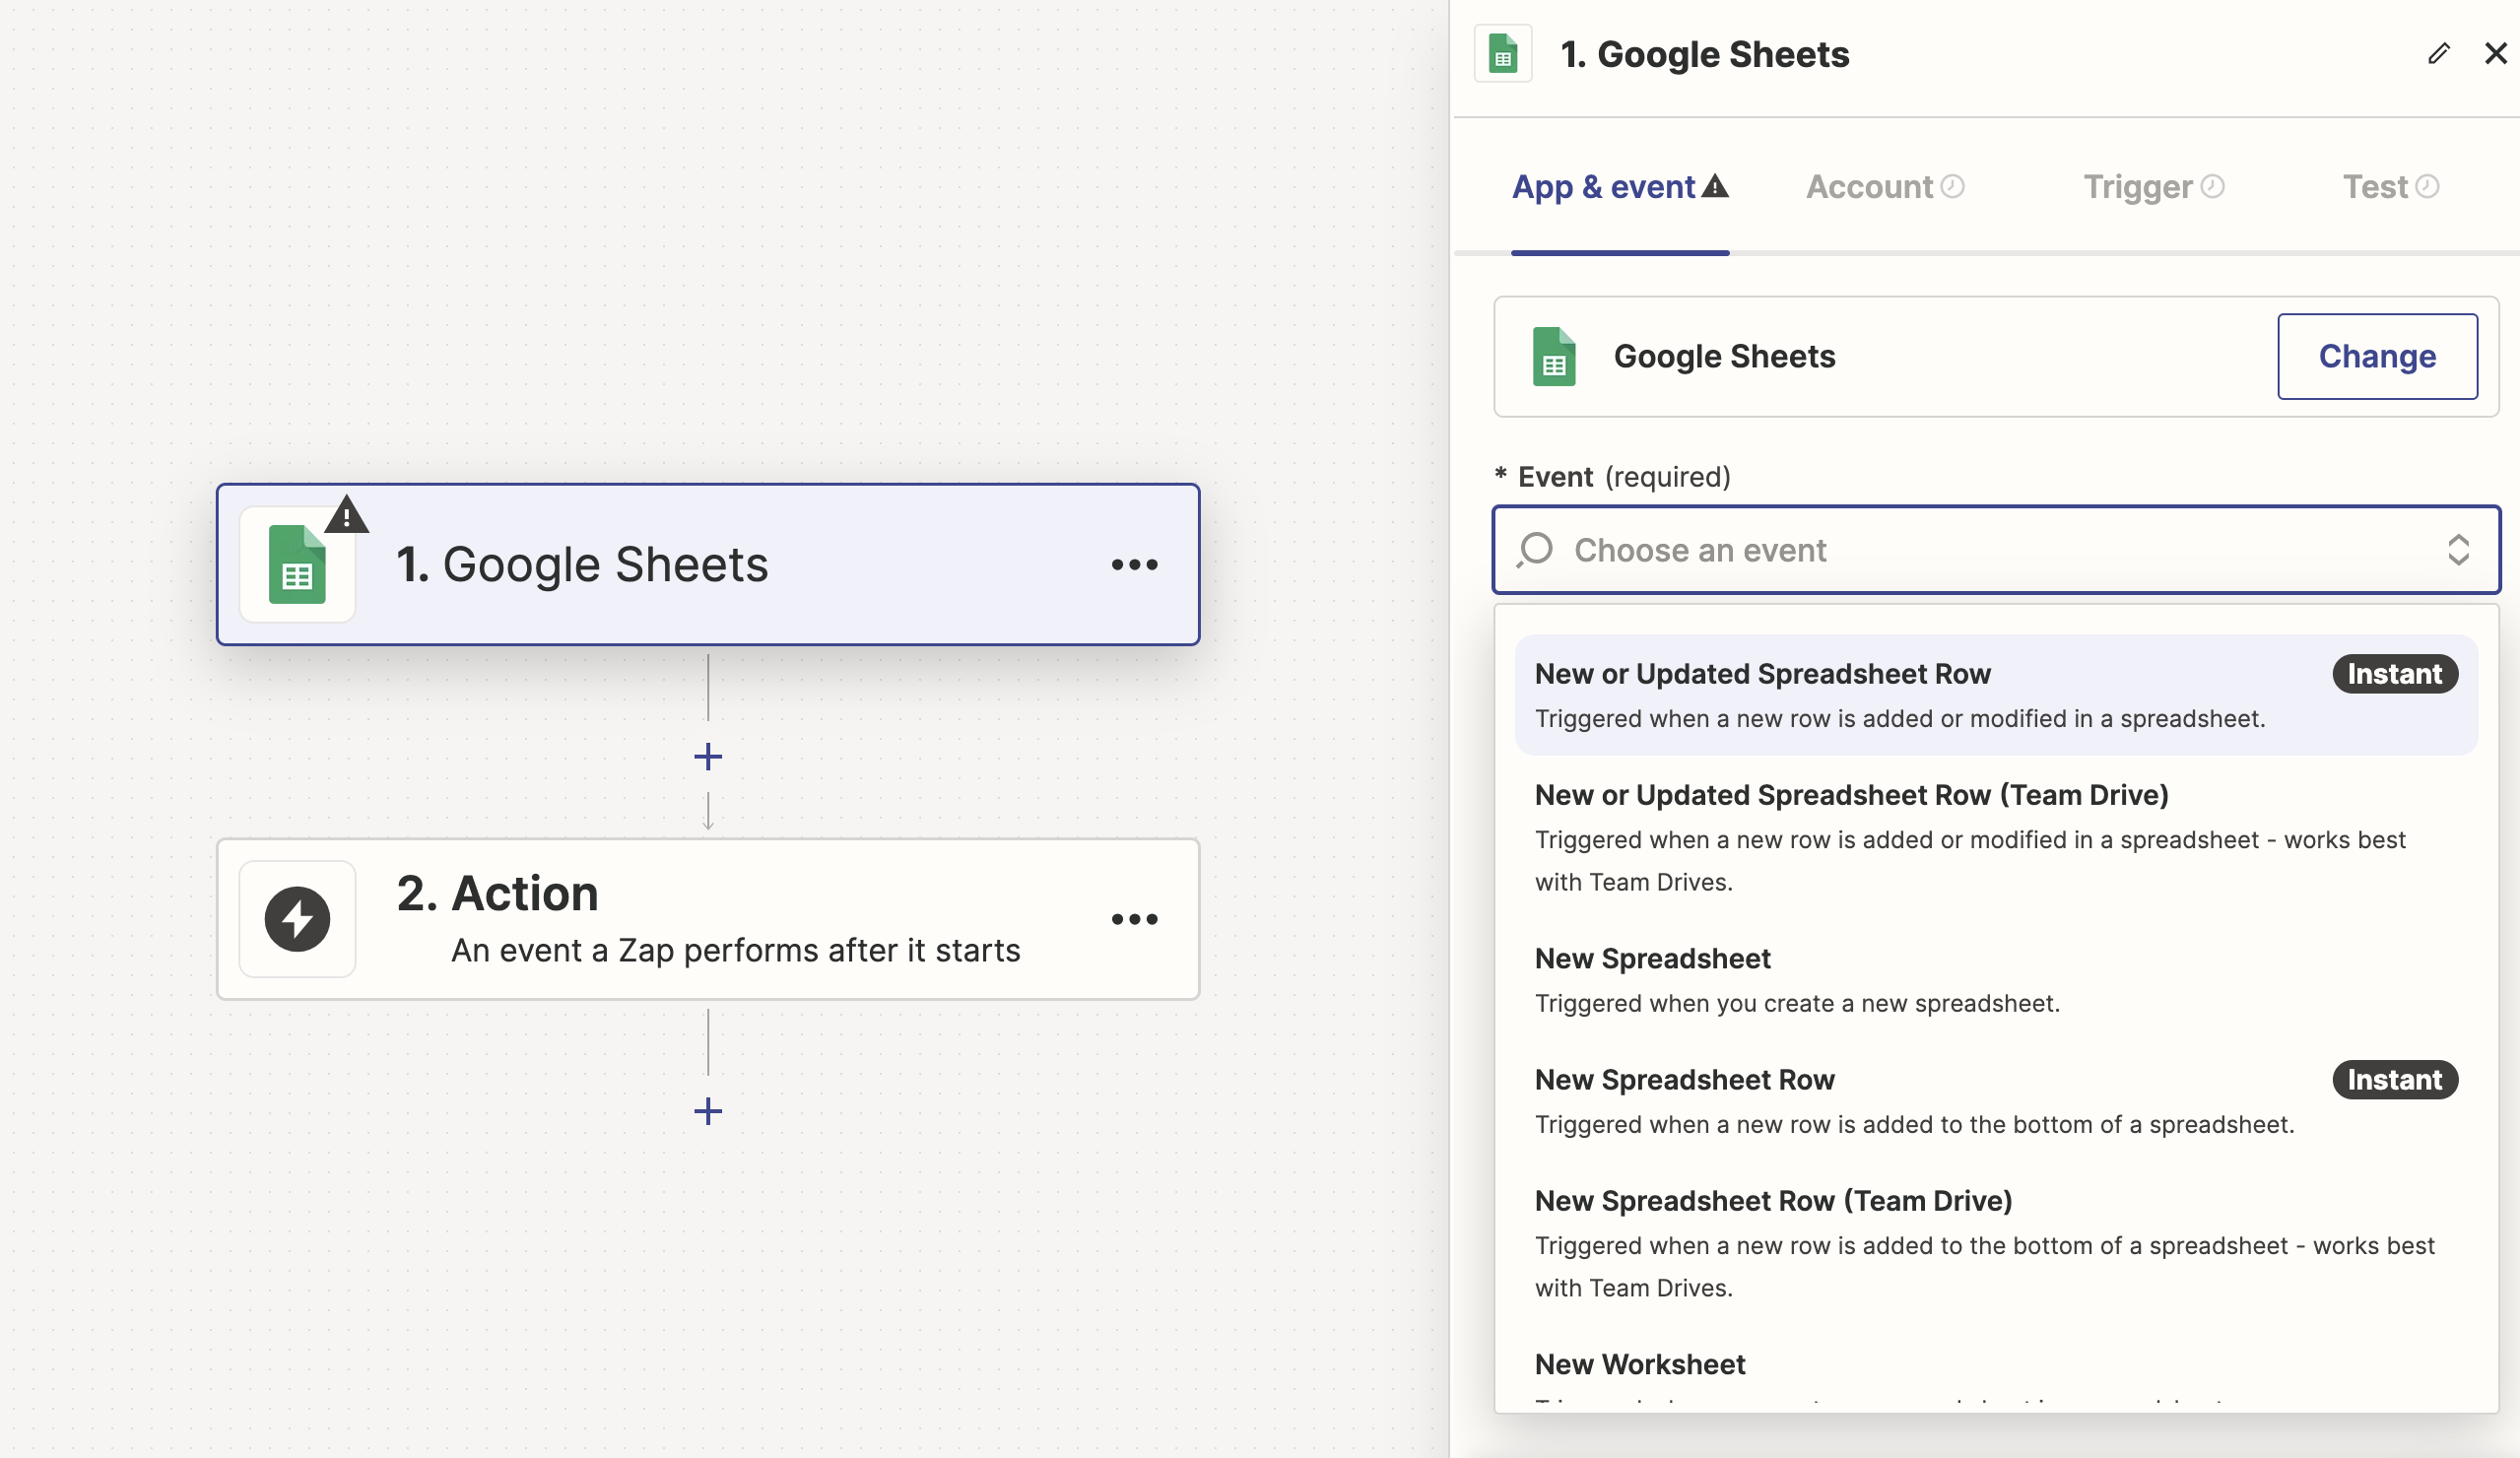
Start by creating a new Zap and selecting the Google Sheets app as the starting point. Then, add the New or Updated Spreadsheet Row in Google Sheets trigger in Zapier.
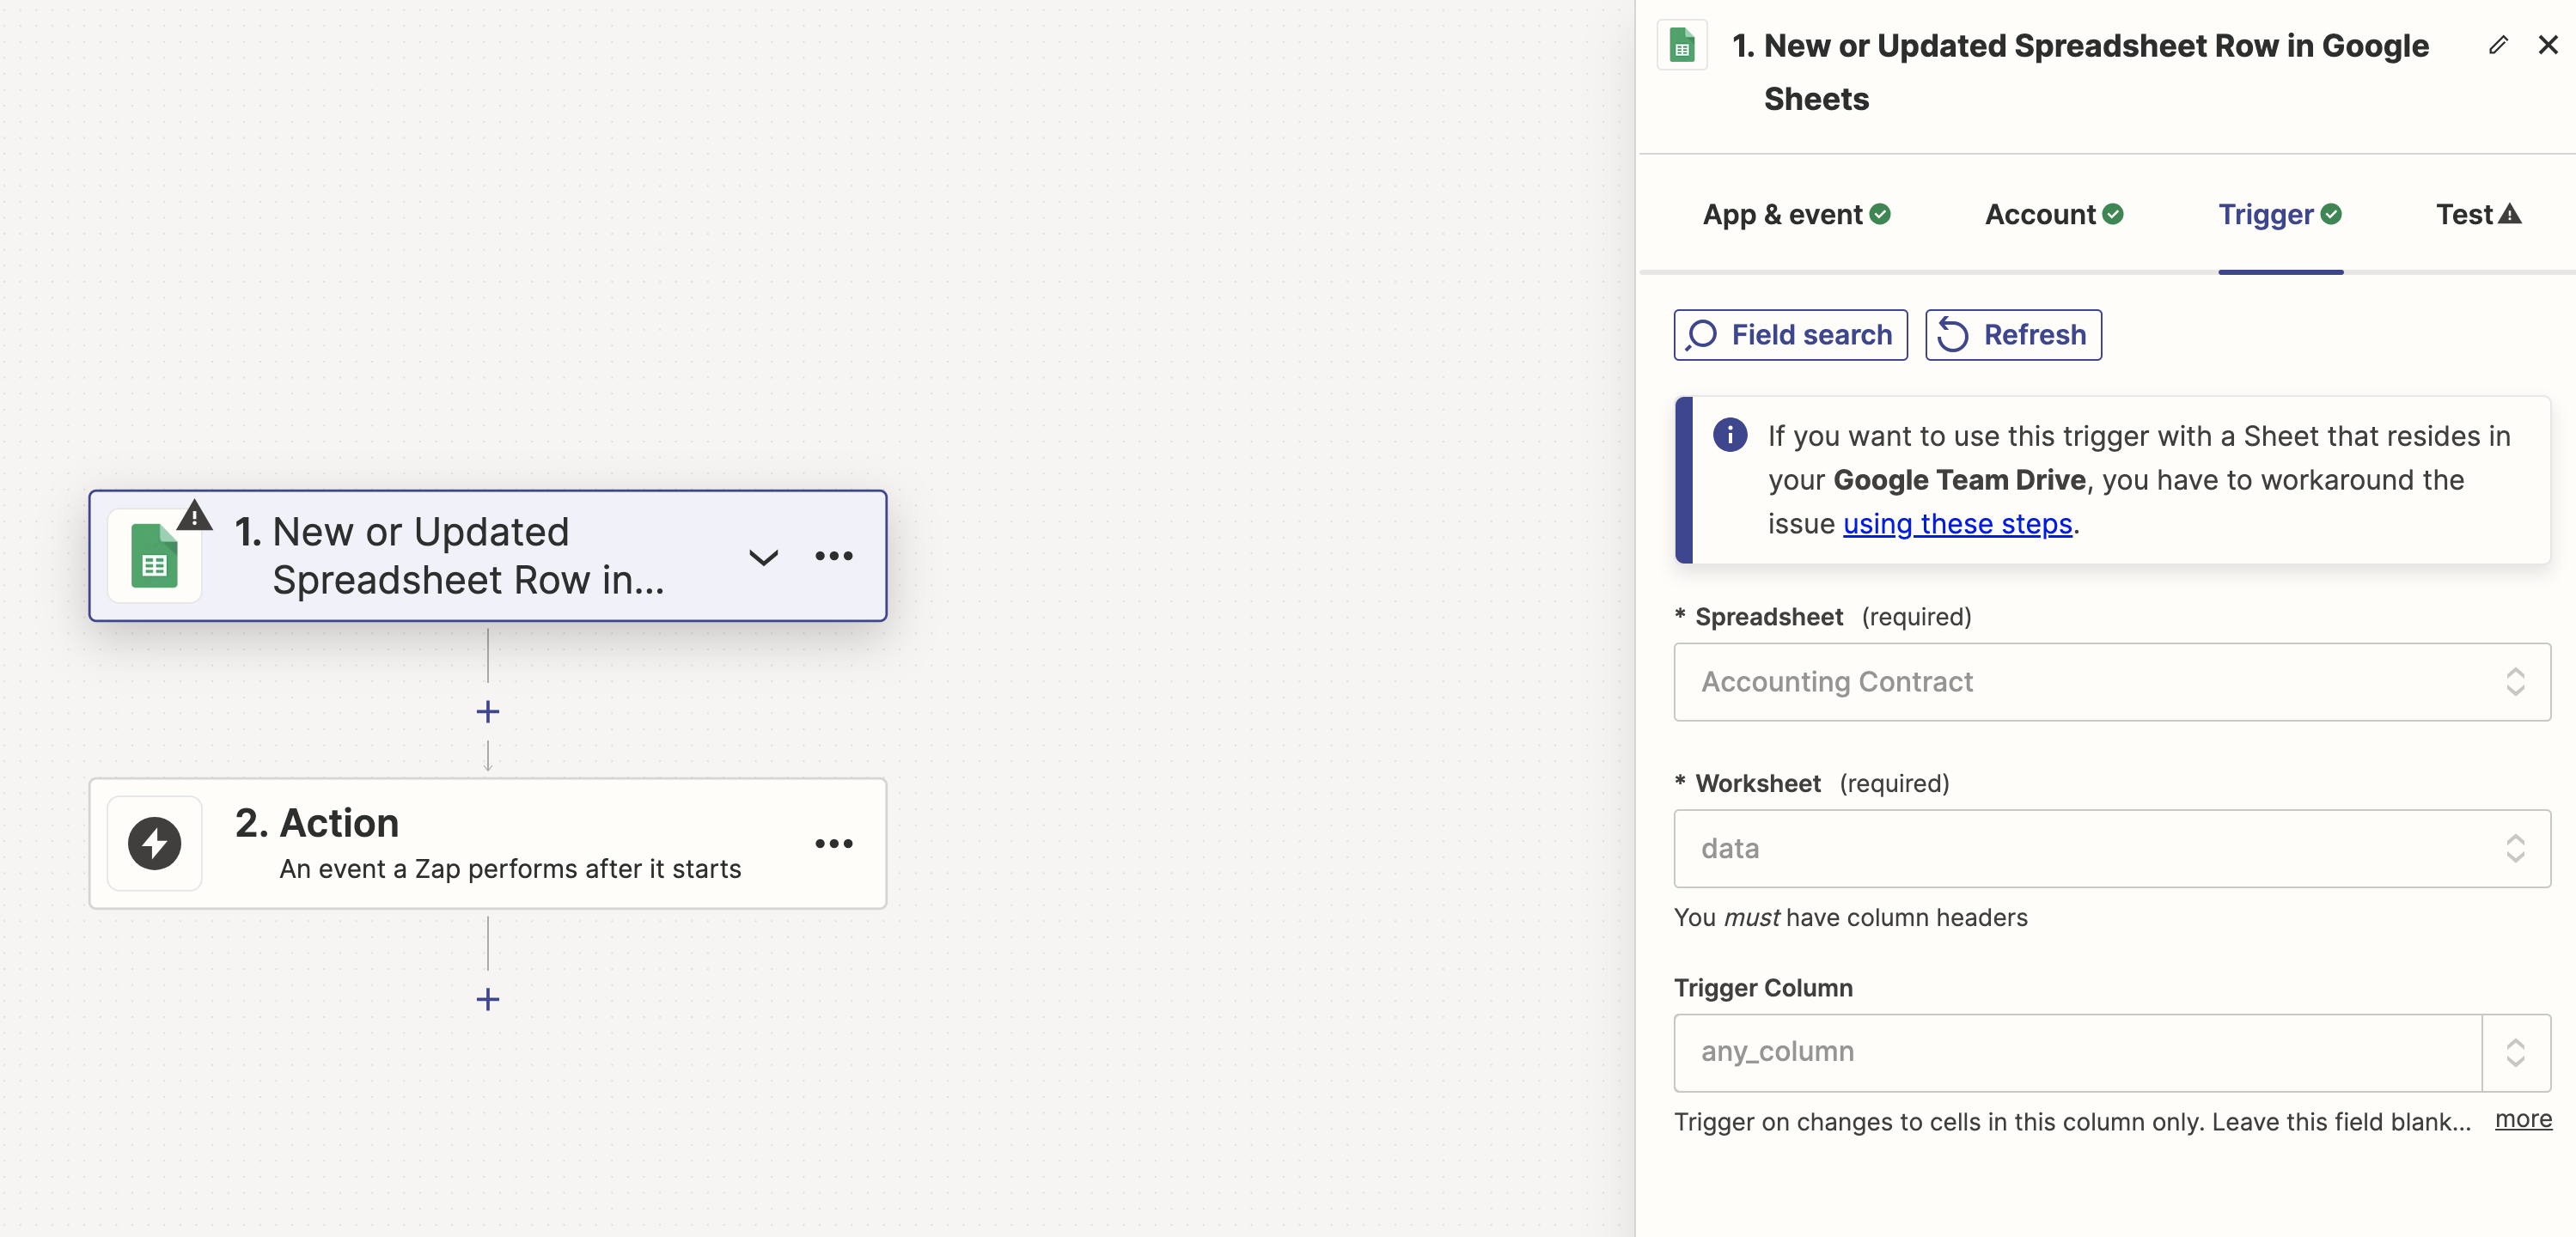
Next, connect your Google account that was used to import the data in Google Sheets. On the Trigger tab select the Spreadsheet and Worksheet corresponding to your Google Sheets document:
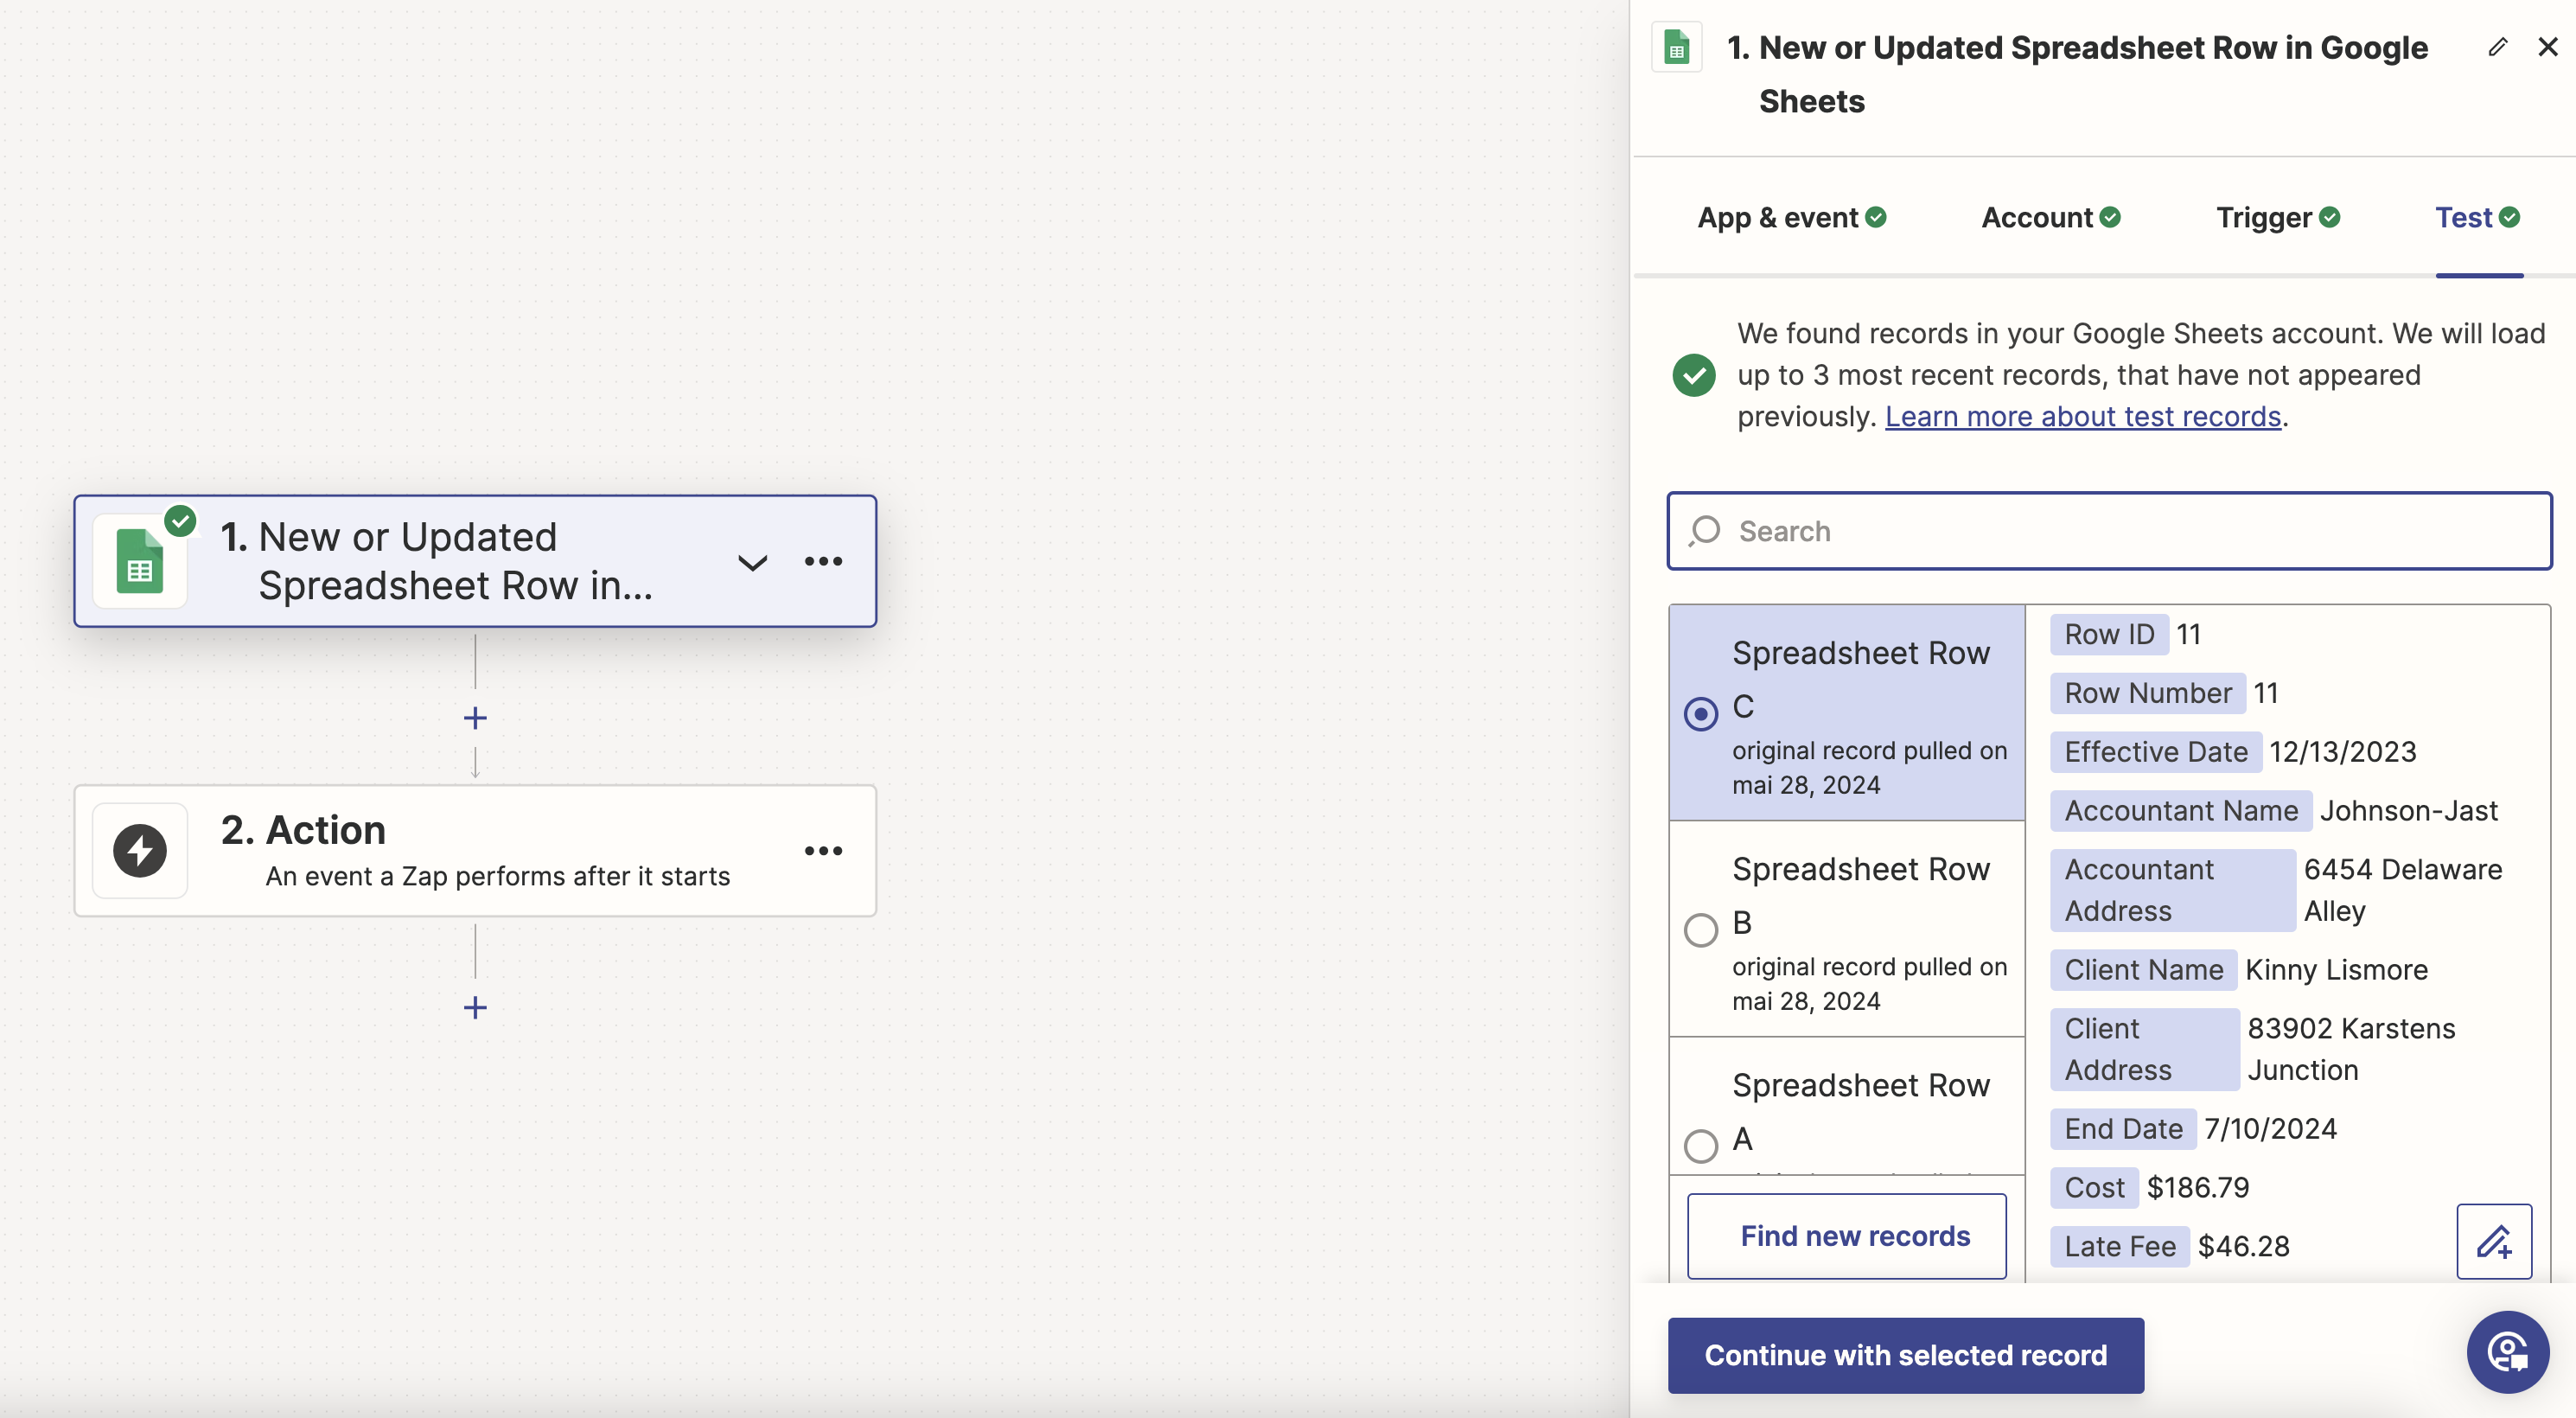
Finally, on the Test step, you can verify that the connection is successful. The listing shows the three most recent records of your data. Select one of them and click on Continue with selected record to complete this step. The selected record will be used when setting up the other apps in the Zap to preview the data that will be coming from the Google Sheets app.
Creating the Template in DocuGenerate
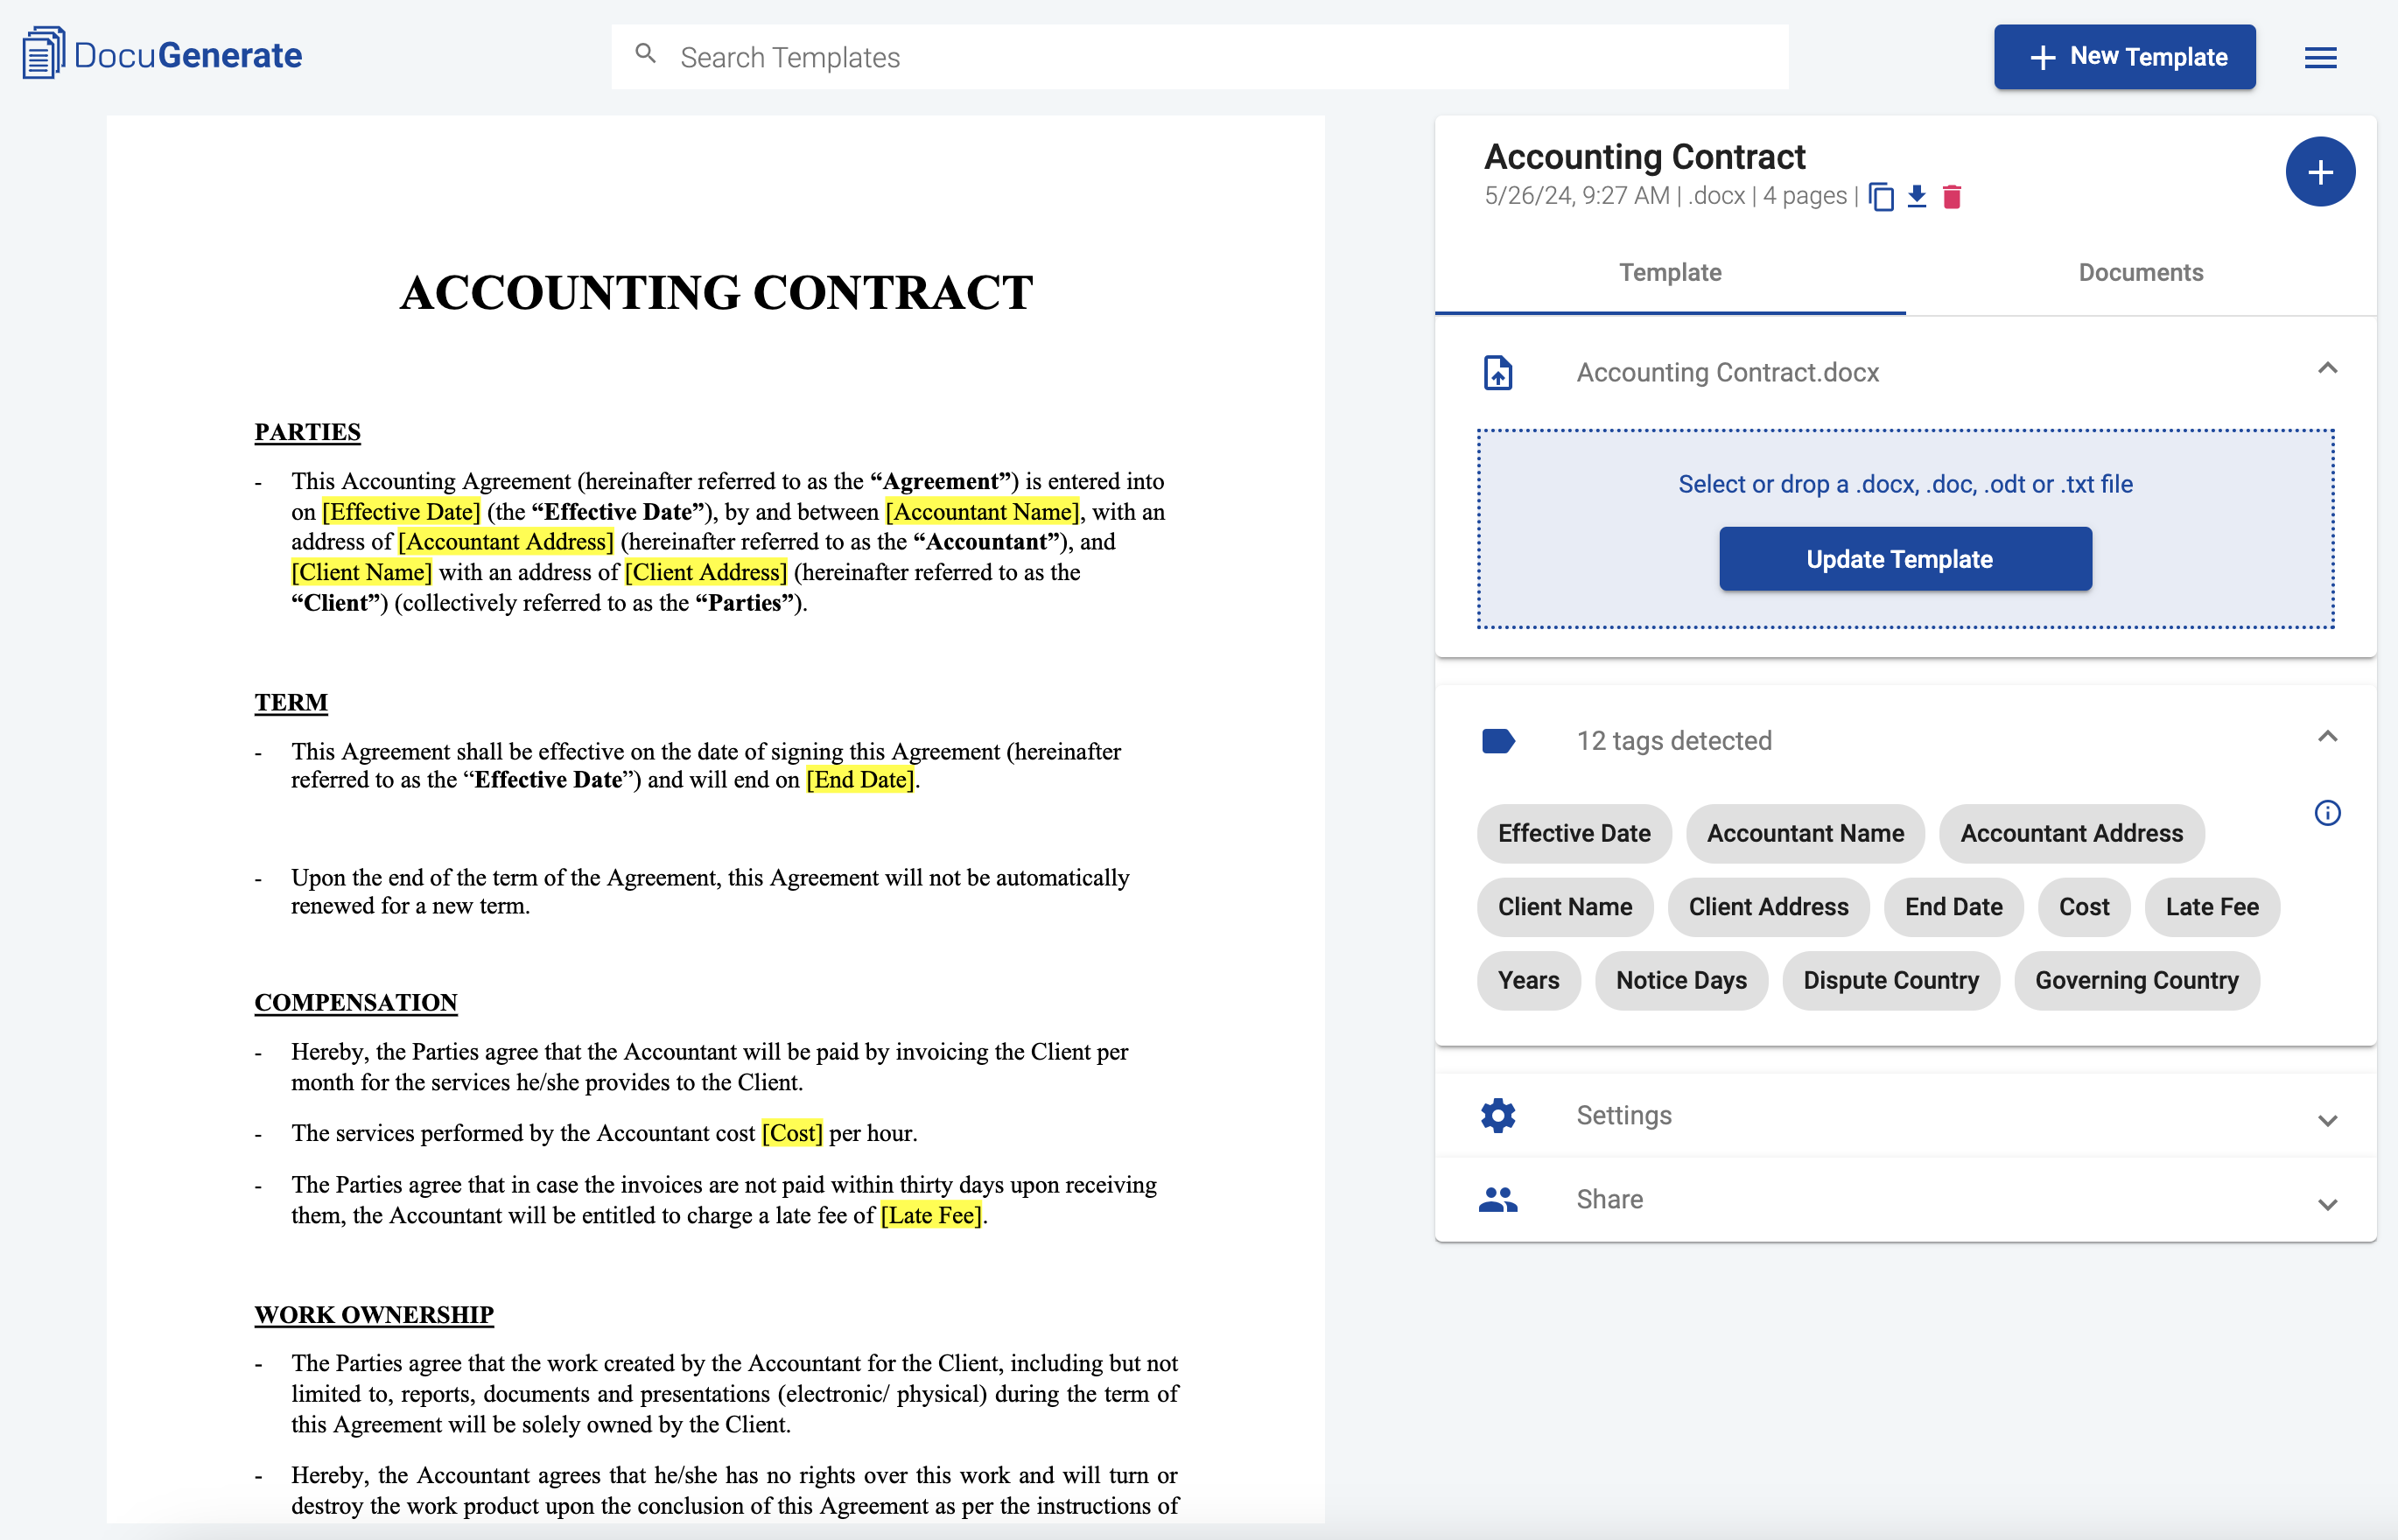
Log in to DocuGenerate and create a new template using the Accounting Contract.docx sample file. Follow the guide in our Help Center if you need help. Your screen should look something like this:
Setting Up the “Generate Document” Action
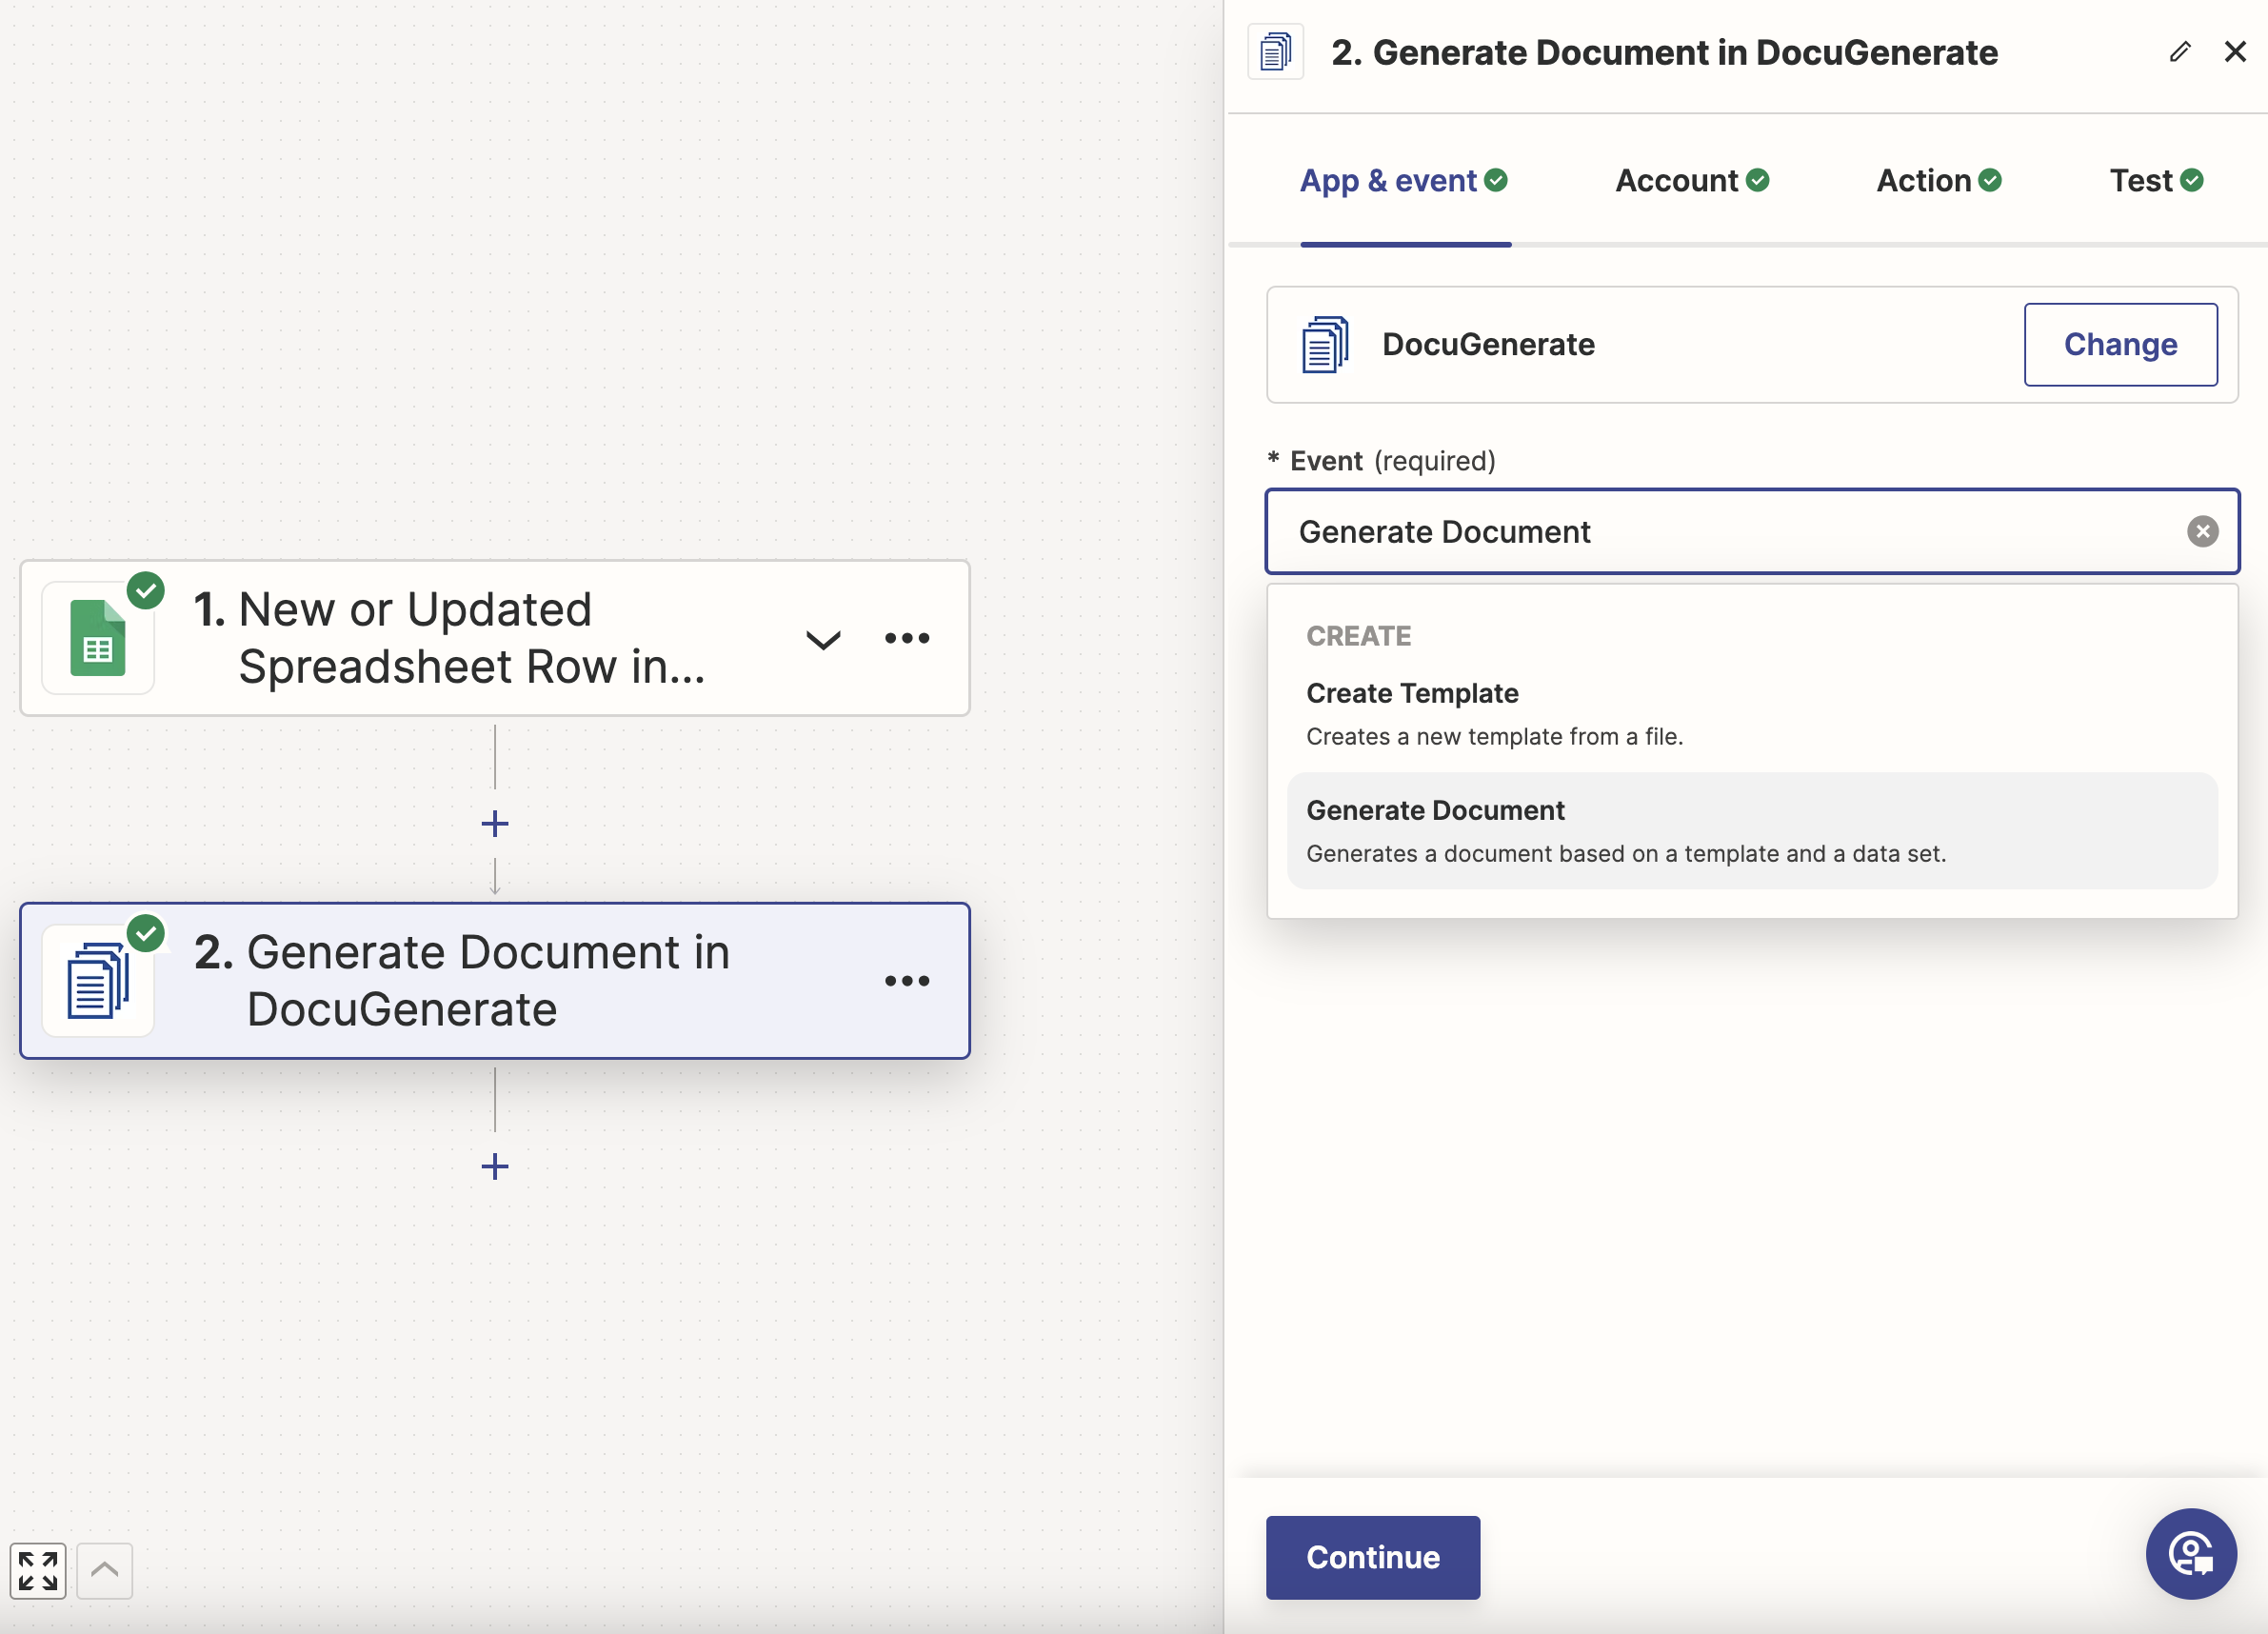
Search for the DocuGenerate app and add it to the Zap. Then select the Generate Document action. For more information about connecting Zapier with DocuGenerate, check out the guide in our Help Center.
After connecting your DocuGenerate account to Zapier, you need to configure the call parameters in the Action tab. From the drop-down list, select the Accounting Contract template created in the previous step. Specify a Name, like Contract for [Client Name], where [Client Name] is a dynamic field that will be inserted by Zapier during the API call to DocuGenerate. For the format, you can choose PDF.
When selecting the template, the Data parameter will be pre-populated with an empty JSON object corresponding to the merge tags contained in the template. For each key, you’ll need to map the values from the Google Sheet app. Make sure to keep the double quotes surrounding each value, otherwise the JSON will be invalid and the API call will fail.
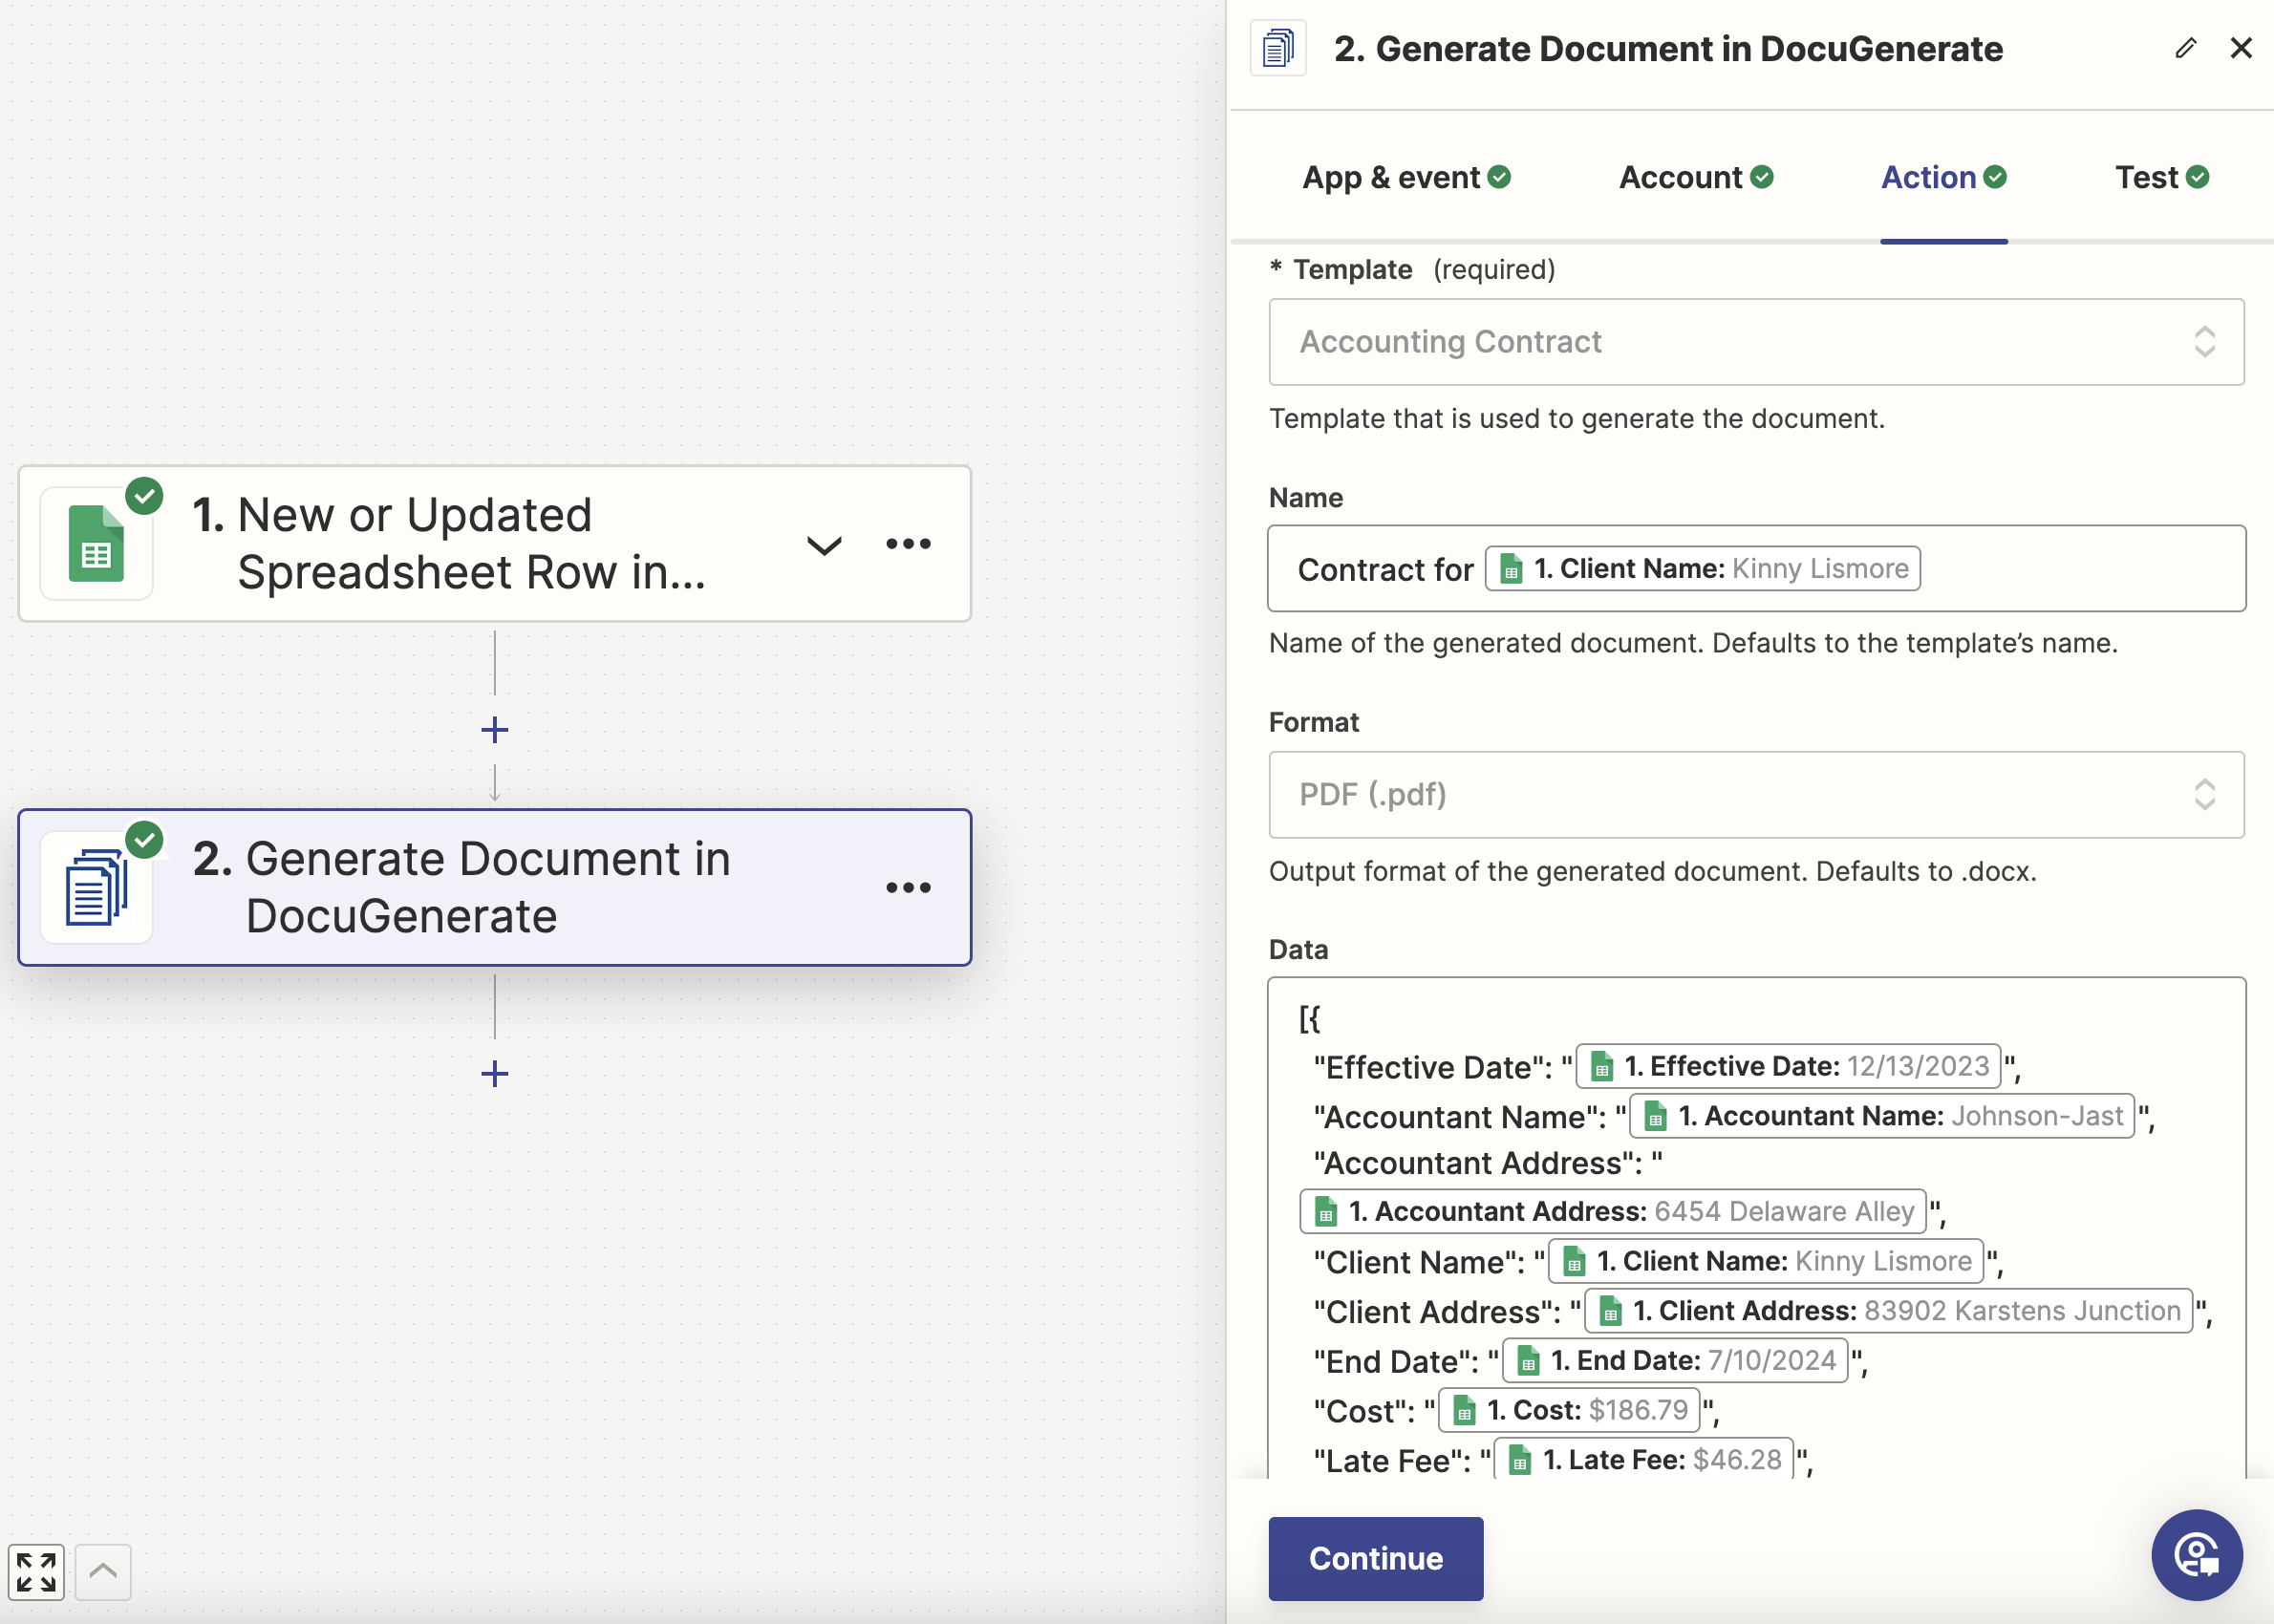
Take for example the first key, this is the correct way to do it:
"Effective Date": "1. Effective Date 12/13/2023"
This on the other hand, would be incorrect because the double quotes are missing:
"Effective Date": 1. Effective Date 12/13/2023
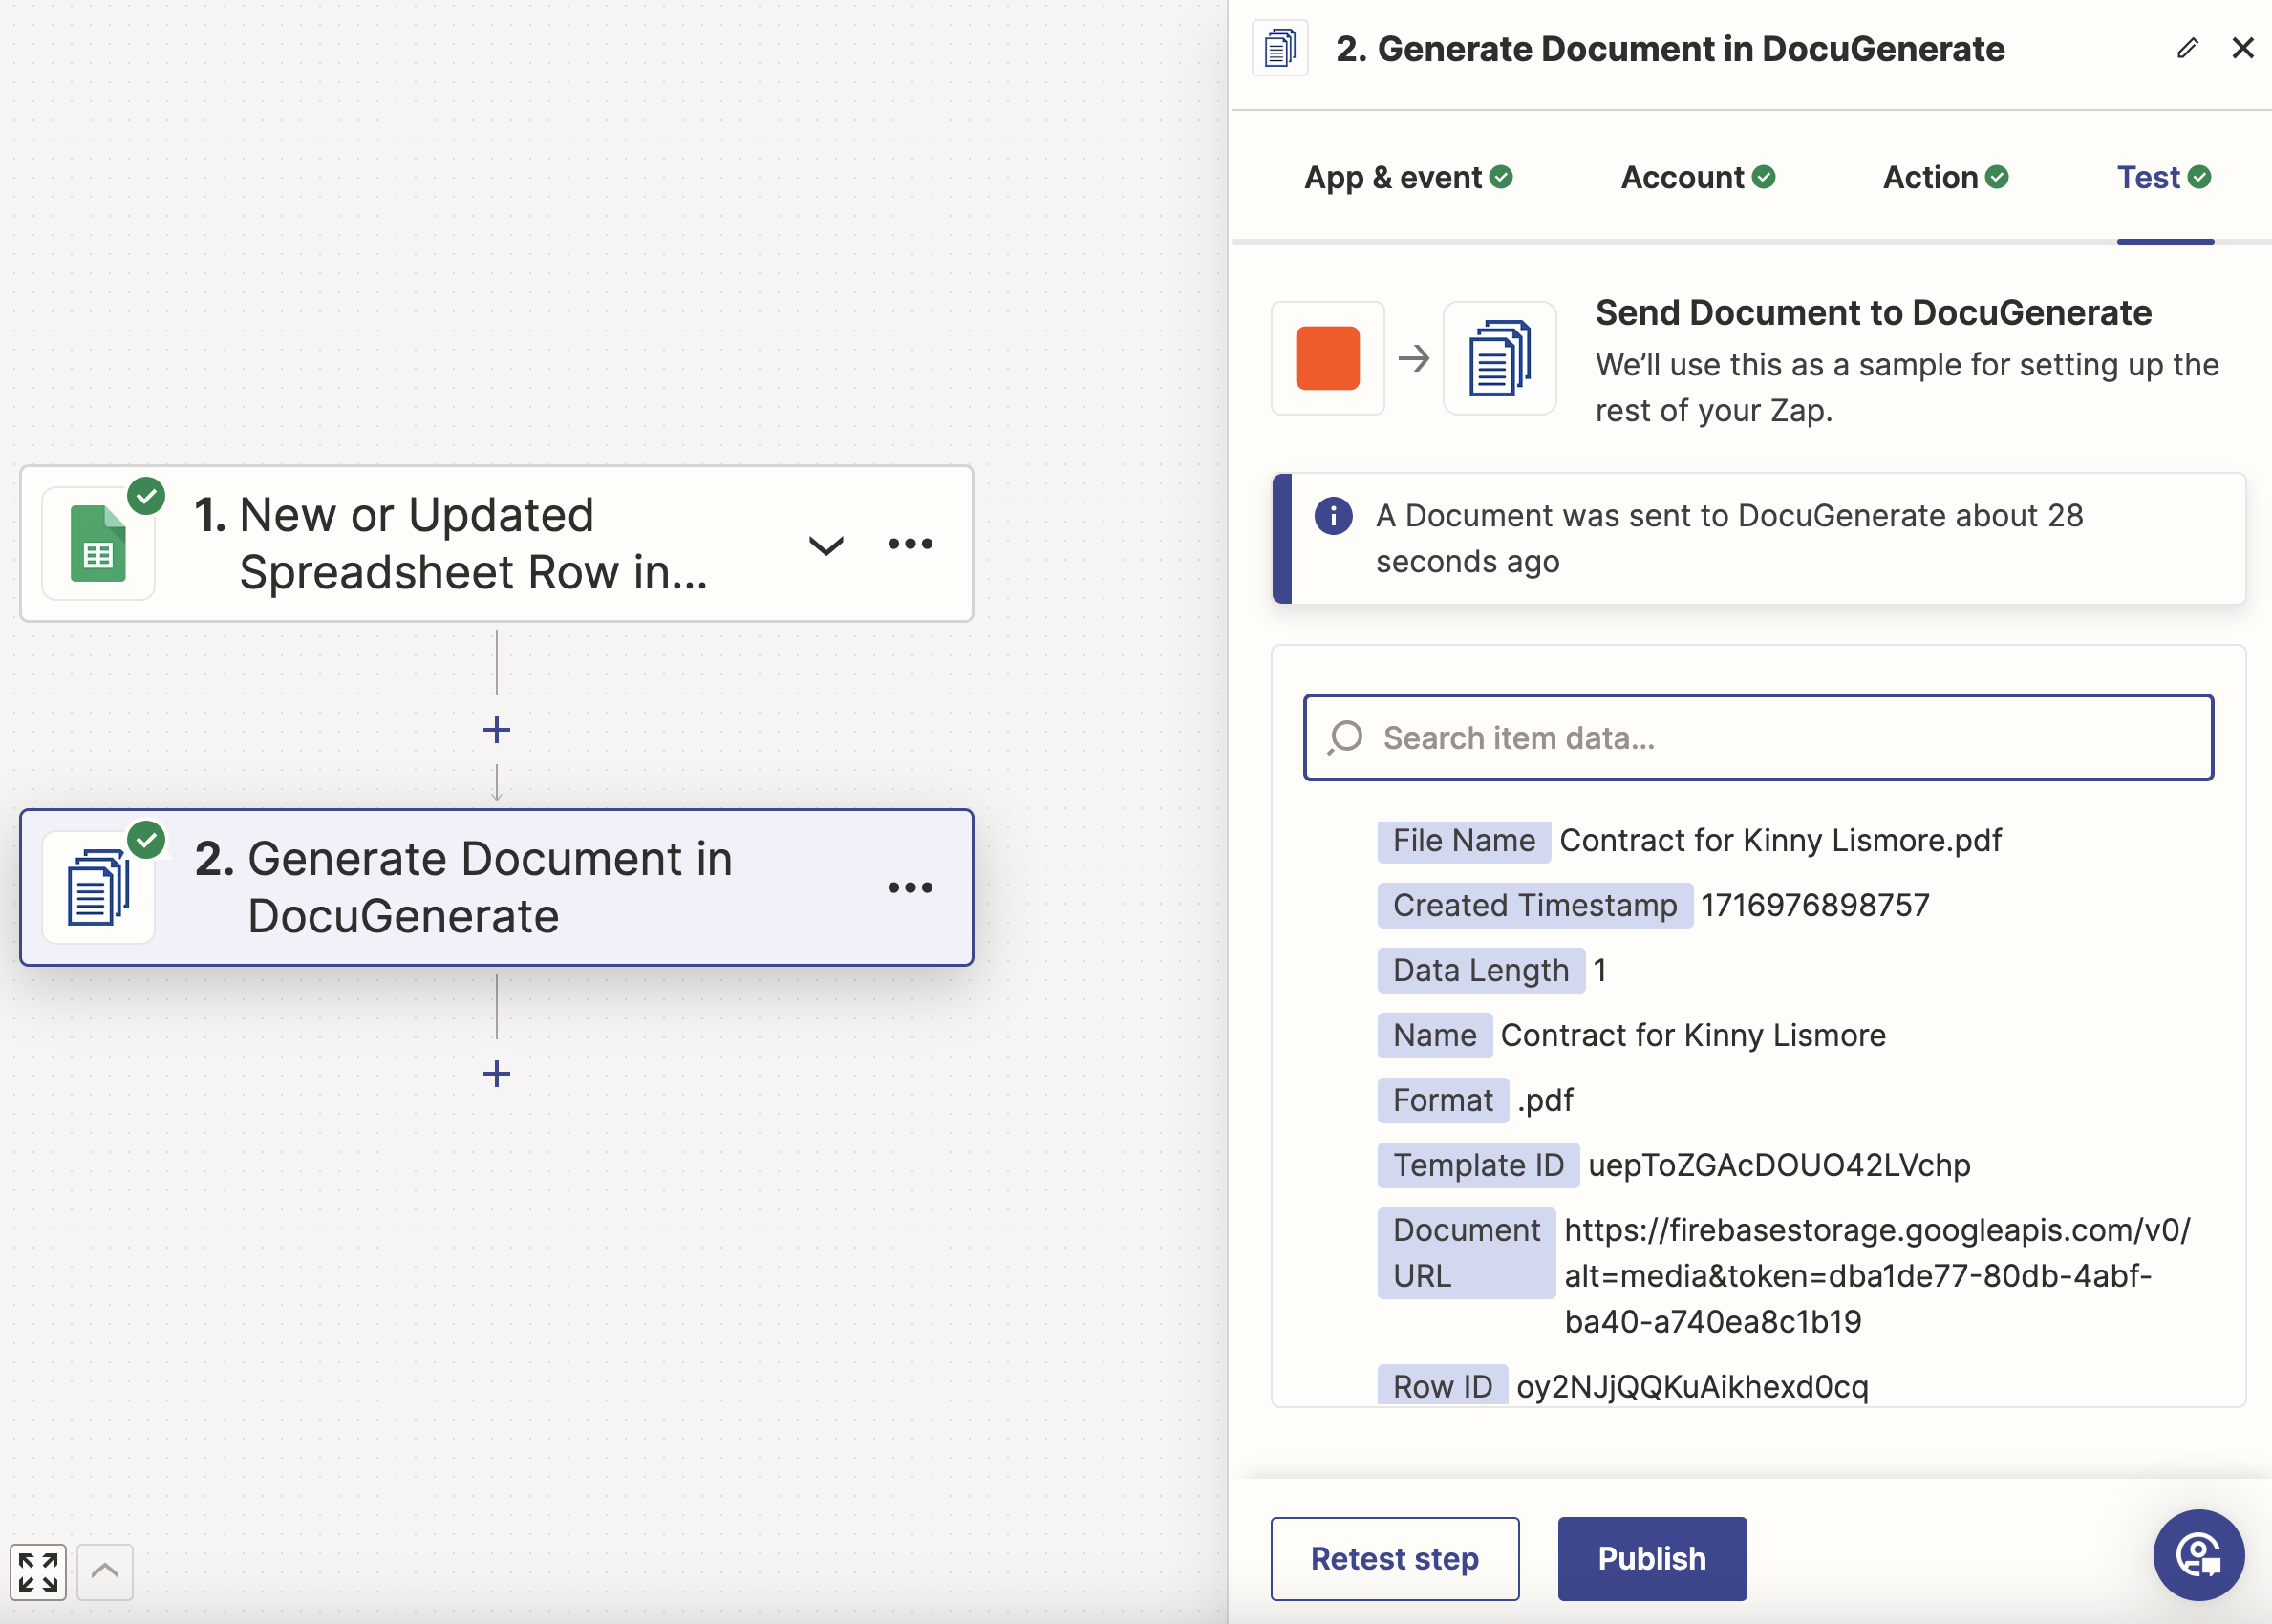
Finally, after the mapping is complete, you can go ahead and test this step. If everything is set up correctly, then the API call will be successful, and you will see the JSON response coming from DocuGenerate’s API:
You’re all done! Click on the Publish button to save and publish your Zap.
Going Further: Handle Multi-Line Data Values
Sometimes the values from the data source, in this case, the Google Sheet, may be multi-line strings. Although this is usually not the case, as most string values are single-lined. But it’s best to handle this edge case to avoid issues while running the Zap.
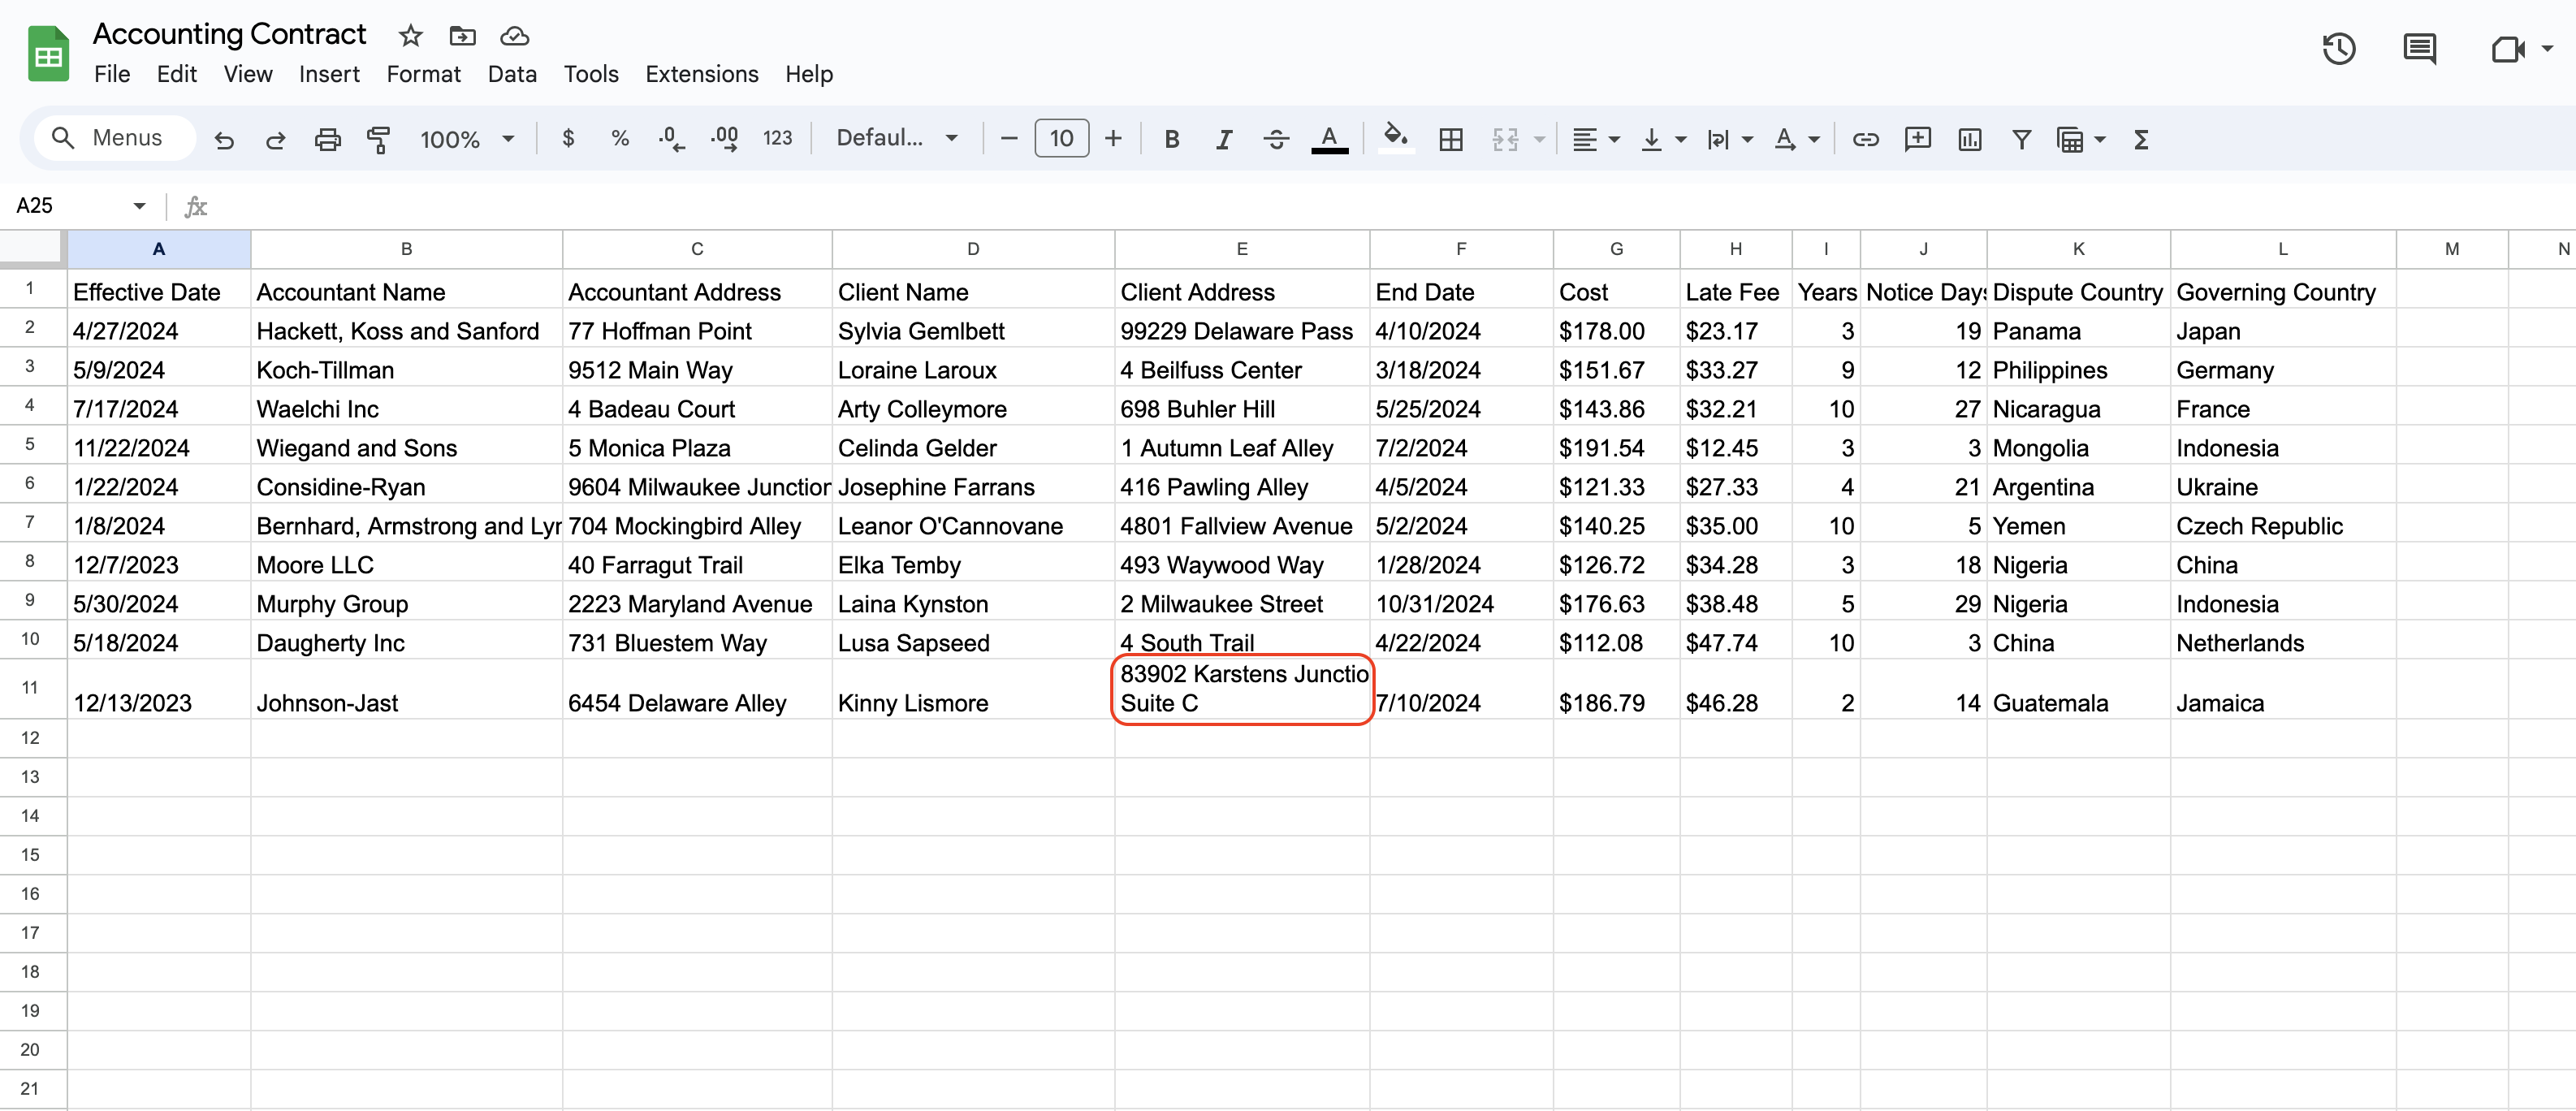
For example, consider the same dataset, but with the Client Address in the last row changed to a multi-line value:
83902 Karstens Junction
Suite C
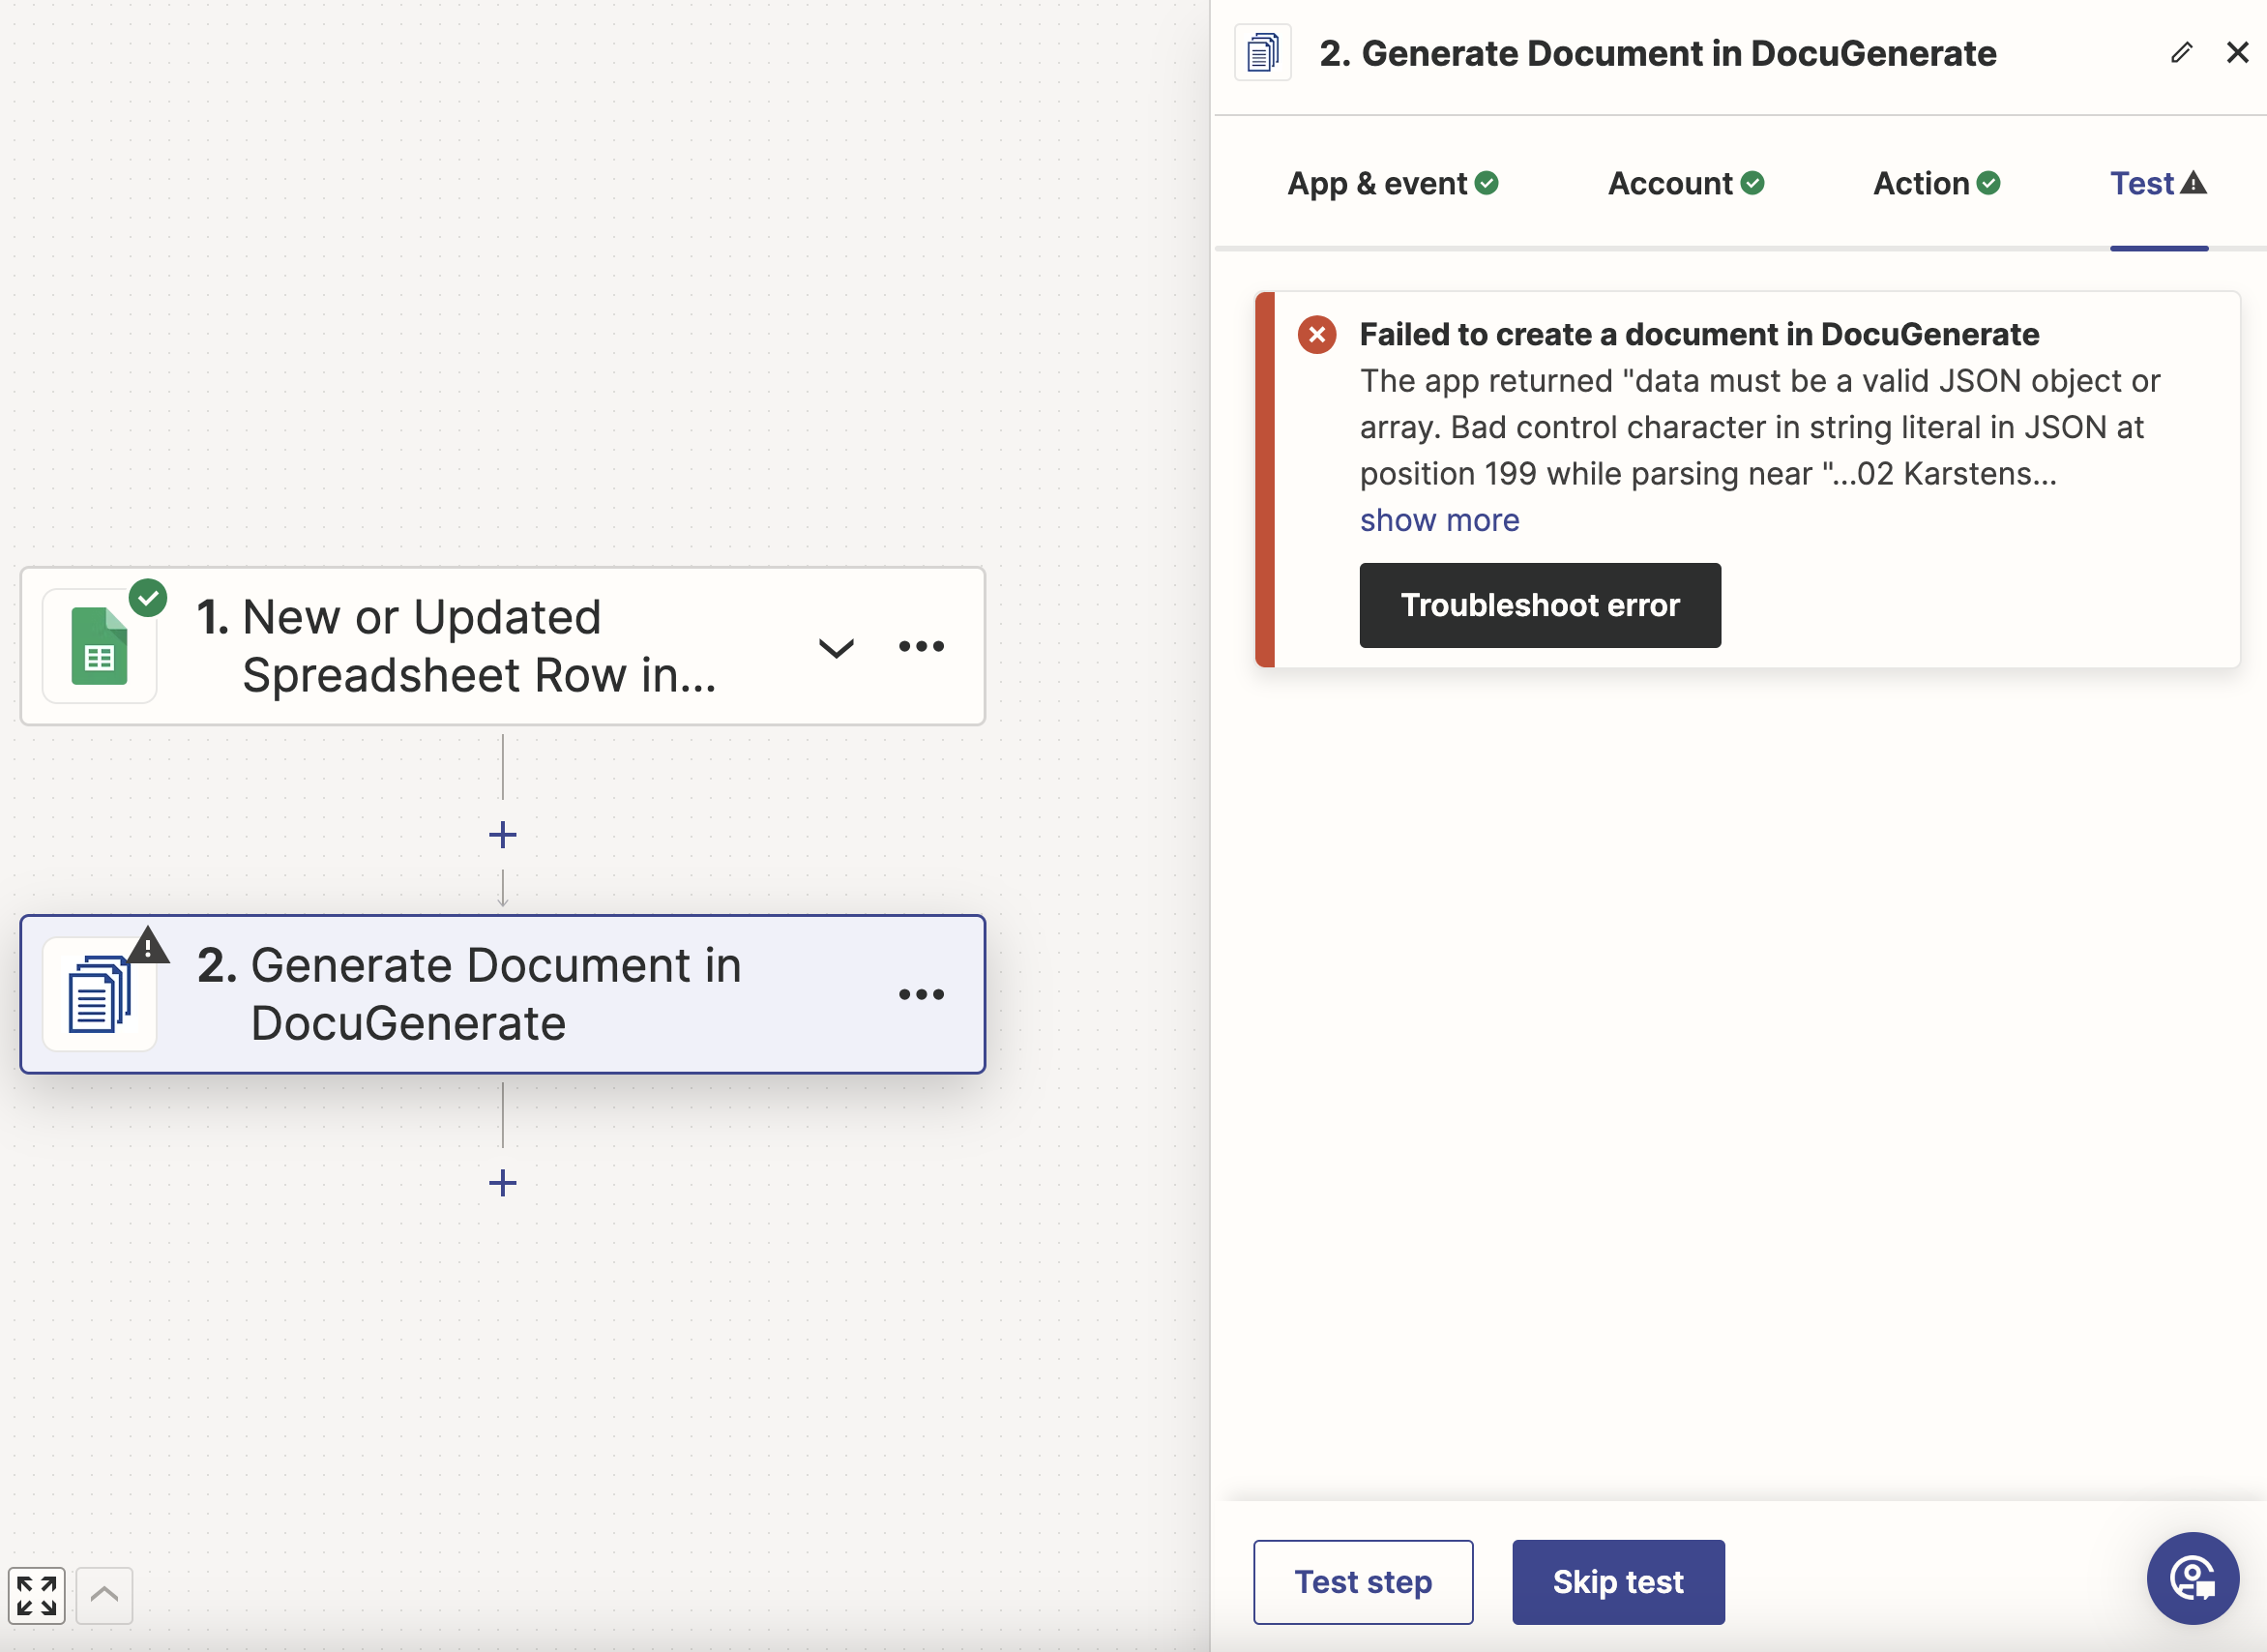
If we were to test the Zap again using this updated record, the Generate Document step would fail with the following error:
data must be a valid JSON object or array. Bad control character in string literal in
JSON at position 199 while parsing near "...02 Karstens Junction Suite C", "End Da..."
And this is how it would look in the Zapier interface:
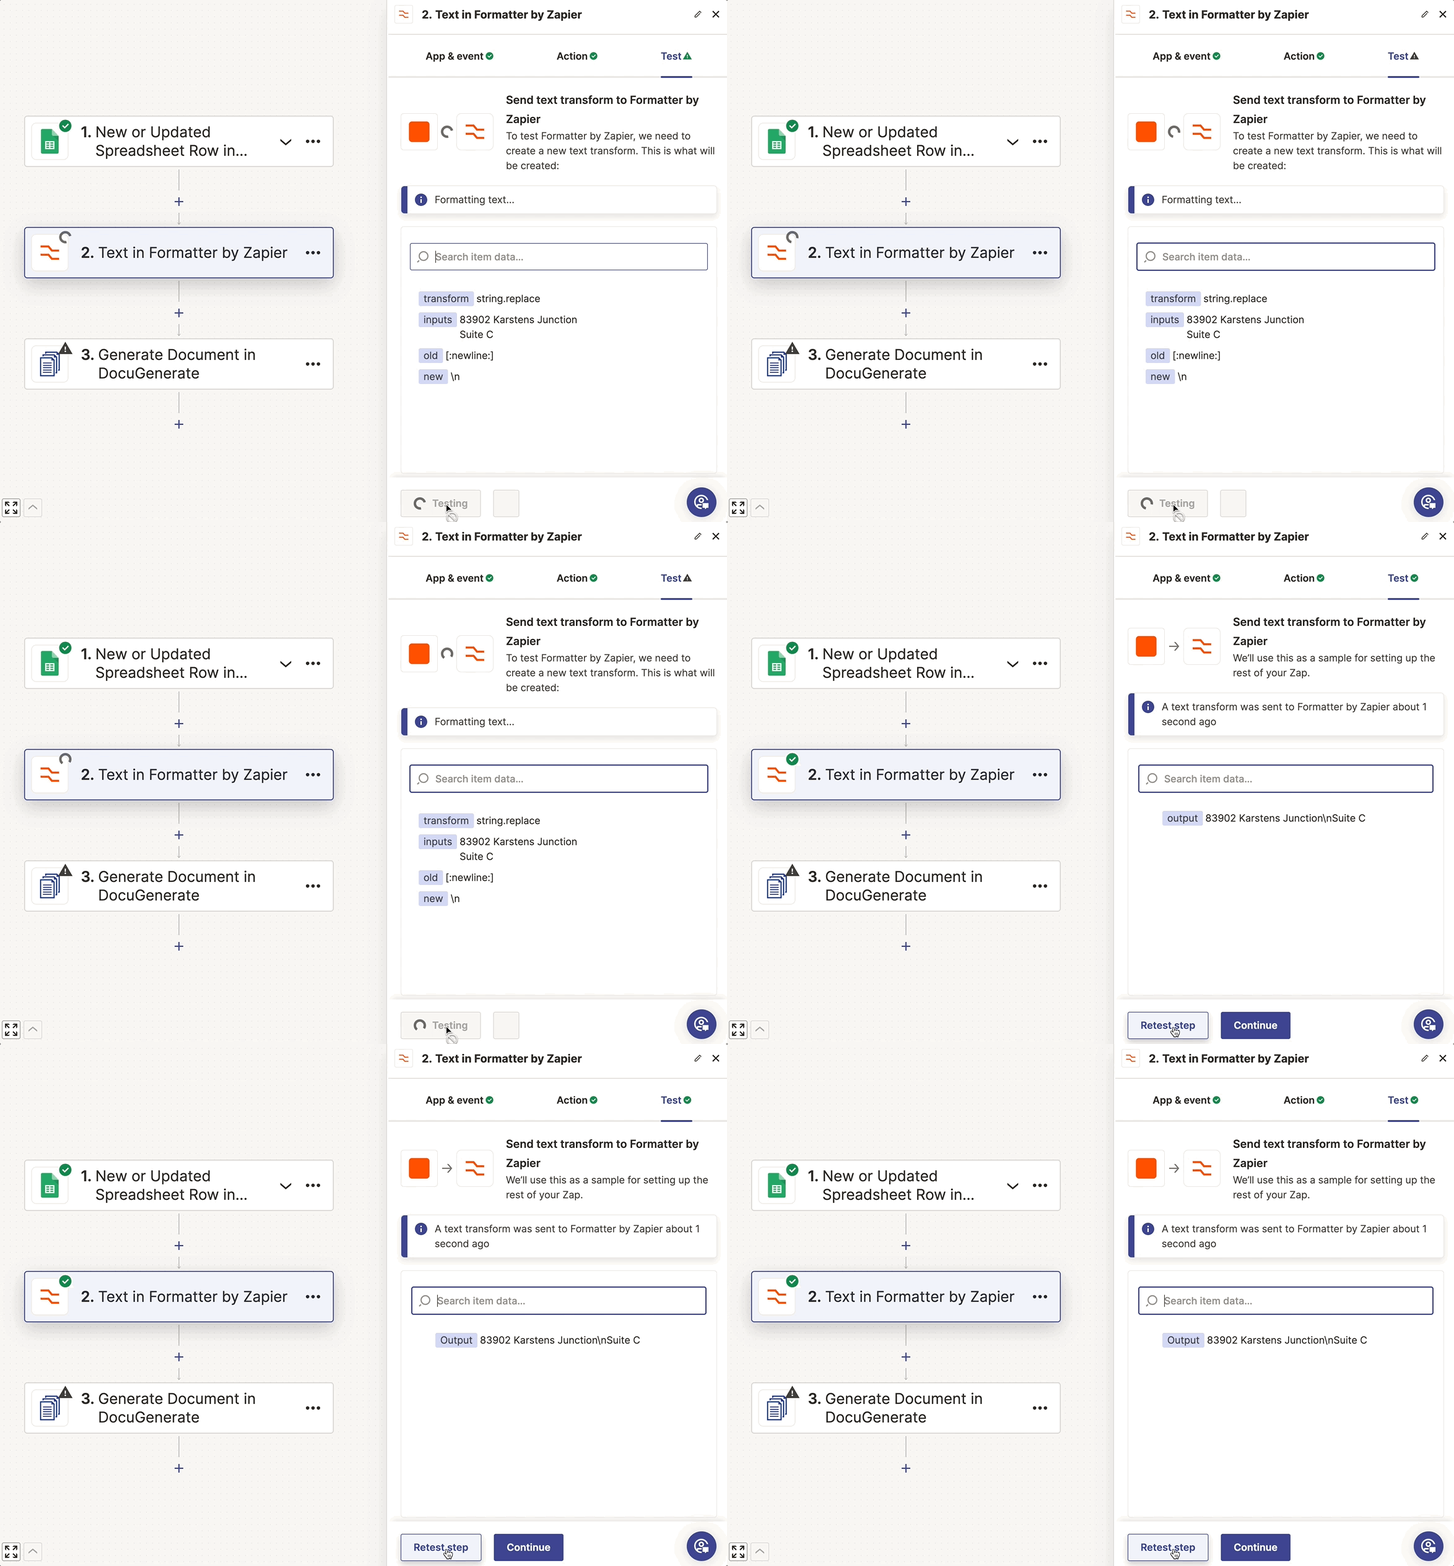
To fix this issue we need to add a new step to our Zap to format the Client Address value. Add the app Formatter by Zapier before the Generate Document step and choose the Text event.
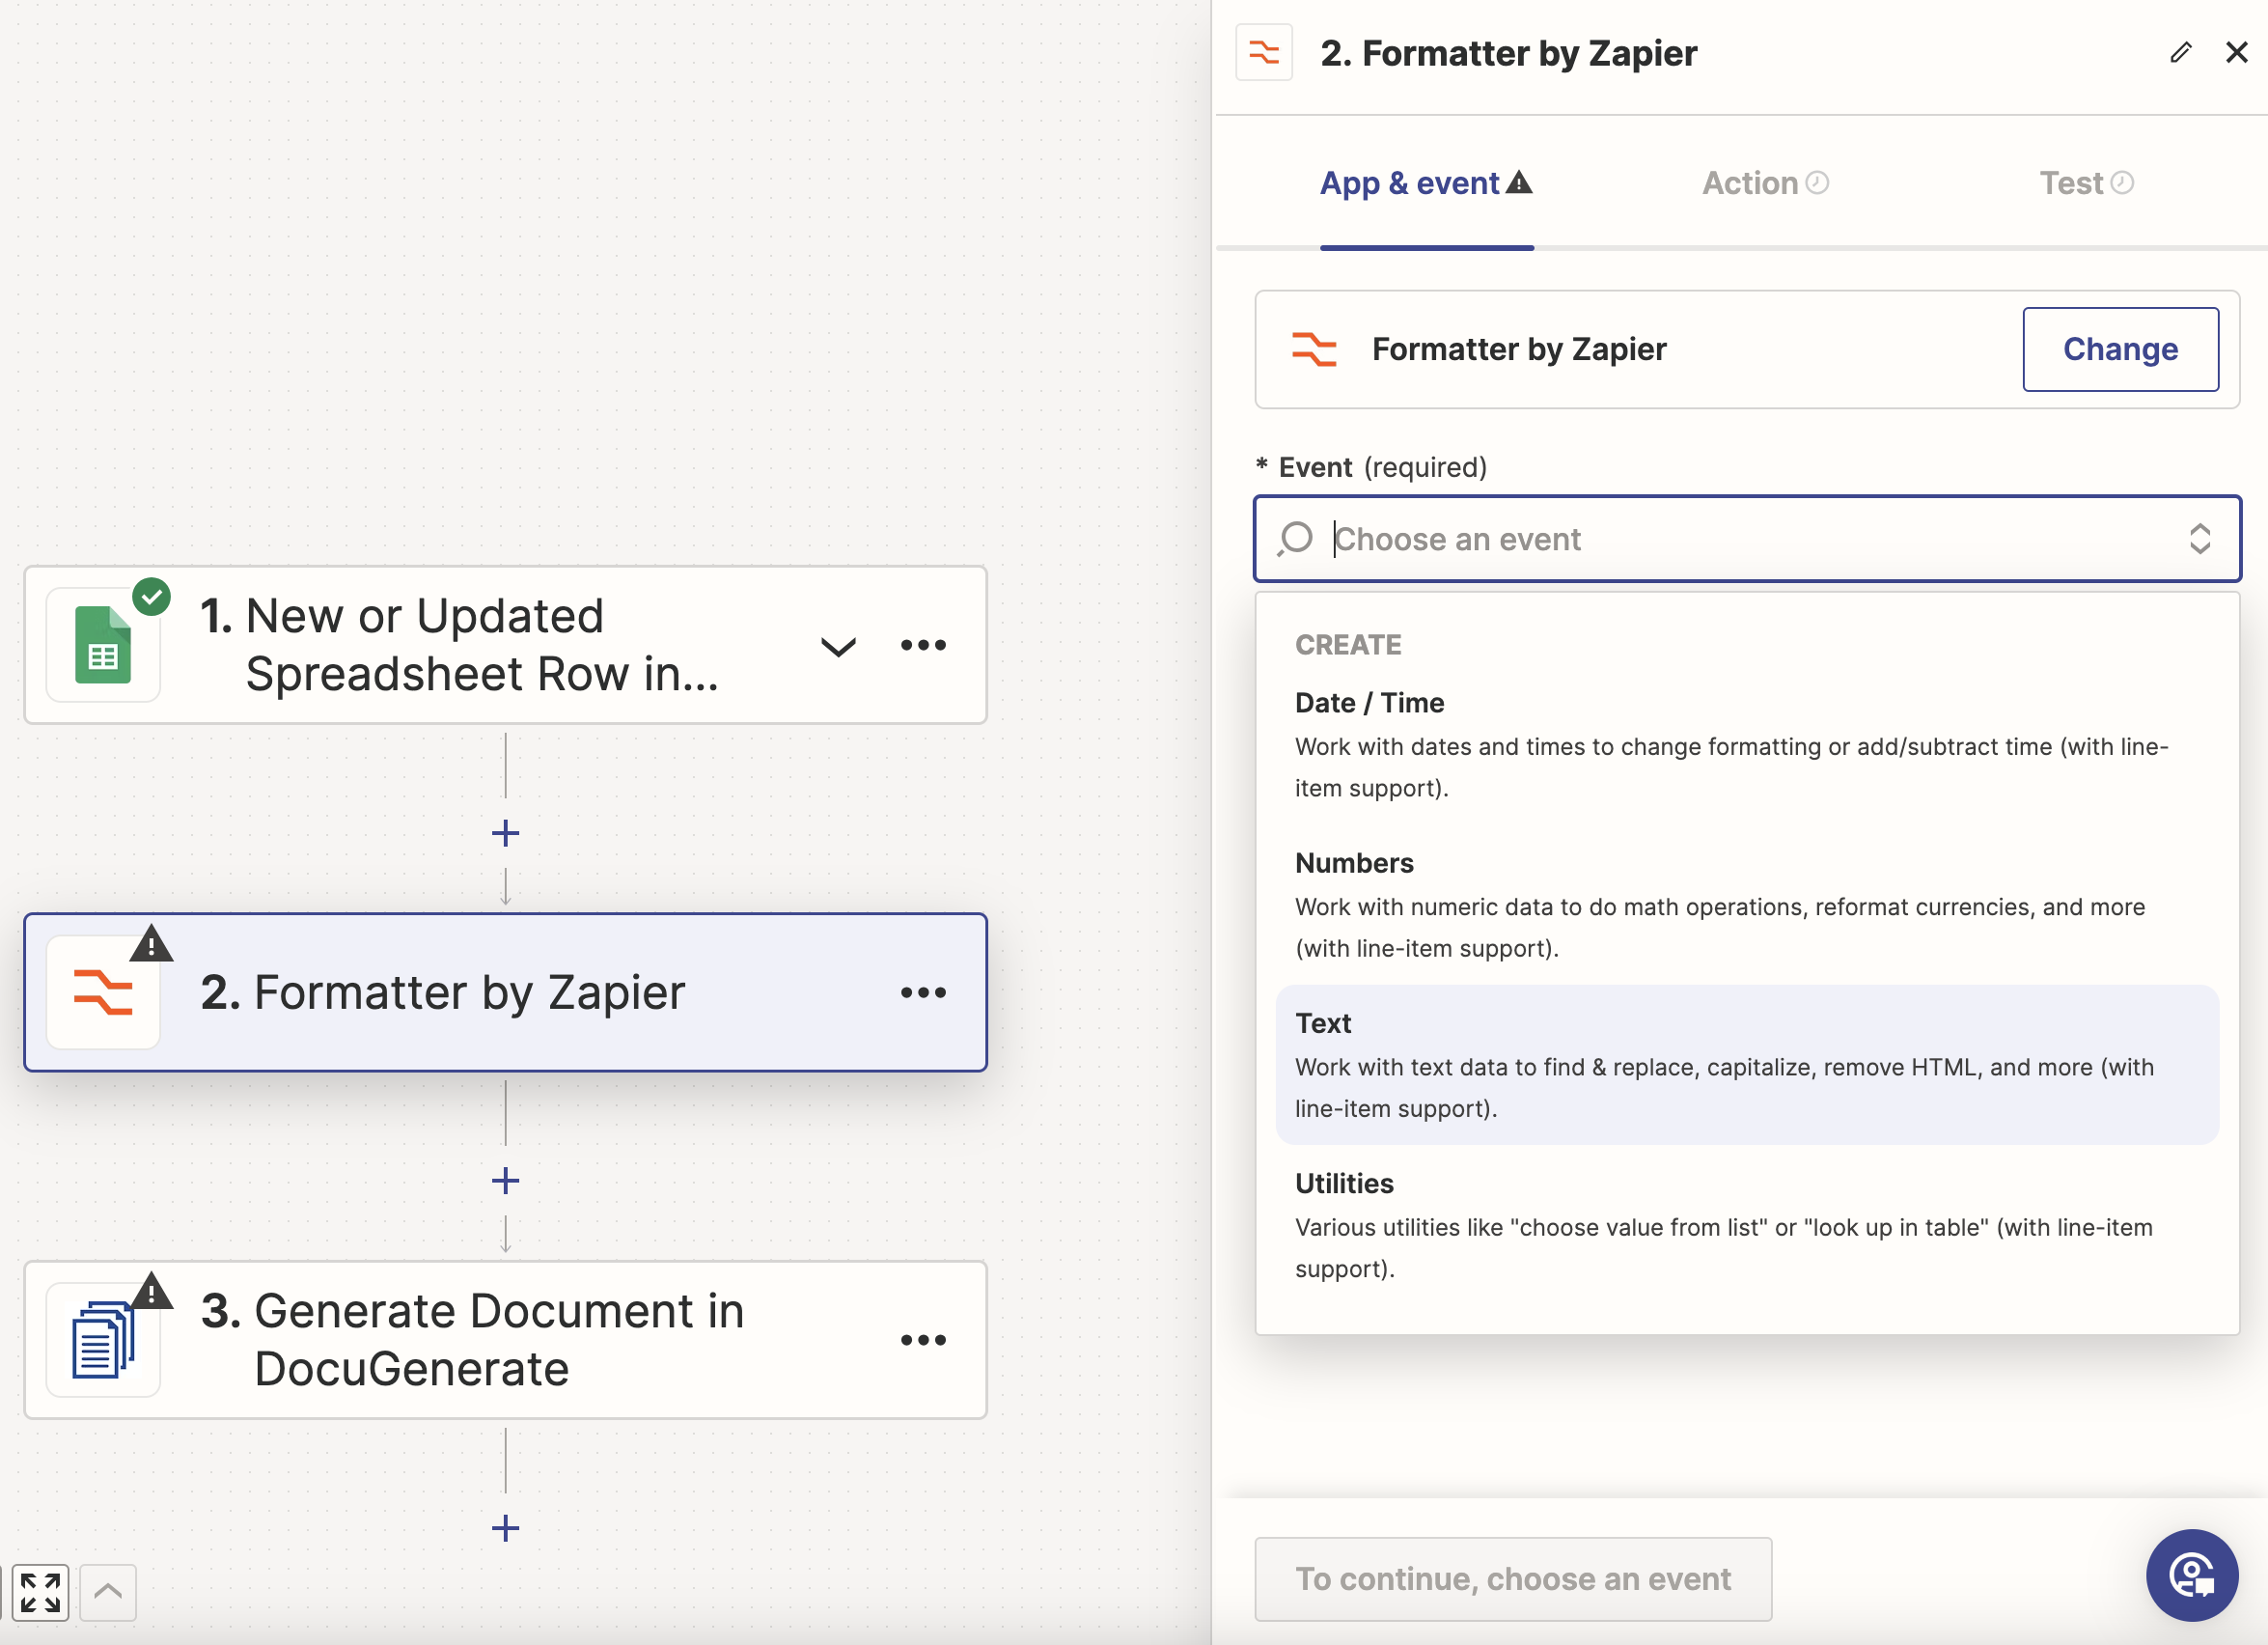
Then select the Replace action and for the input choose the Client Address field. For the Find value input [:newline:] which matches newline characters. And for the Replace value input the \n. This will replace all the carriage returns in the text with the \n character.
For more info about finding, replacing, or splitting special characters, check out this detailed article on Zapier. This guide provides comprehensive instructions and examples on how to handle various text formatting tasks in Zapier, ensuring your automation workflows run smoothly even when dealing with complex text data.
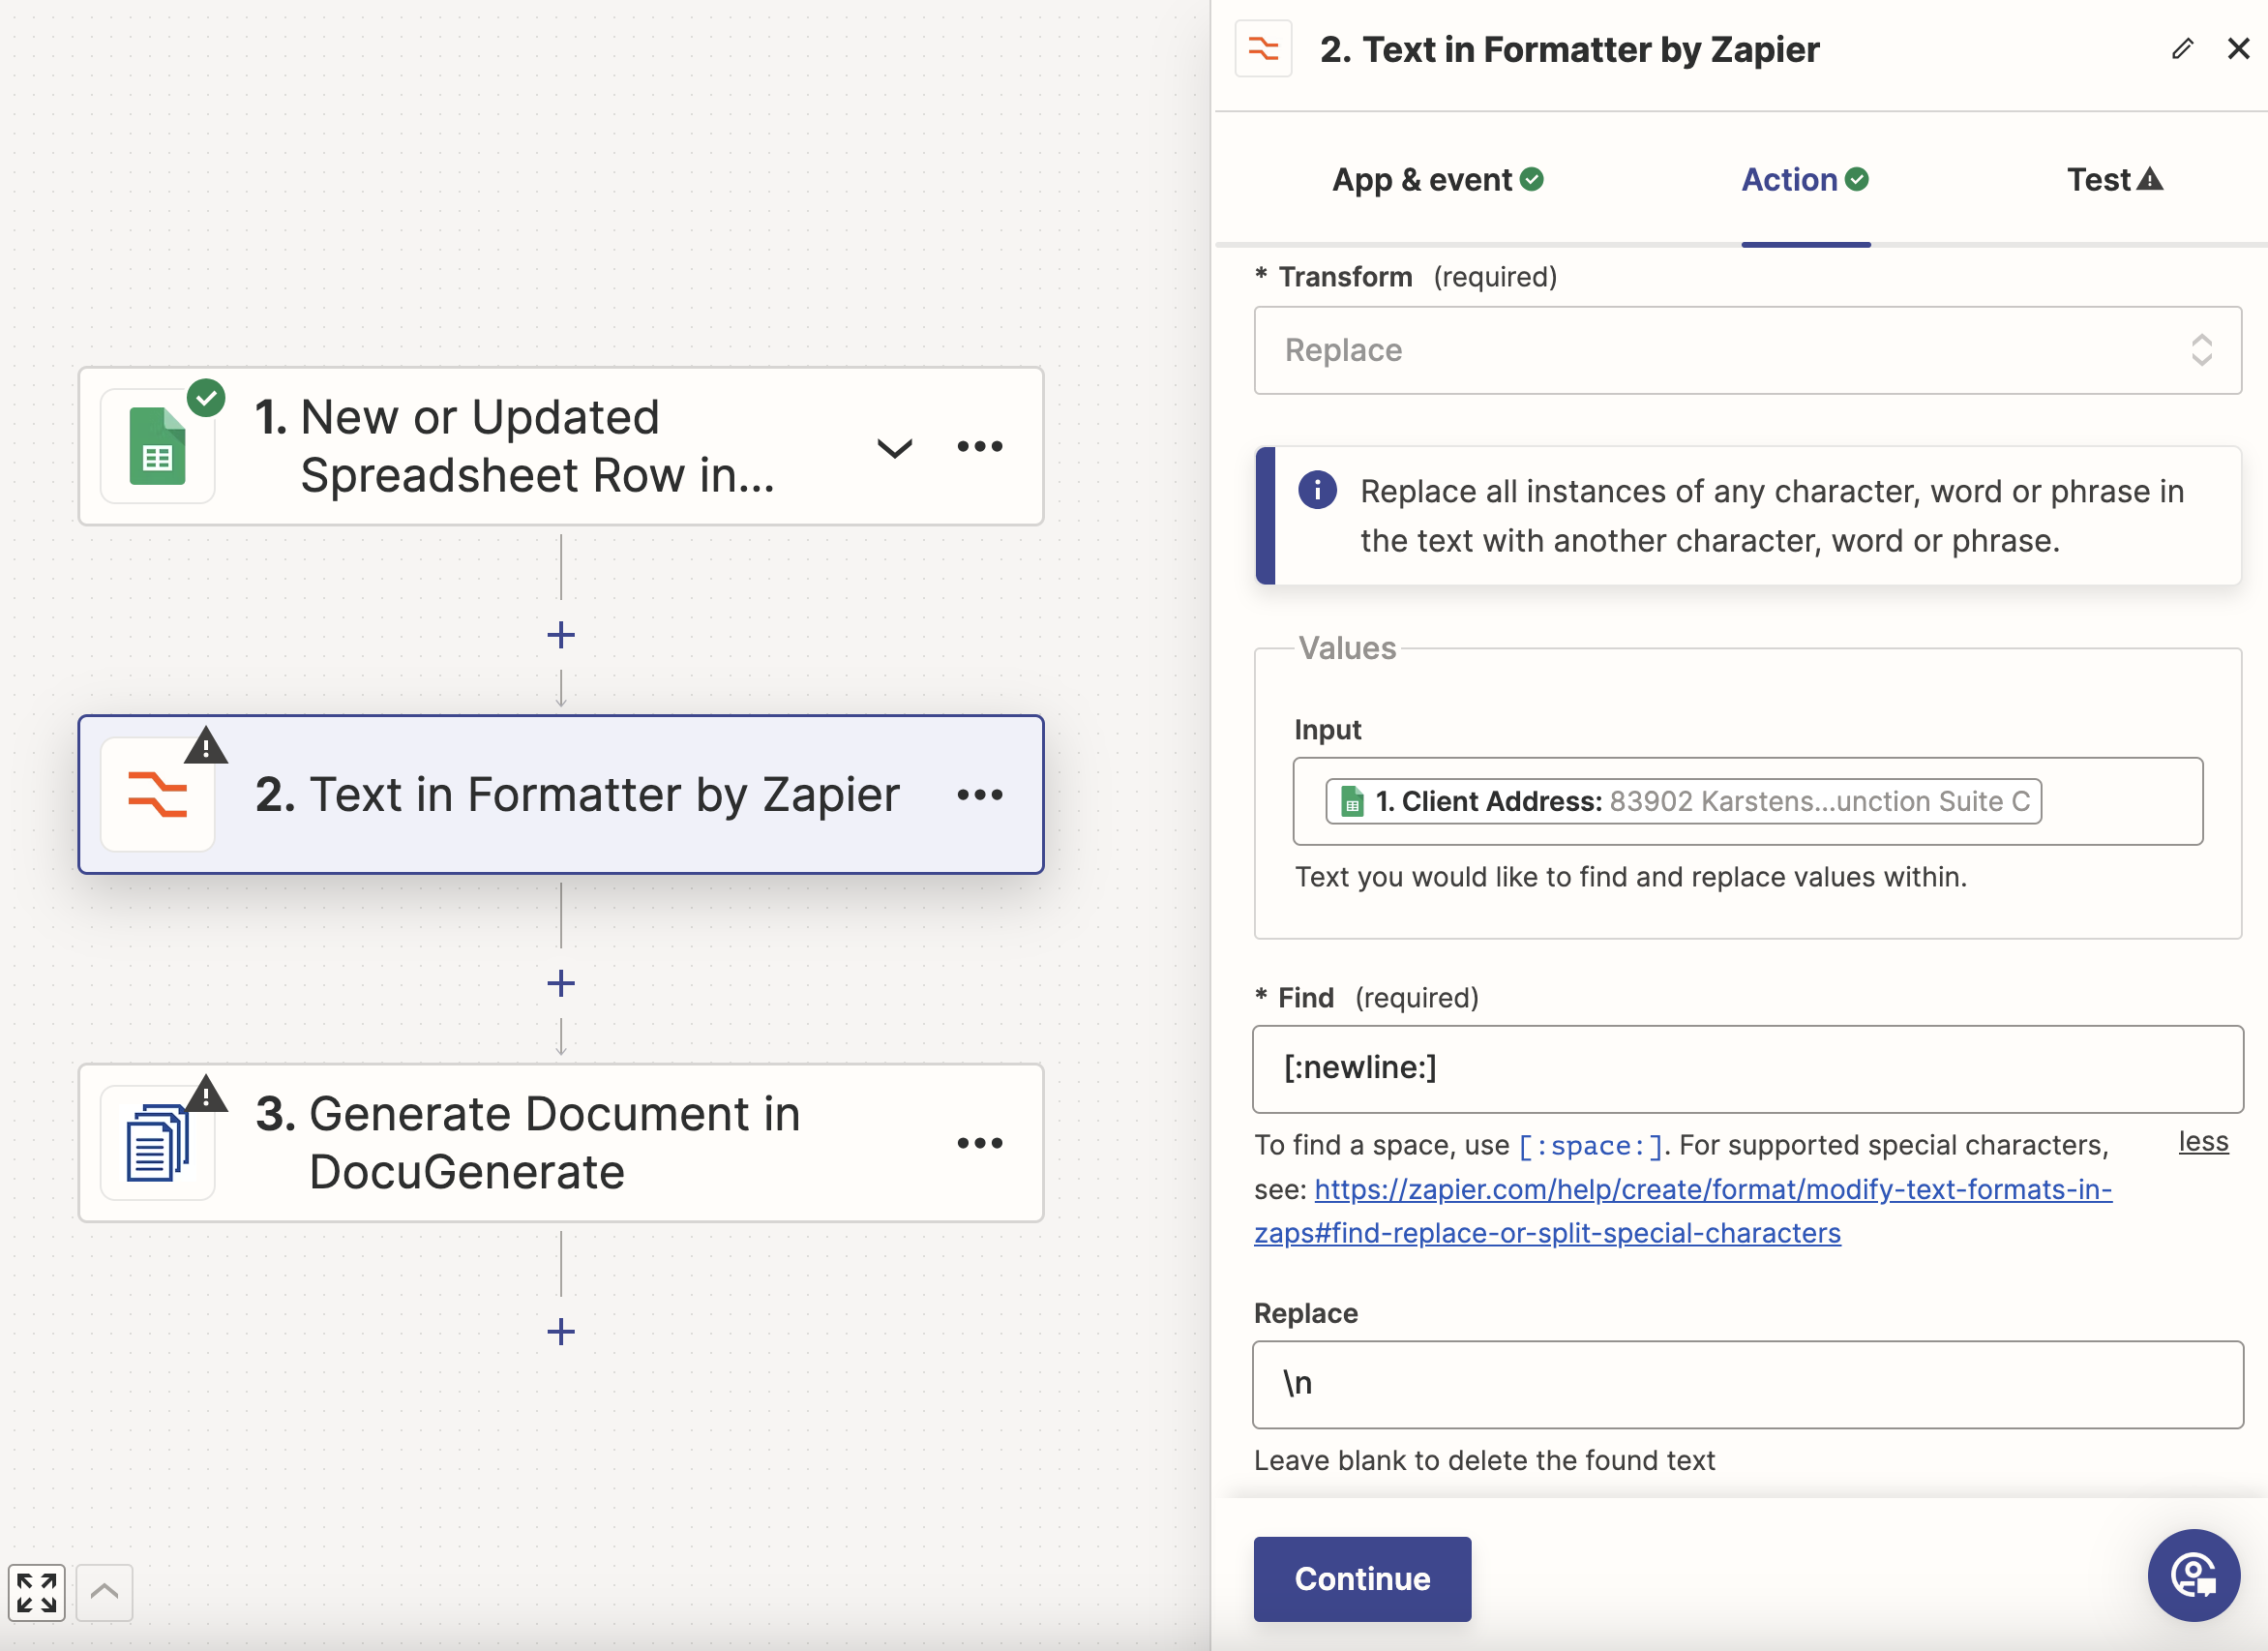
Moving on to the Test step. As you can see, the value is successfully replaced by:
83902 Karstens Junction\nSuite C
Finally, we need to update the Generate Document action to use the formatted value for the Client Address field. This way, we don’t use the value from the Google Sheet directly anymore but the output from the Formatter step, which fixes the new lines issue.
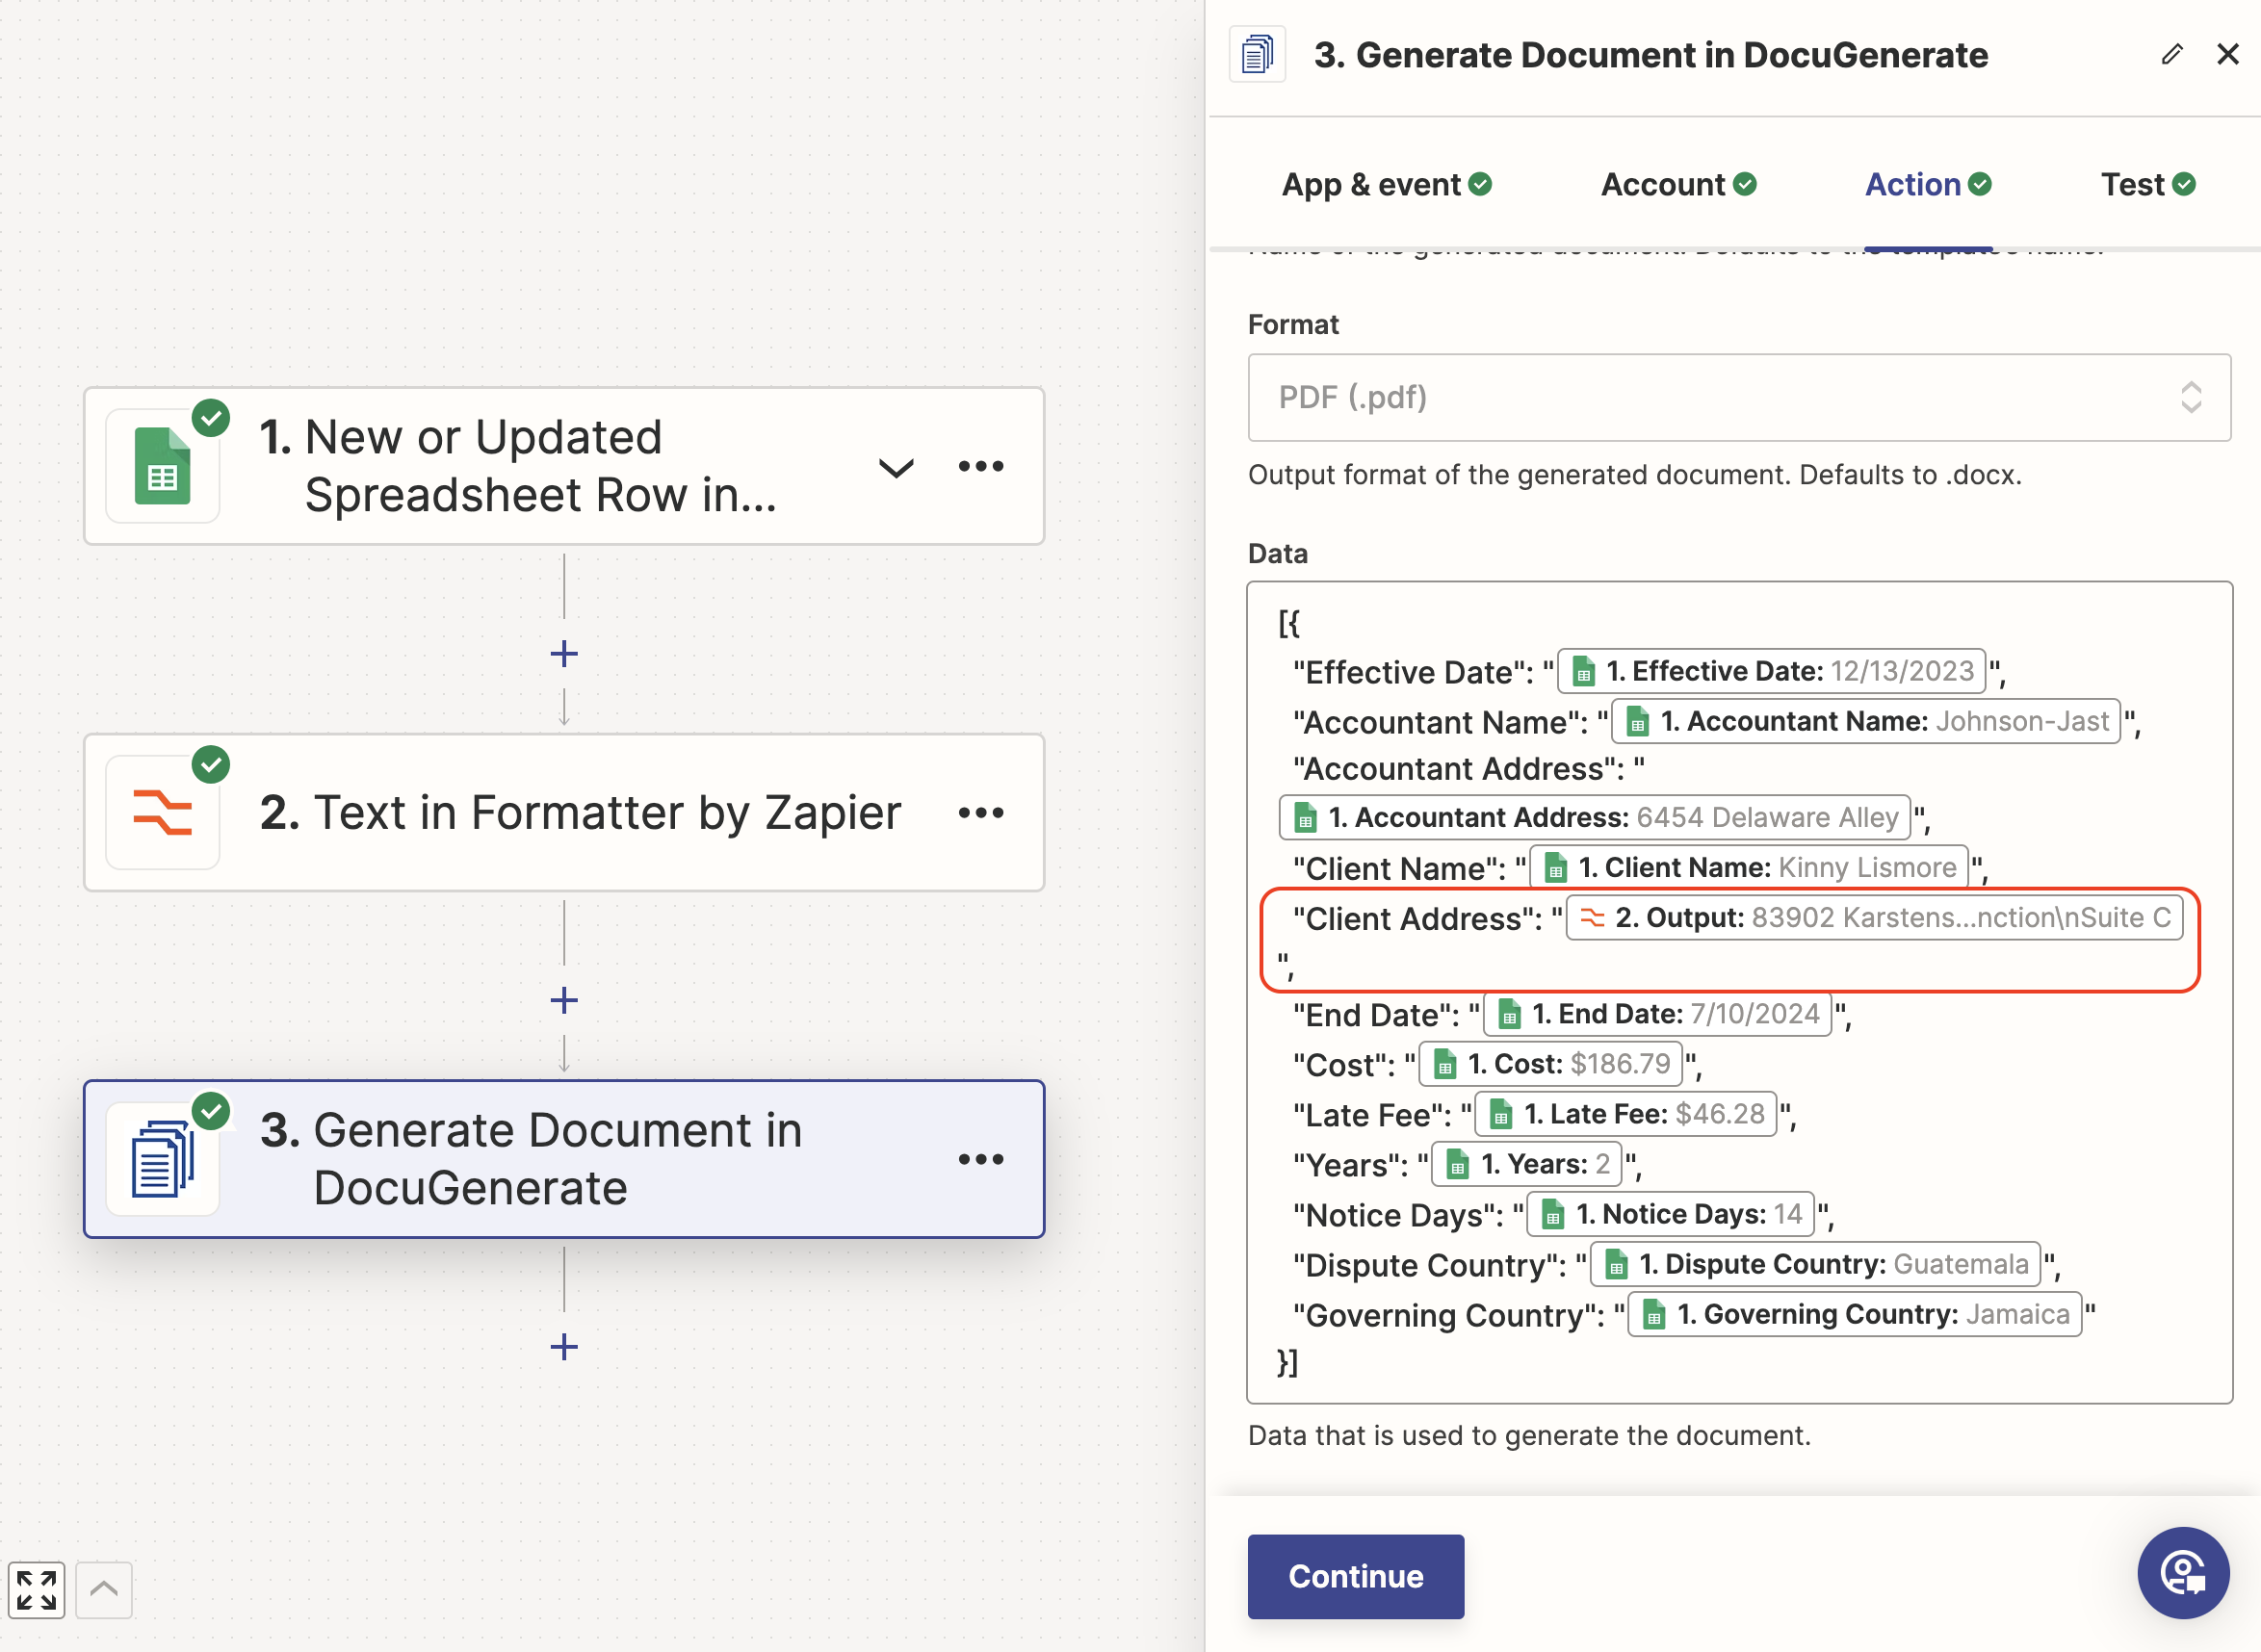
We only did the formatting for one field, but you can add additional formatting steps if other values from the data set are susceptible to being multi-line strings.
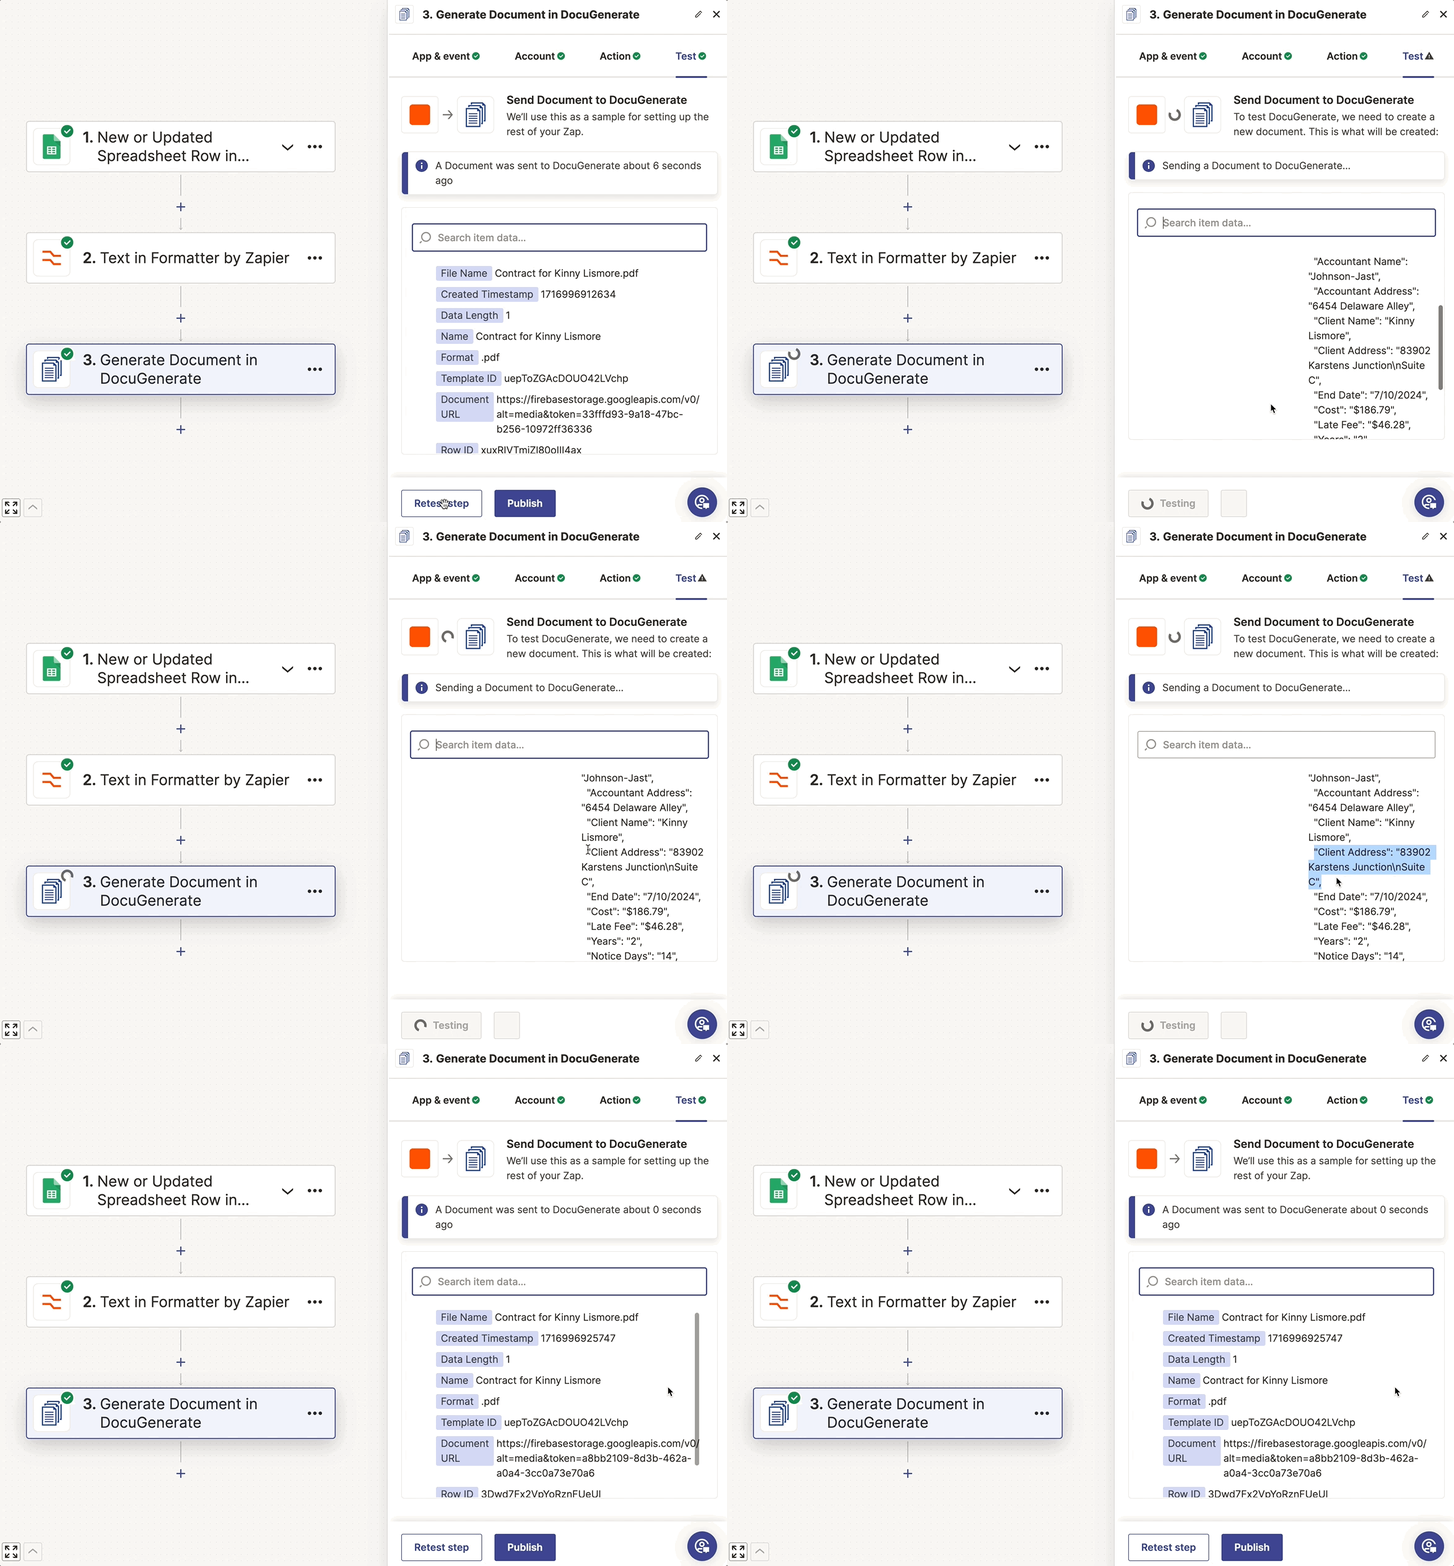
With this change, when we test the final step, the document generation doesn’t fail anymore, and the document is generated successfully.
Conclusion
Automating document generation using Google Sheets, Zapier, and DocuGenerate can significantly streamline your workflow. This setup not only saves time but also reduces errors and ensures consistency across your documents. Whether you’re generating invoices, contracts, or certificates, this powerful automation can handle it all.
By integrating these tools, you can focus on more critical tasks while your documents are created seamlessly in the background. We encourage you to try this setup and explore the possibilities of what you can automate with DocuGenerate and Zapier.
Resources


