Scenario Overview
Creating event tickets with barcodes can be a game-changer for streamlining entry management and enhancing customer experience. Automation not only saves time but also reduces errors and ensures a professional touch. In this guide, we will use Make (formerly Integromat) to automate the entire process. We’ll integrate Stripe to handle payments, generate tickets using DocuGenerate, and send them to your customers via email. Here’s what you will learn:
Let’s dive into the step-by-step process.
Setting Up Stripe
Stripe is a powerful payment processing platform that allows you to easily accept payments online. For our event ticketing system, Stripe will handle the payments for the Event Admission product that we’ll create below. Here’s how to set it up:
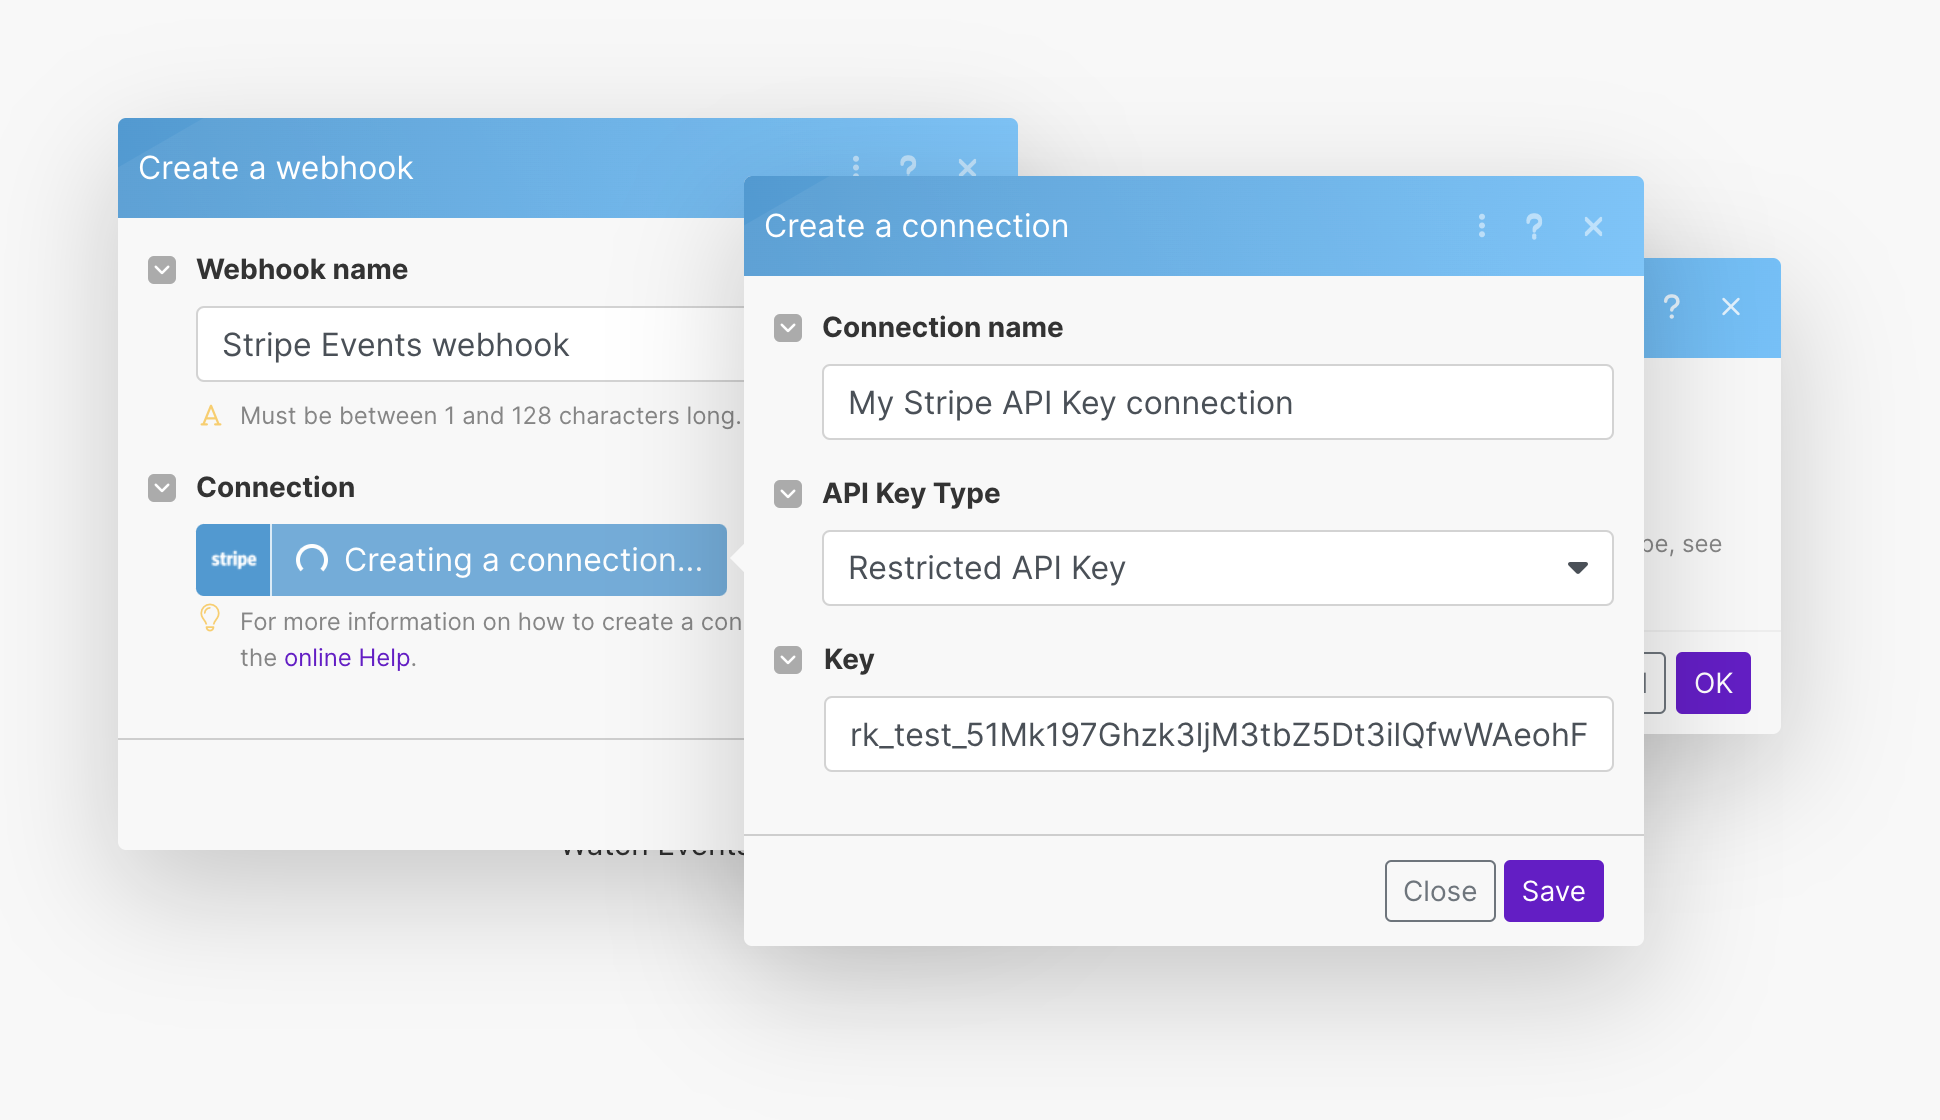
1. Create a Stripe Connection in Make
First, you need to add the Stripe app to your scenario and use the Watch Events trigger, which is activated when a given event occurs. To create a Stripe connection in Make, you also need to generate a restricted API key. Go to the Developers page in Stripe, click on Create restricted key and configure the following permissions:
- Balance:
Read - Checkout Sessions:
Read - Webhook Endpoints:
Write
This API key will allow Make to interact with your Stripe account securely, fetching necessary information about the transactions and ensuring that the correct data is used for ticket generation.
For detailed instructions on setting up the Stripe connection, refer to the Stripe integration documentation. This guide provides a step-by-step walkthrough on connecting Stripe with Make.
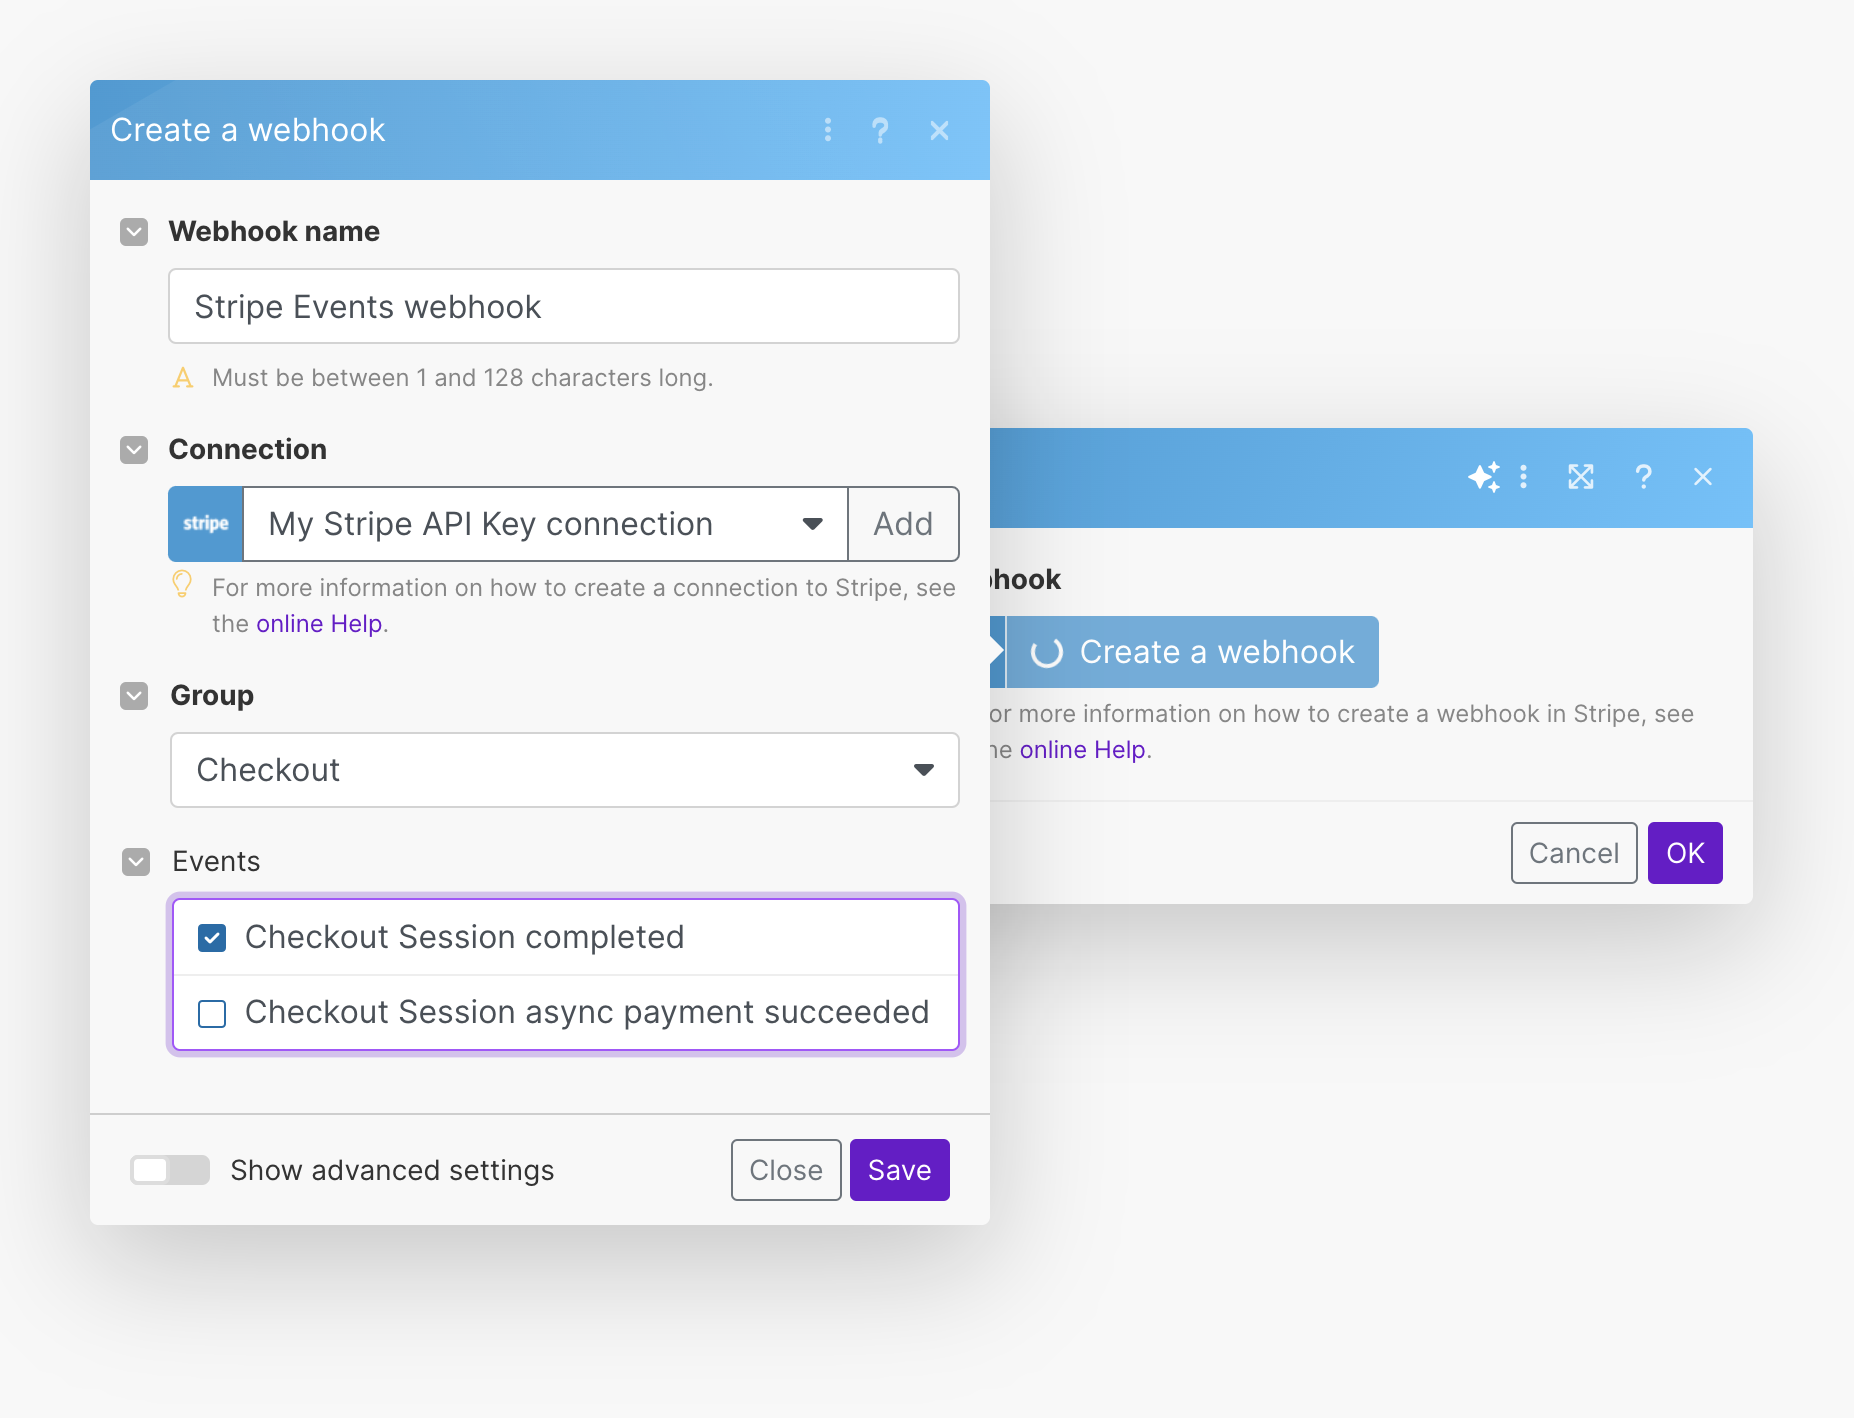
2. Create a Webhook for Checkout Session Completed
Next, you need to create a webhook in Stripe. Webhooks are crucial as they notify your system when certain events happen in your Stripe account. For this setup, we are interested in the Checkout Session completed event, which triggers when a customer successfully completes a purchase.
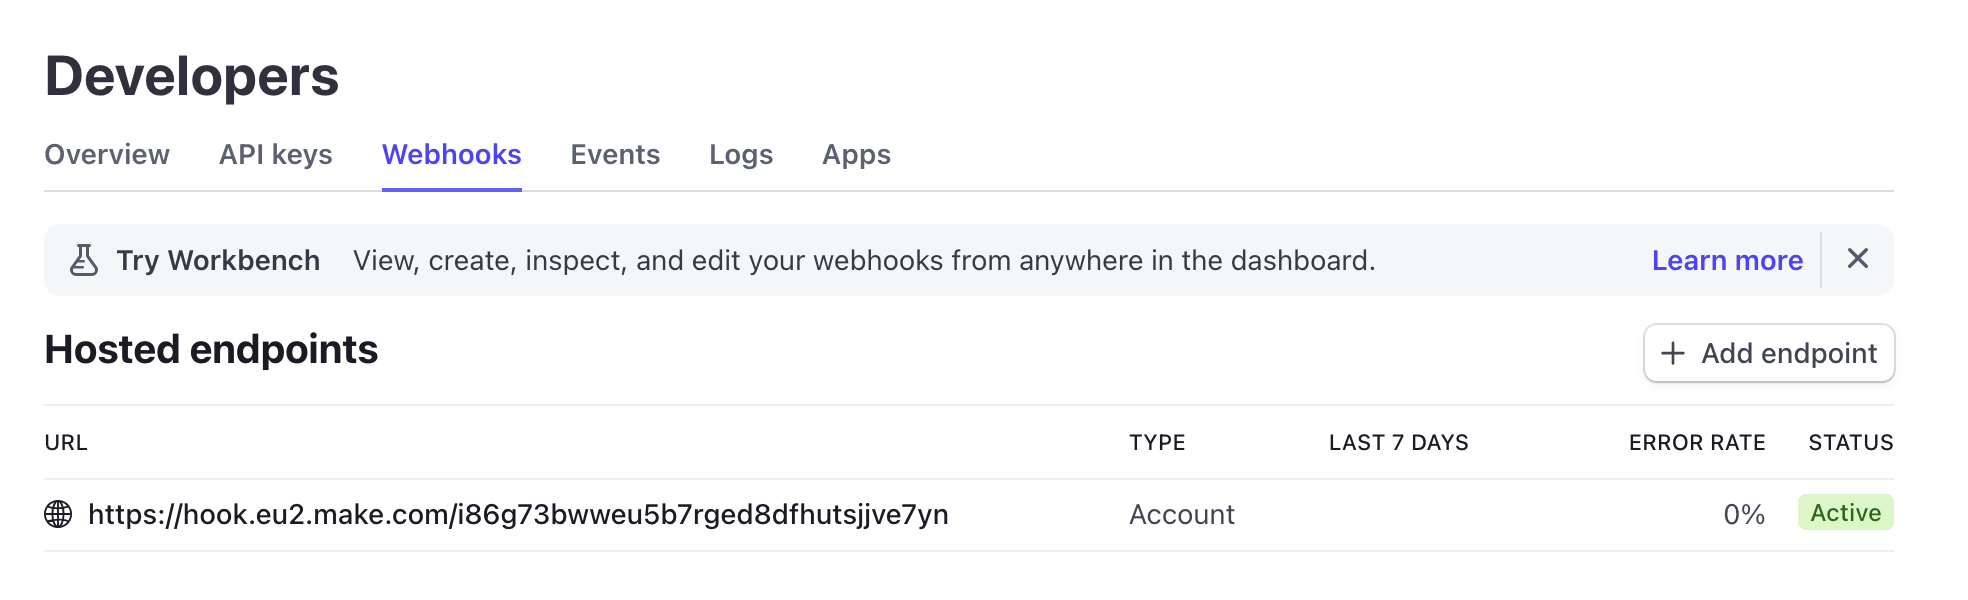
Once set up, this webhook will be visible on Stripe’s Developers page. This visibility ensures that you can monitor and manage your webhooks effectively, helping you troubleshoot any issues that might arise.
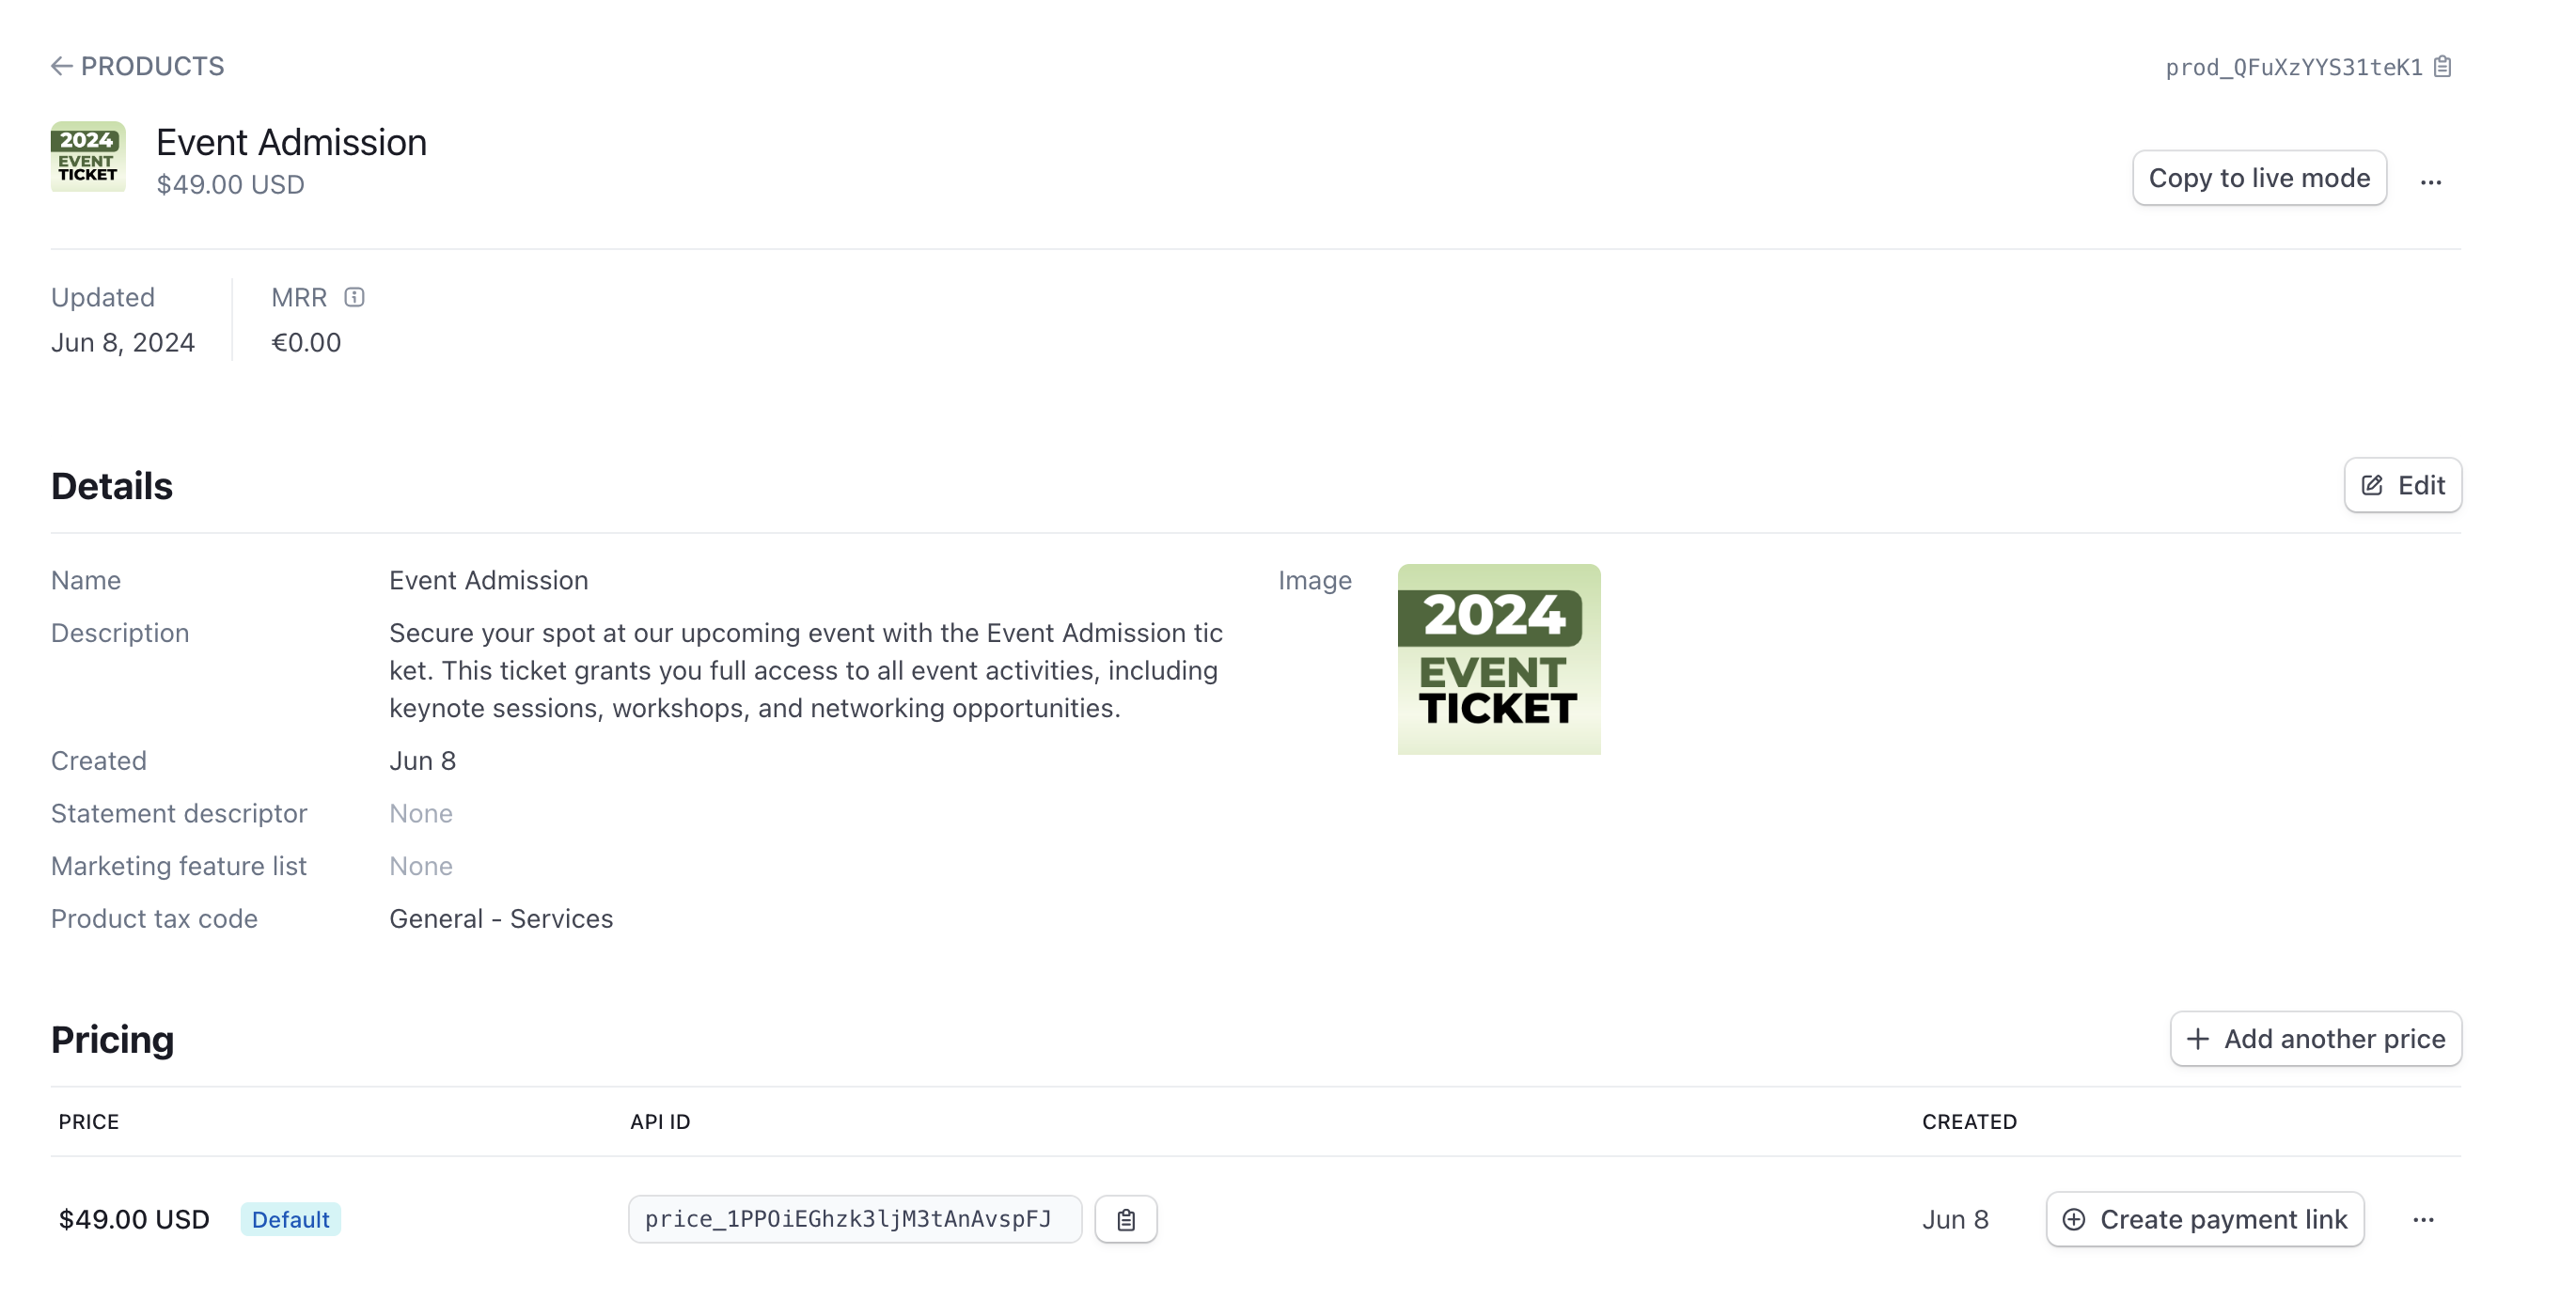
3. Create the “Event Admission” Product
Now, create a product in Stripe called Event Admission. This product represents the ticket for your event. When customers purchase this product, it triggers the entire ticketing process.
Creating a product in Stripe is straightforward. Ensure that all relevant details, such as price and description, are correctly filled out to provide clear information to your customers.
4. Create a Payment Link for Your Product
Once your product is set up, the next step is to create a payment link. This link is what your customers will use to purchase their event tickets. Stripe makes it easy to generate these links, which you can then share via email, social media, or your website. The payment link will direct customers to a secure checkout page where they can complete their purchase.
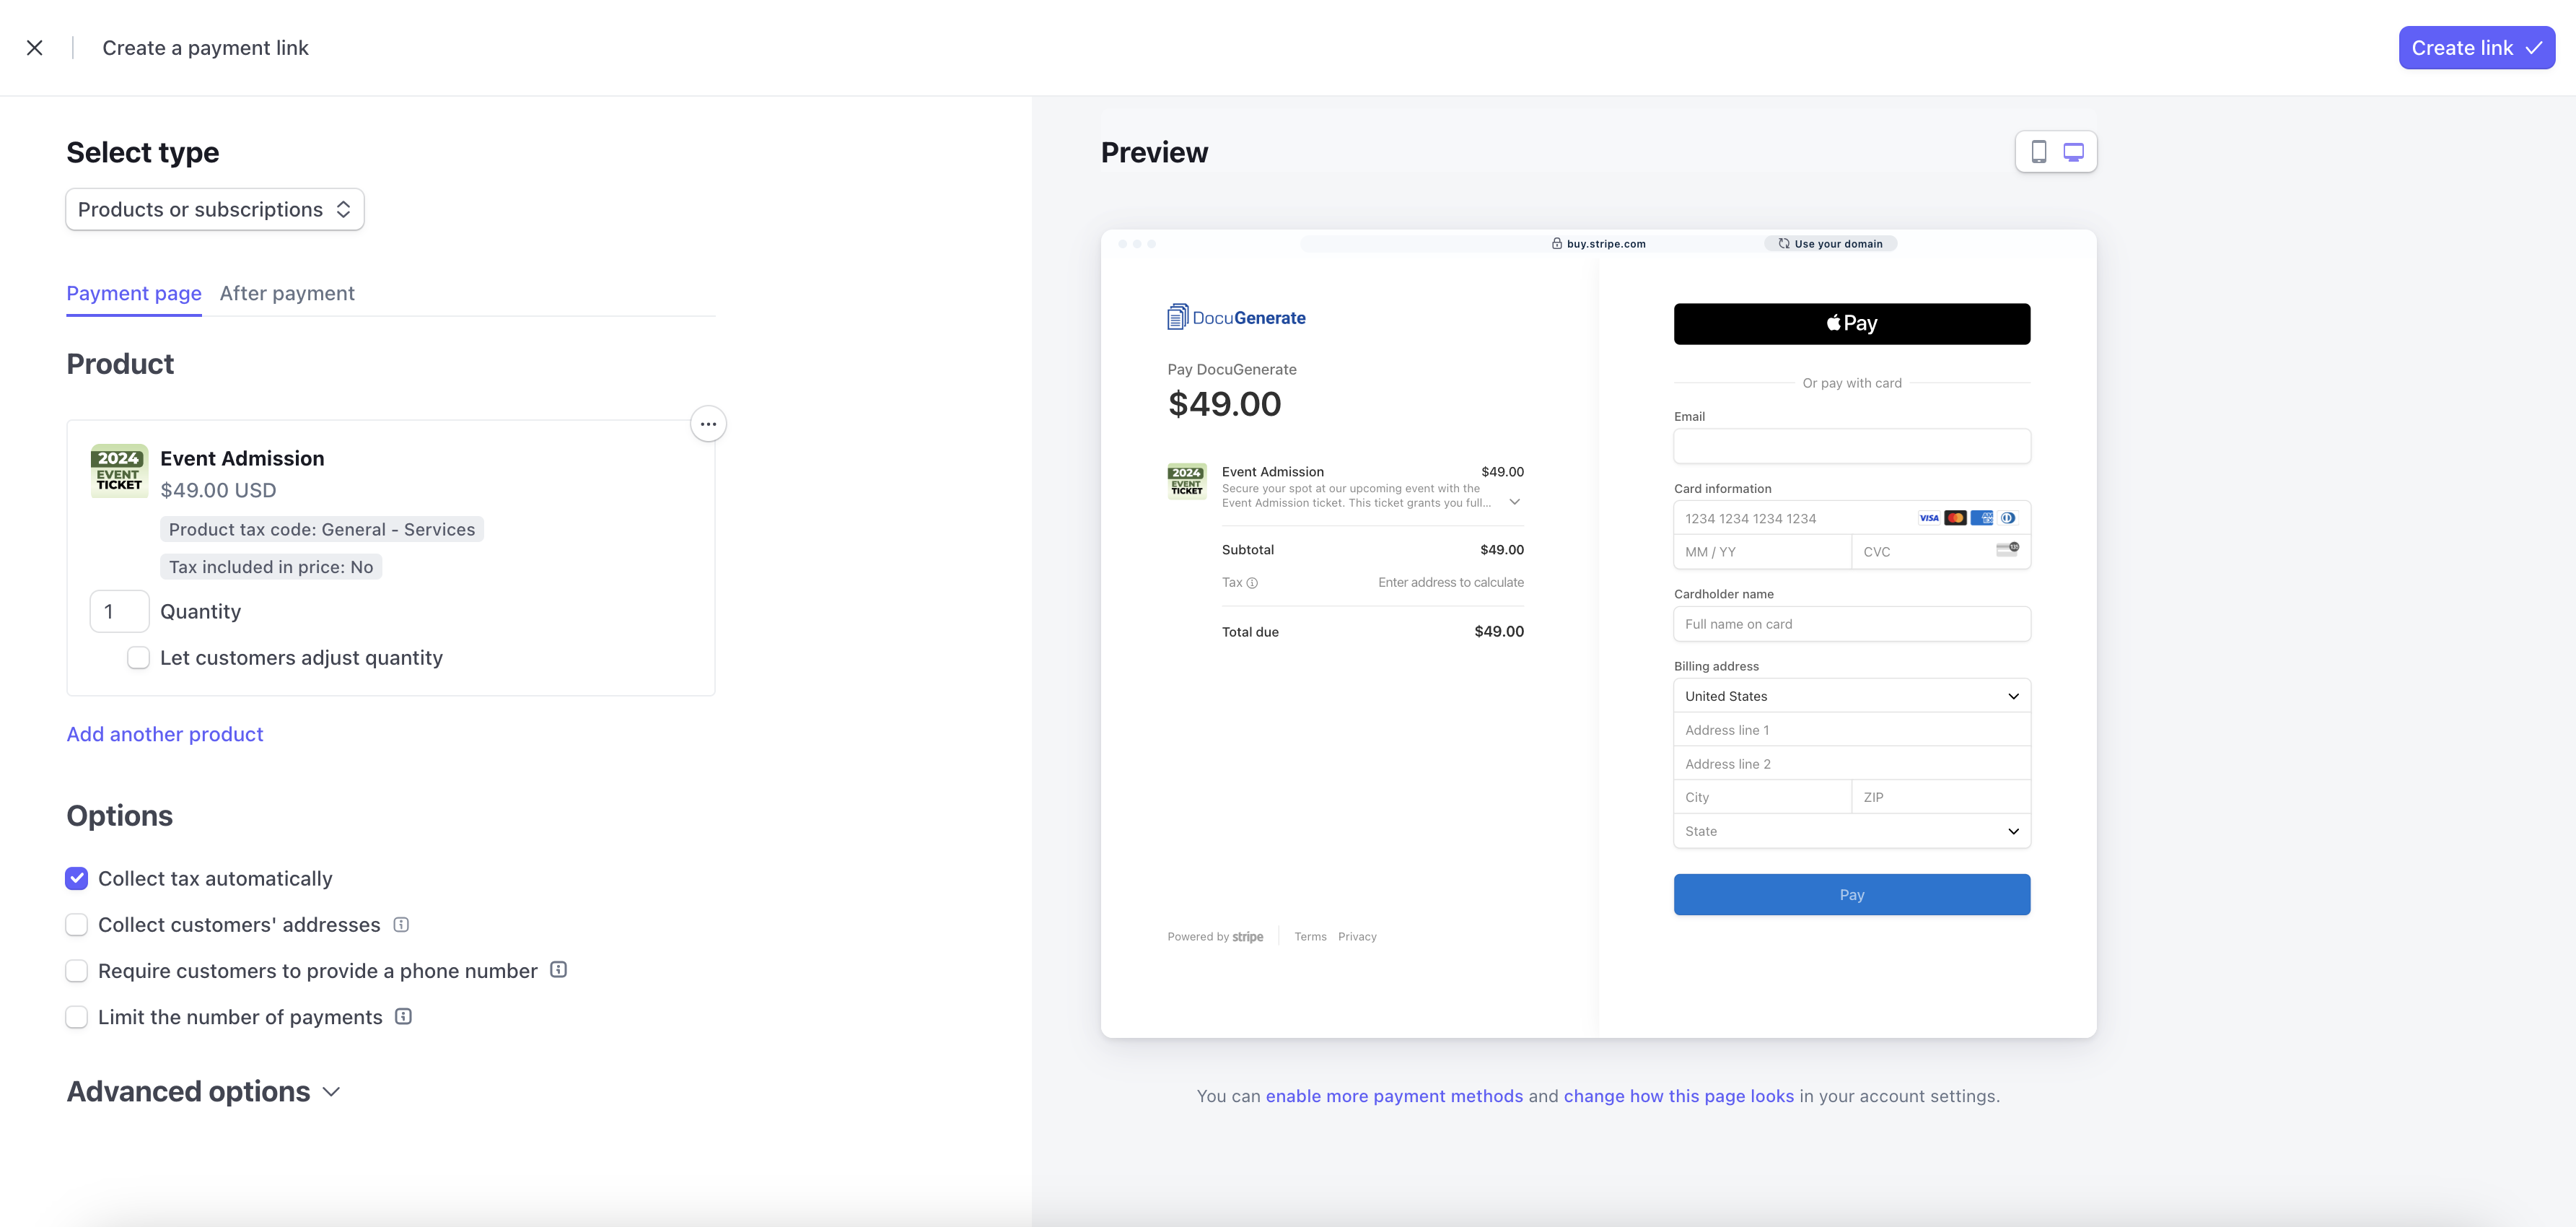
You can test the payment process using the Payment Link for the Event Admission product. Enter your email address and for the card information use 4242 4242 4242 4242, which is a test credit card number on Stripe. For the expiration data and CVC values you can use dummy values, as long as the expiration date is in the future. Then, if you hit Pay, you’ll receive an email with your test PDF ticket, as detailed further.
Setting Up DocuGenerate
DocuGenerate is a powerful tool for automating document creation. In this step, we’ll set up DocuGenerate to create a ticket template. This template will be used to generate personalized tickets for each customer.
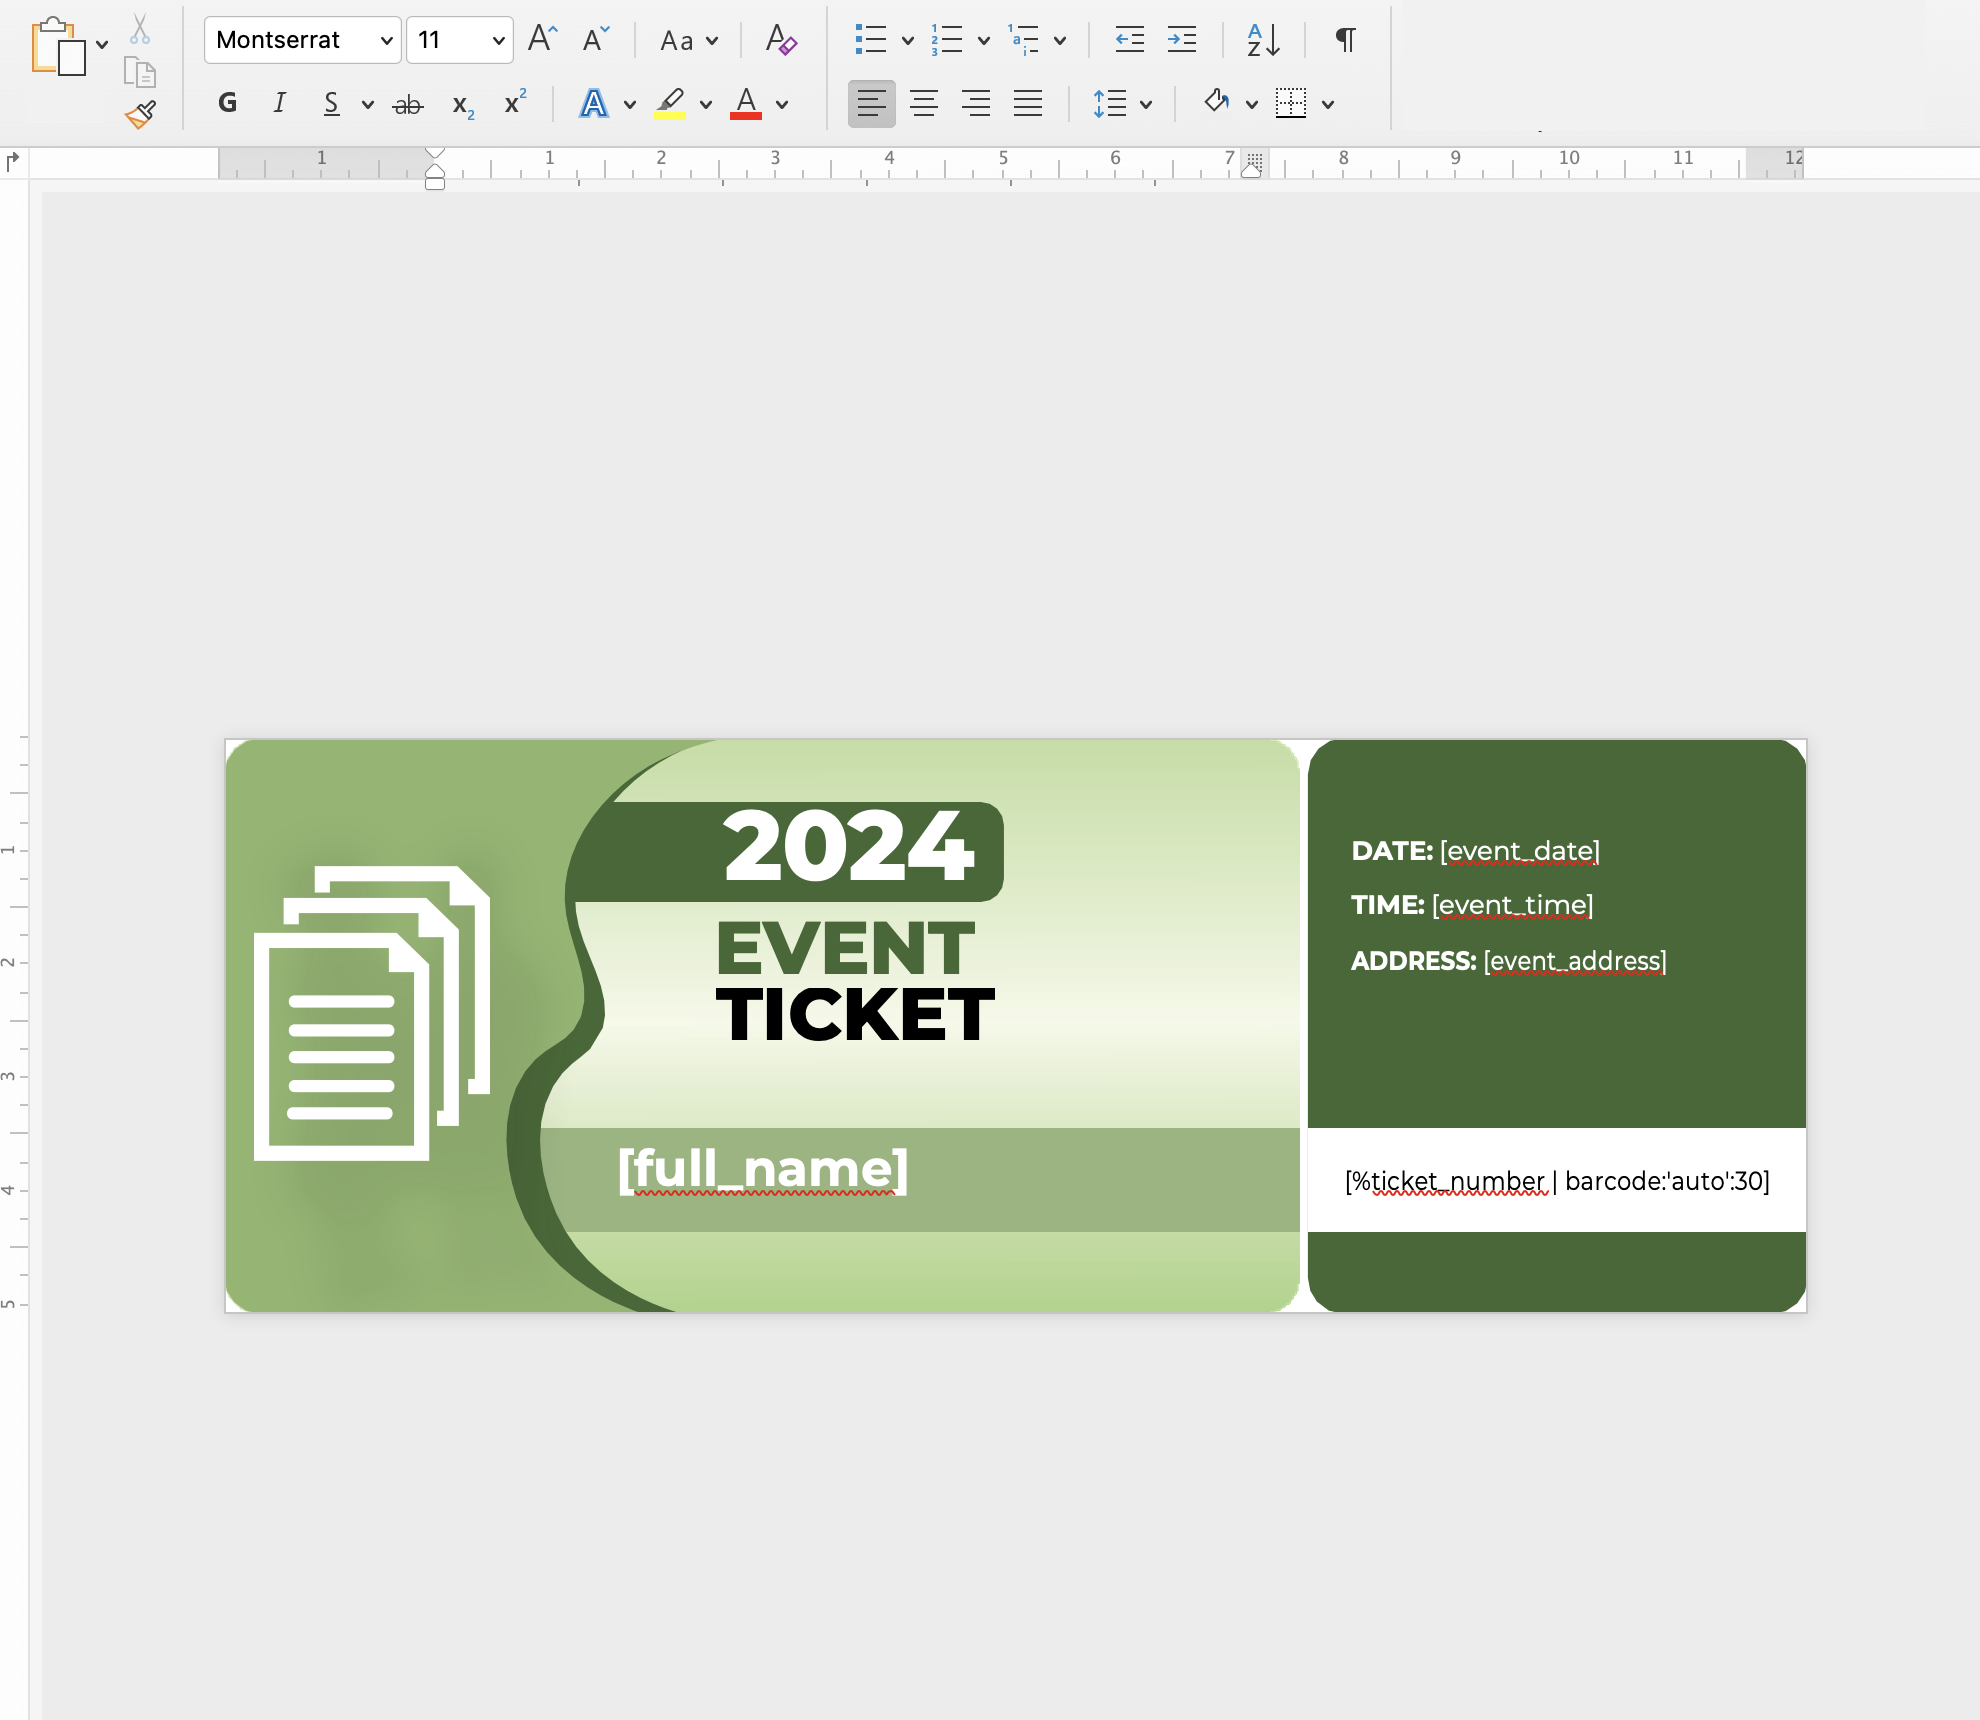
1. Design Your Ticket Template
Start by designing a ticket template in Microsoft Word. The template should include placeholders (also known as merge tags) for the following fields: ticket_number, full_name, event_date, event_time, and event_address. These placeholders will be replaced with actual data when generating the tickets.
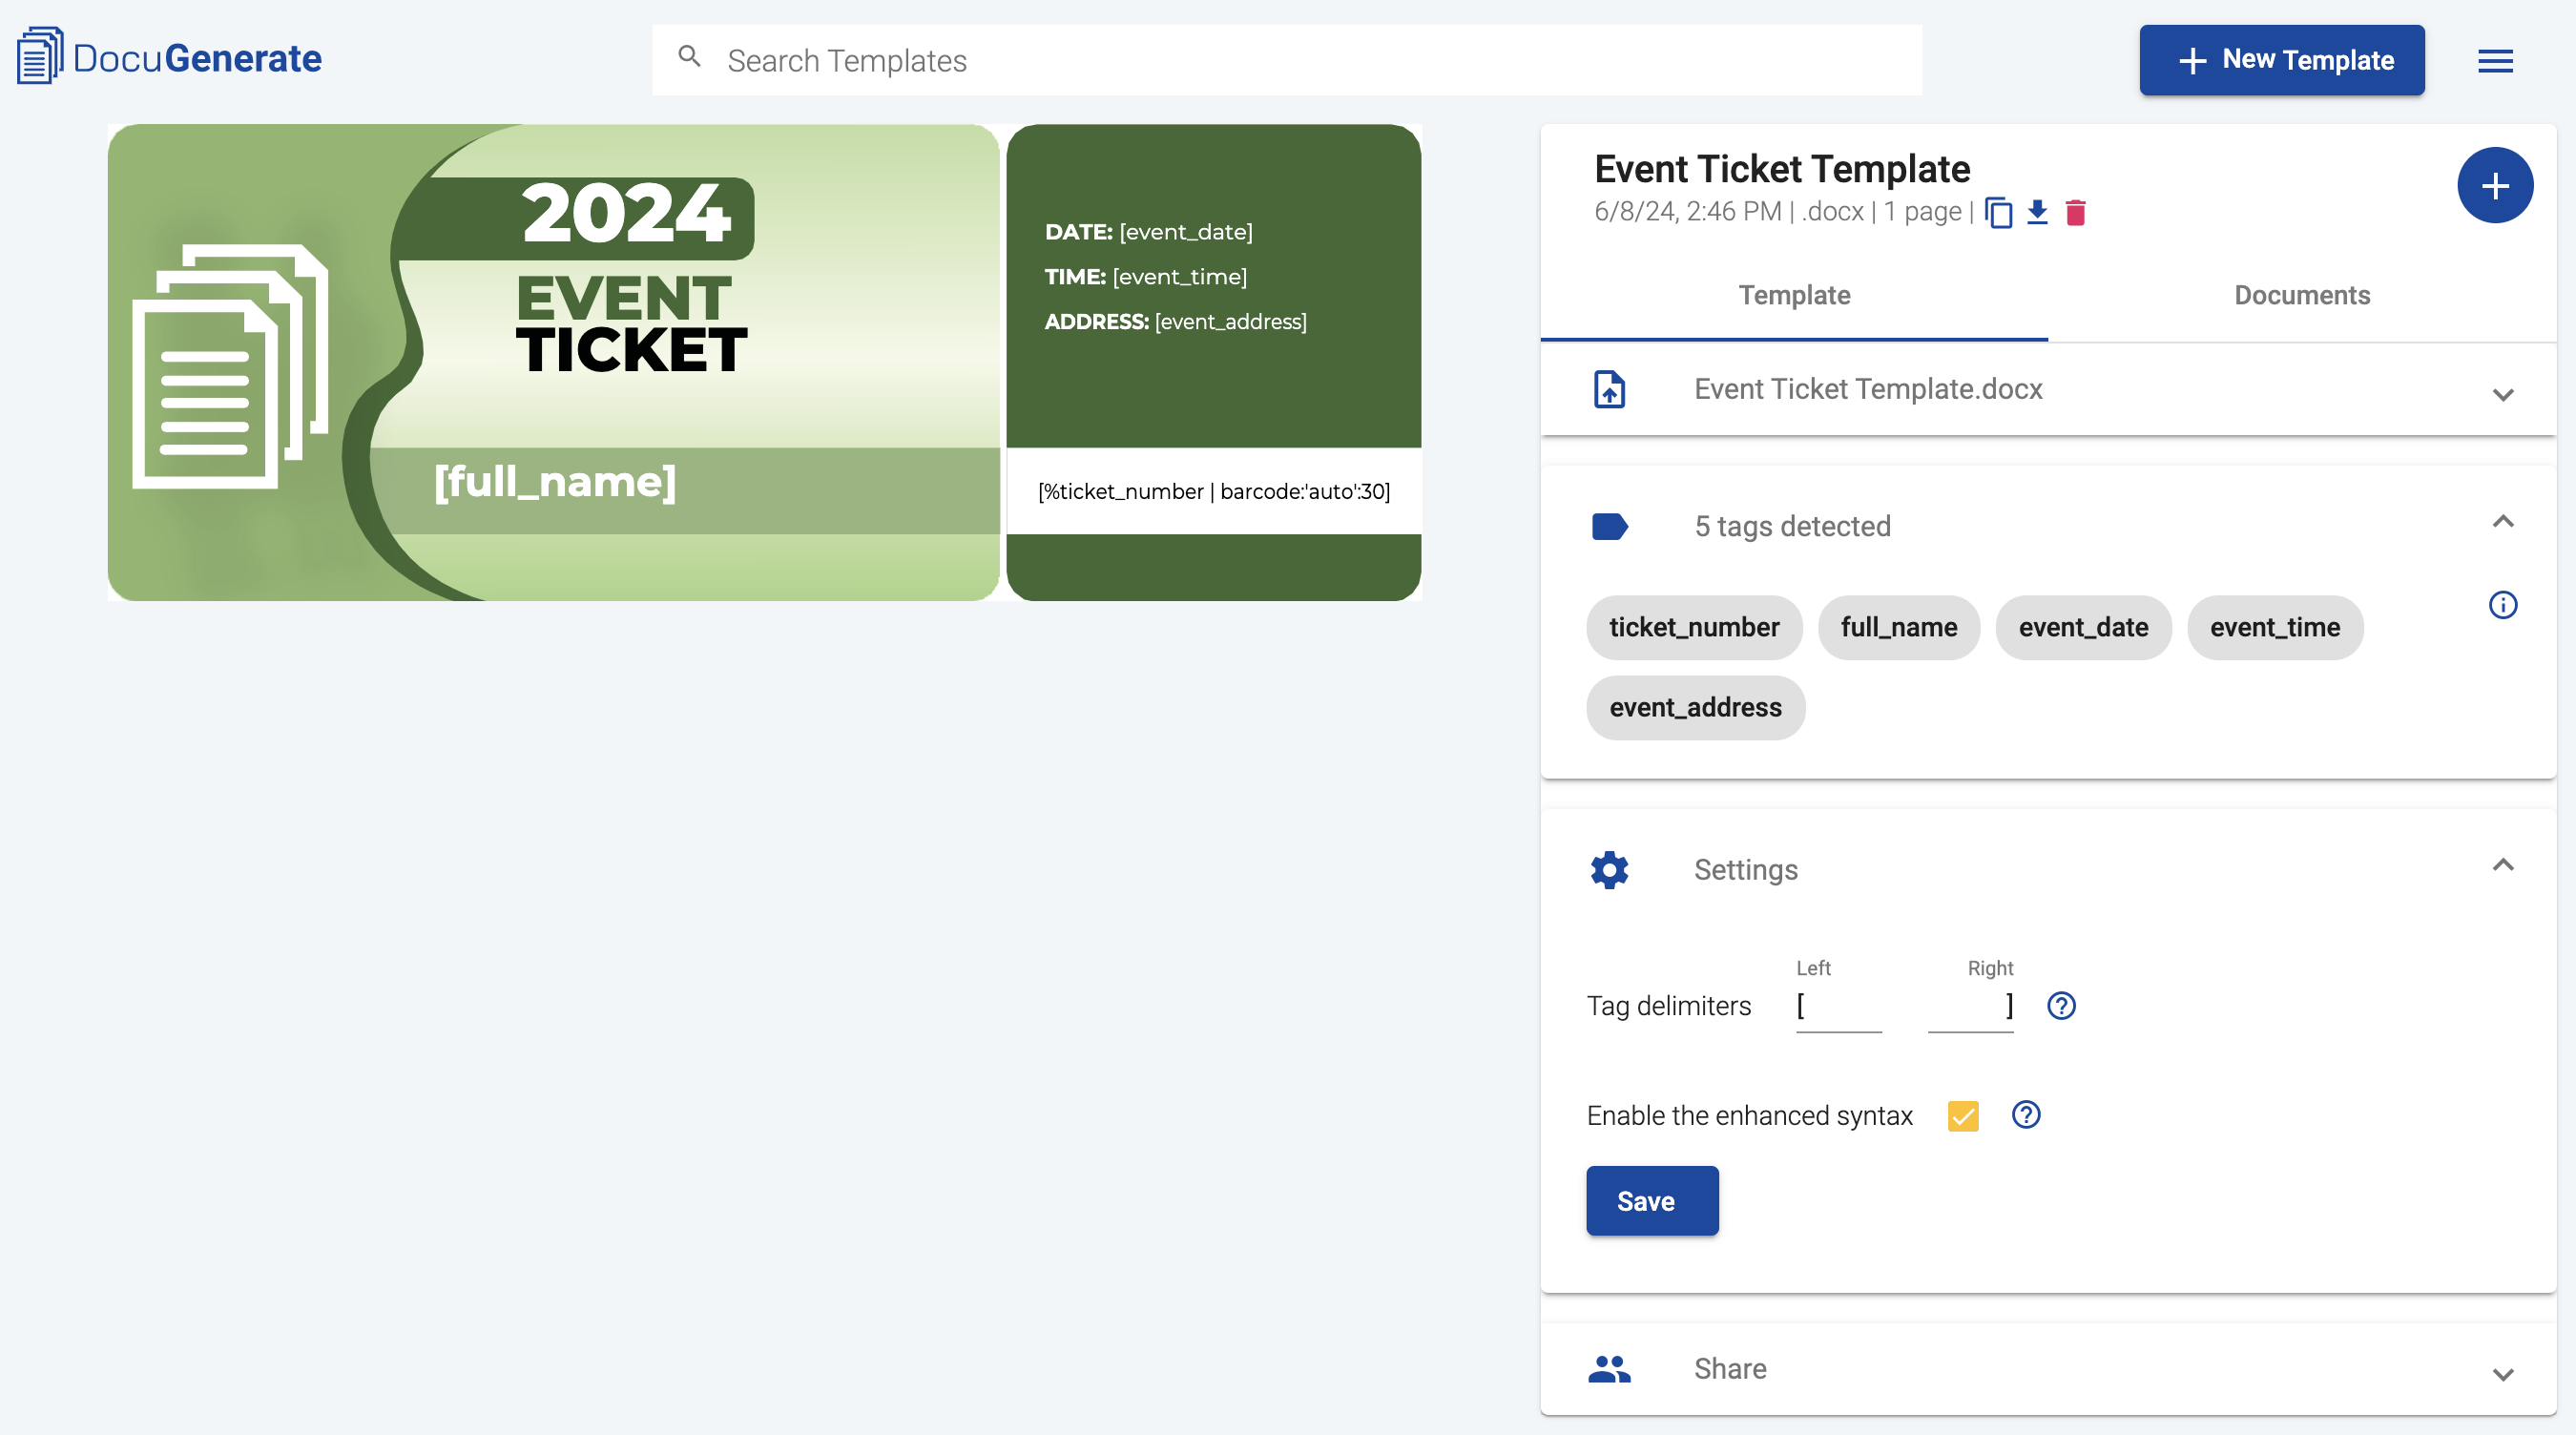
2. Upload the Template to DocuGenerate
Once your template is ready, upload it to DocuGenerate. This step is crucial as it prepares the template for automated document generation. DocuGenerate will use this template to create unique tickets for each customer based on the data received from Stripe.
Make sure to enable the enhanced syntax, which is necessary for using the barcode filter to add a barcode to the ticket. Also, please note that the merge tags don’t have any whitespaces because they are incompatible with the enhanced syntax. Instead, we use the underscore character (_) to separate words within the merge tags.
Feel free to download the template and customize it to fit the branding and details of your event.
Creating the Make Scenario
With Stripe and DocuGenerate set up, we’ll now create a scenario in Make to automate the ticket generation and email process. This scenario will connect all the components together, ensuring a seamless workflow from payment to ticket delivery.
1. Set Up the “Generate a Document” Action
In Make, set up the Generate a Document action by connecting the DocuGenerate app. This action will take the data from the Stripe checkout session and use it to generate a ticket. Ensure that all the placeholders in your ticket template are correctly mapped to the data fields from Stripe.
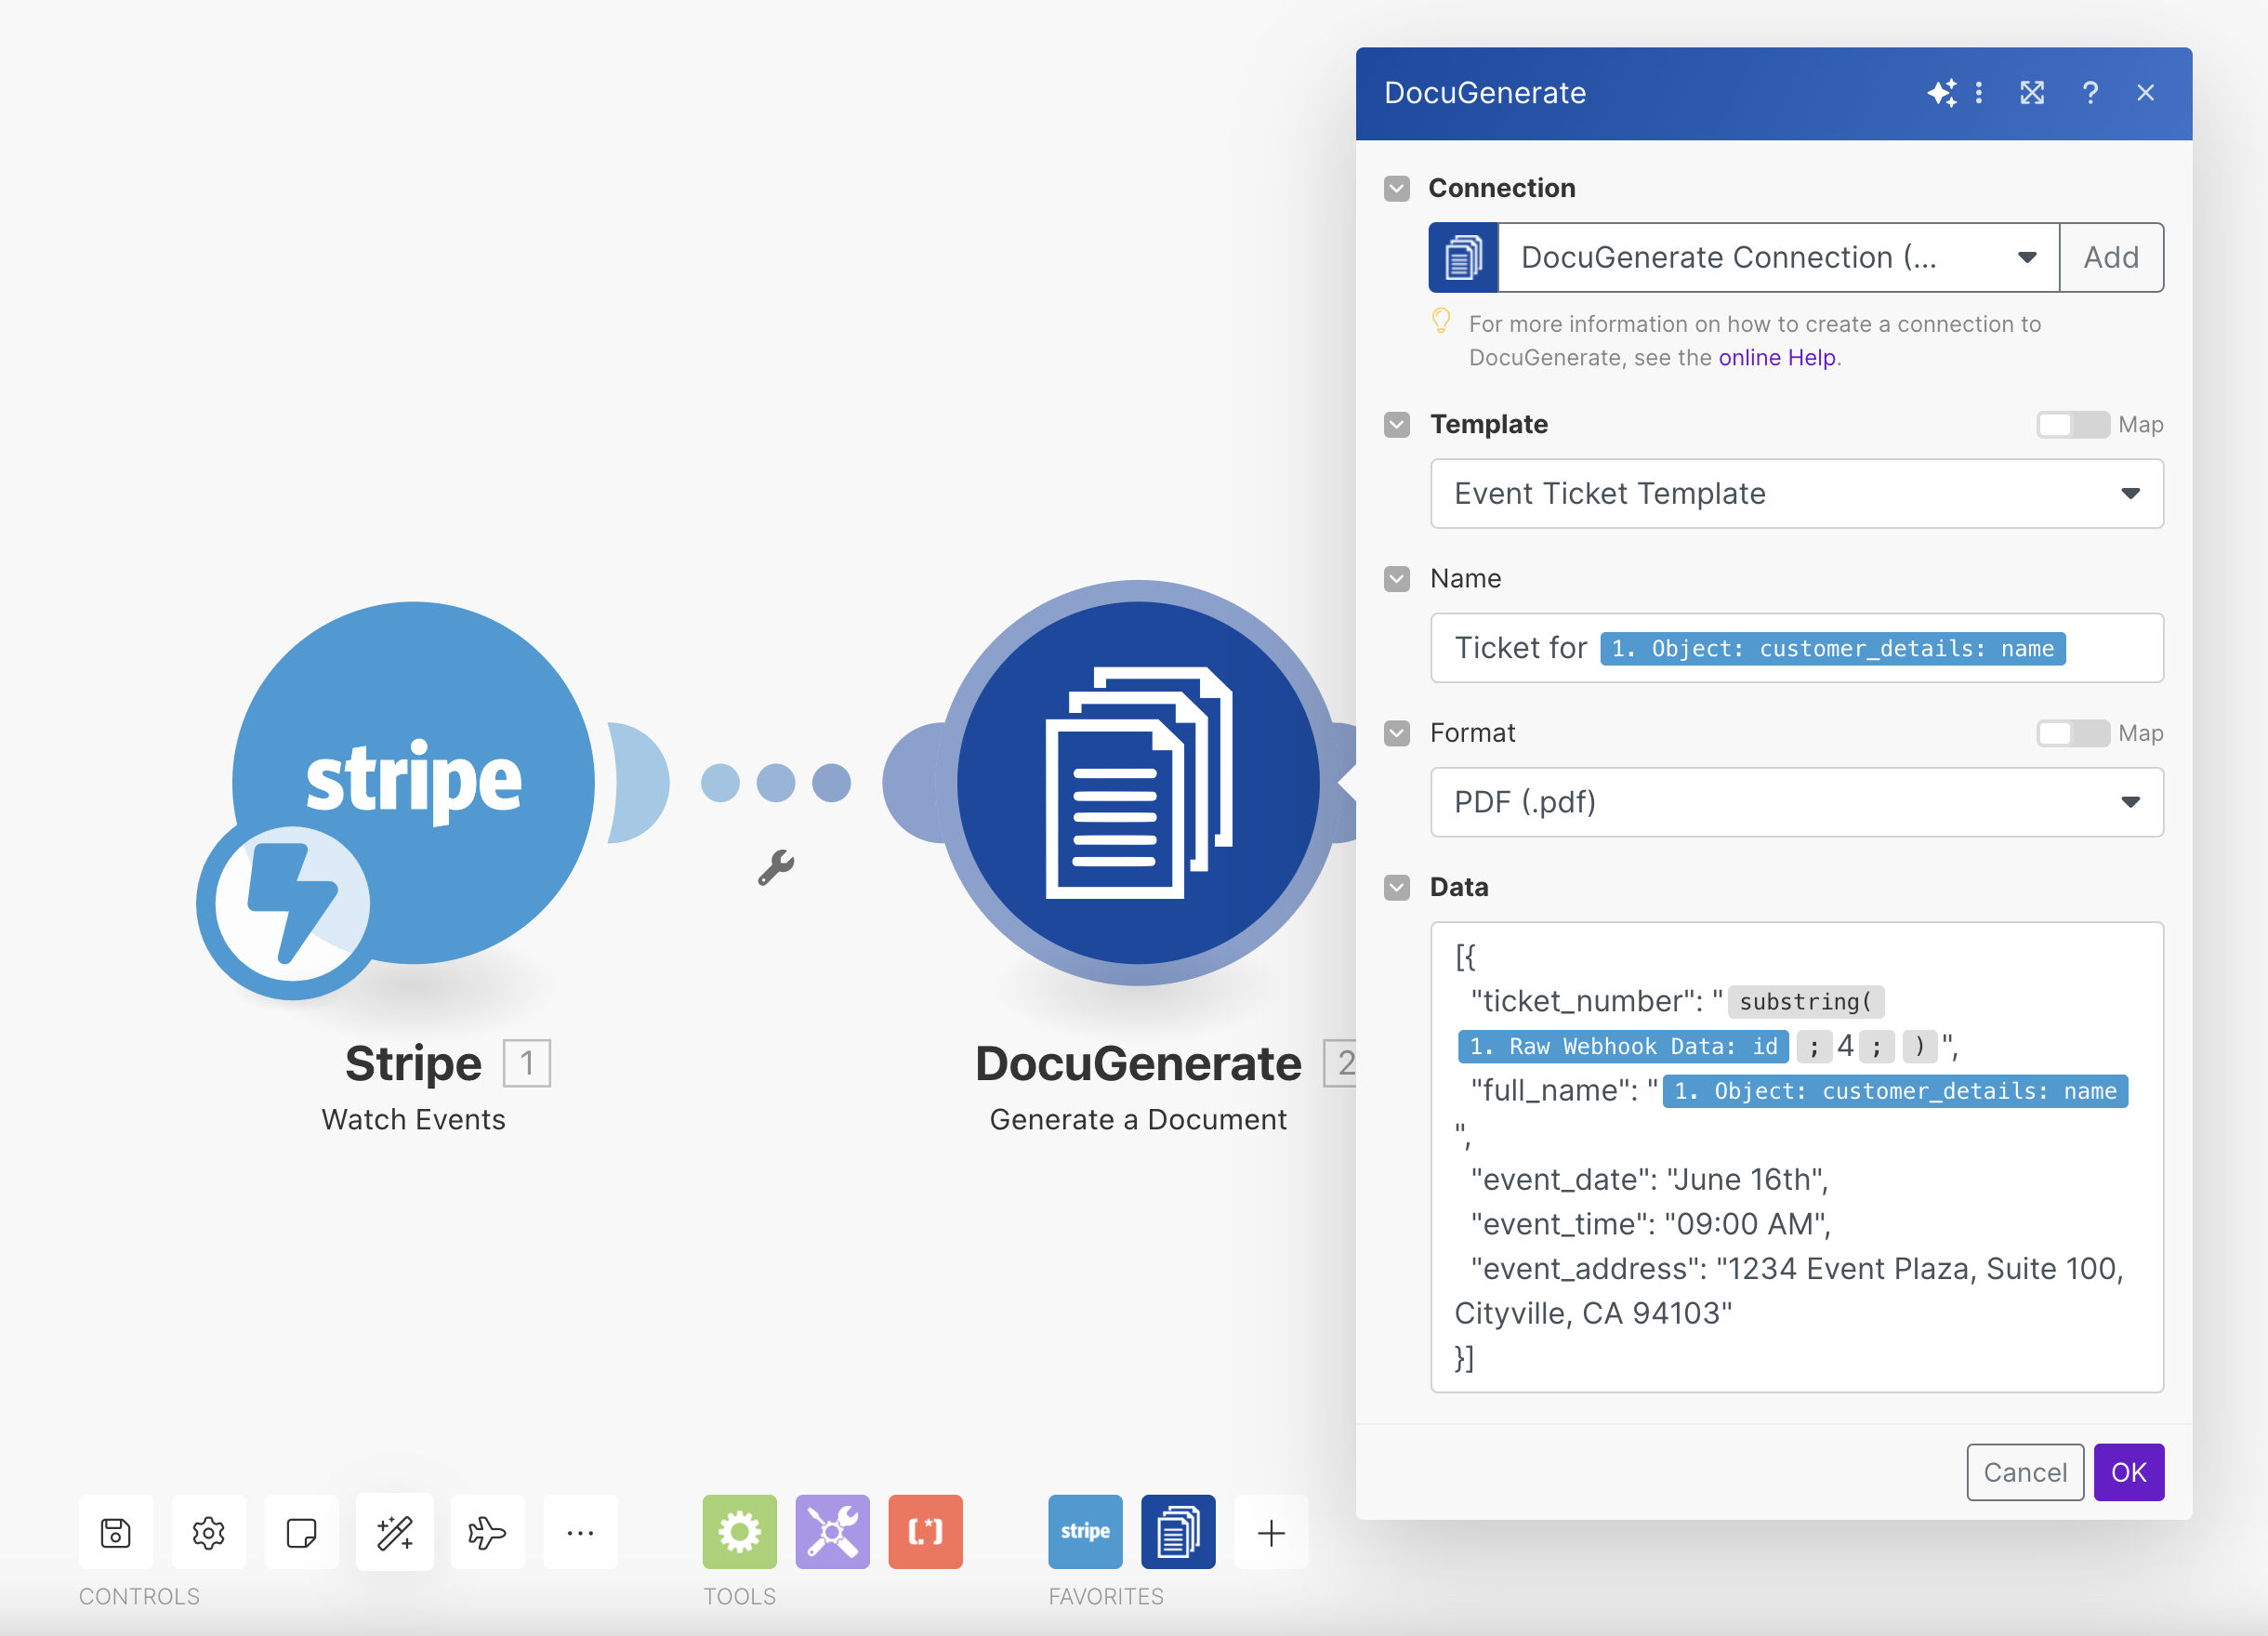
For this tutorial, we used the event ID as the ticket number, but you can use any value that fits your needs. We also used the customer_details: name property from the Stripe event payload to populate the document name and the full_name tag in the document.
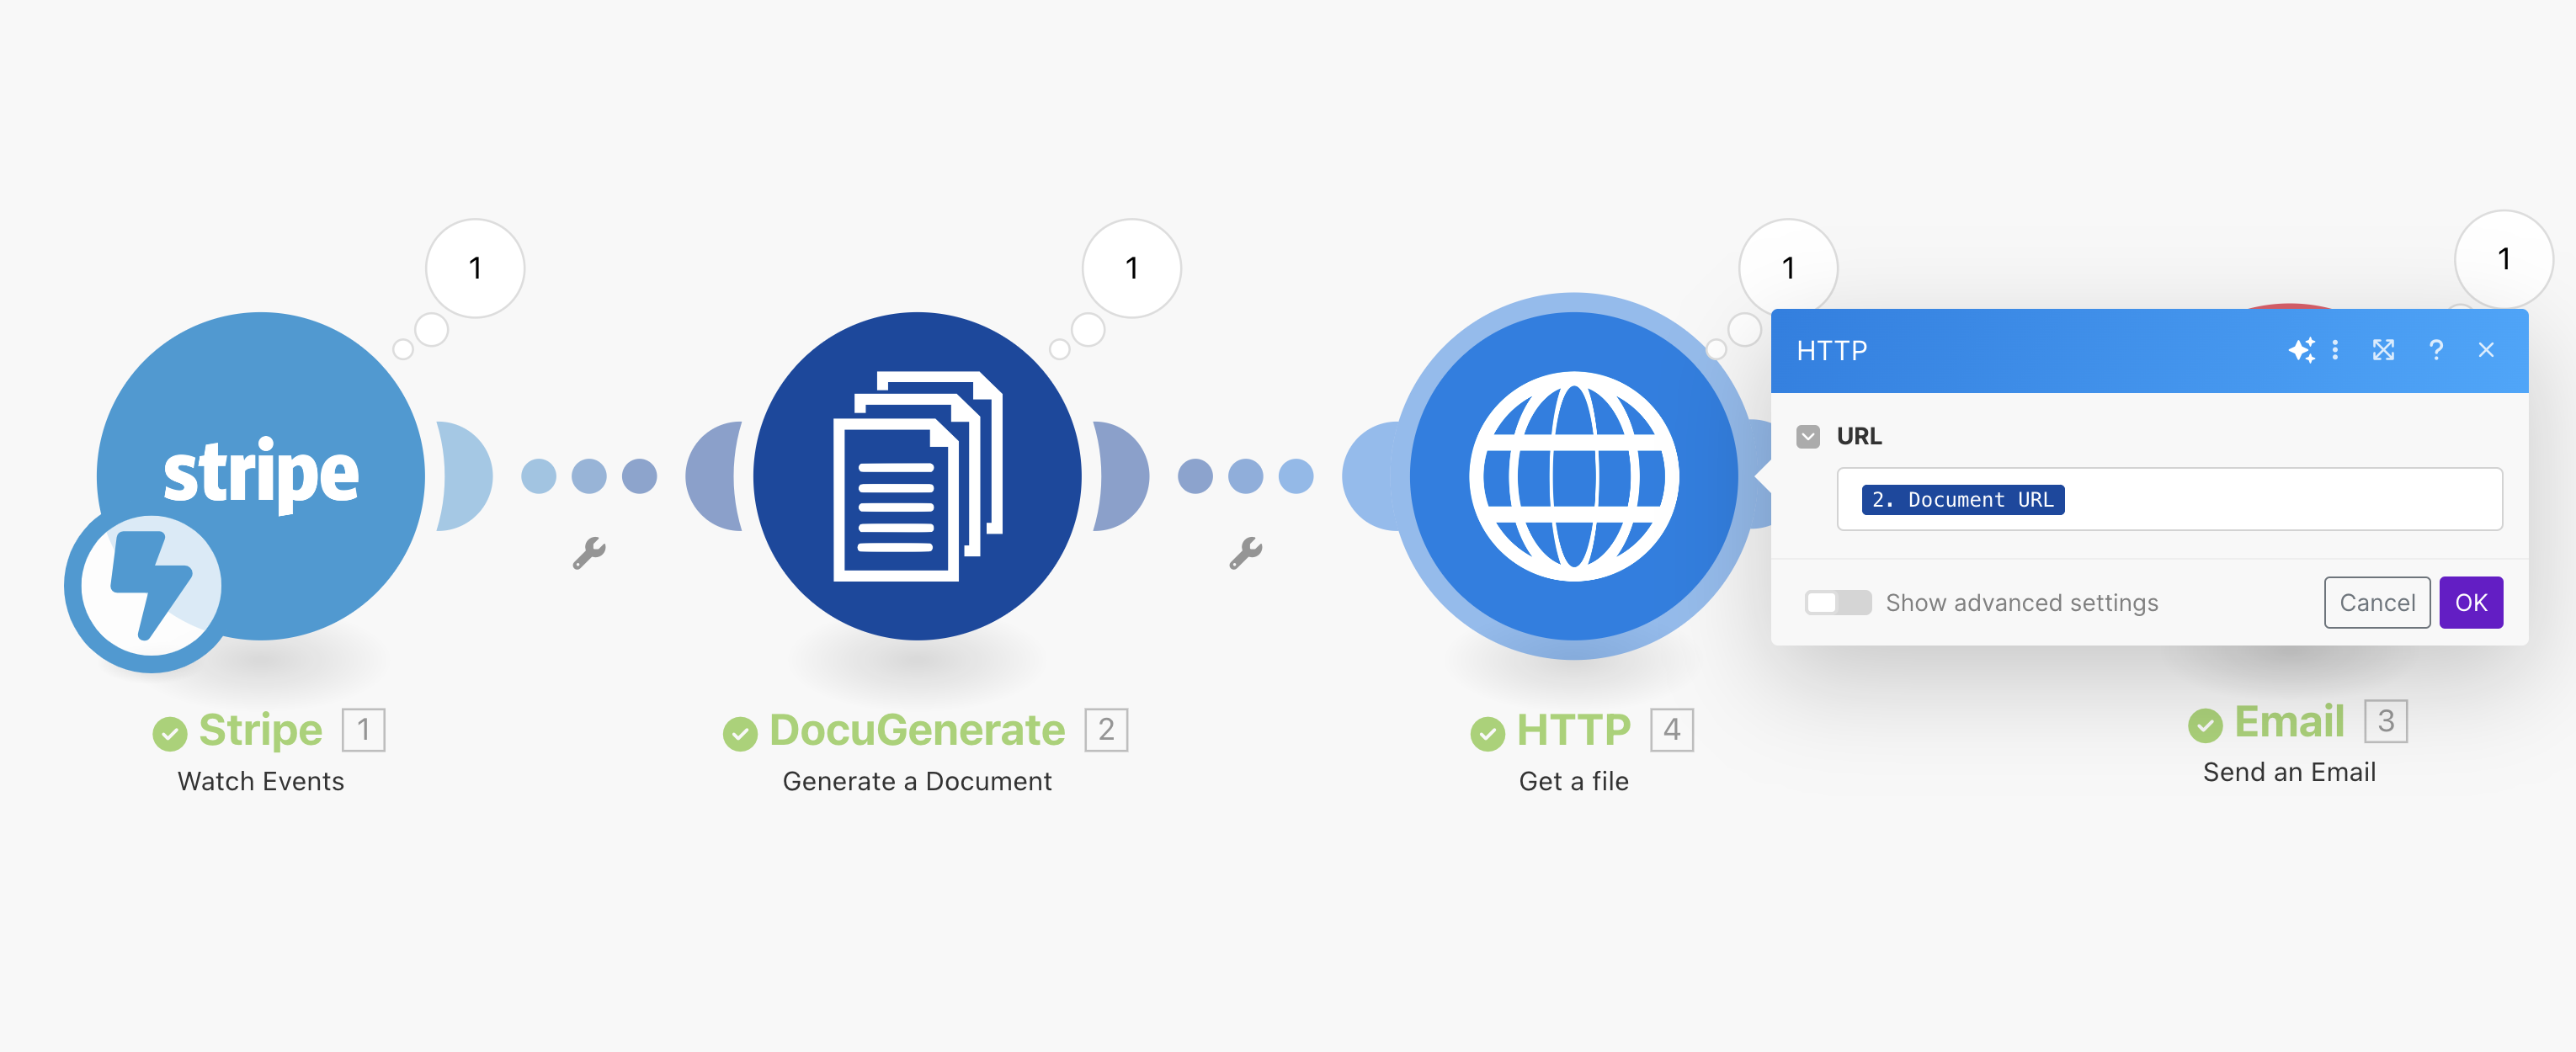
2. Use the HTTP Module to Get the File Content
After generating the document, use the HTTP module in Make to retrieve the generated PDF file content. This module will fetch the ticket from DocuGenerate, ready to be sent via email.
3. Set Up the “Send an Email” Action in Make
Next, configure the “Send an Email” action from the official Email app. This action will send the generated ticket PDF to the customer’s email address. Make sure to customize the email content to include event details and any other relevant information.
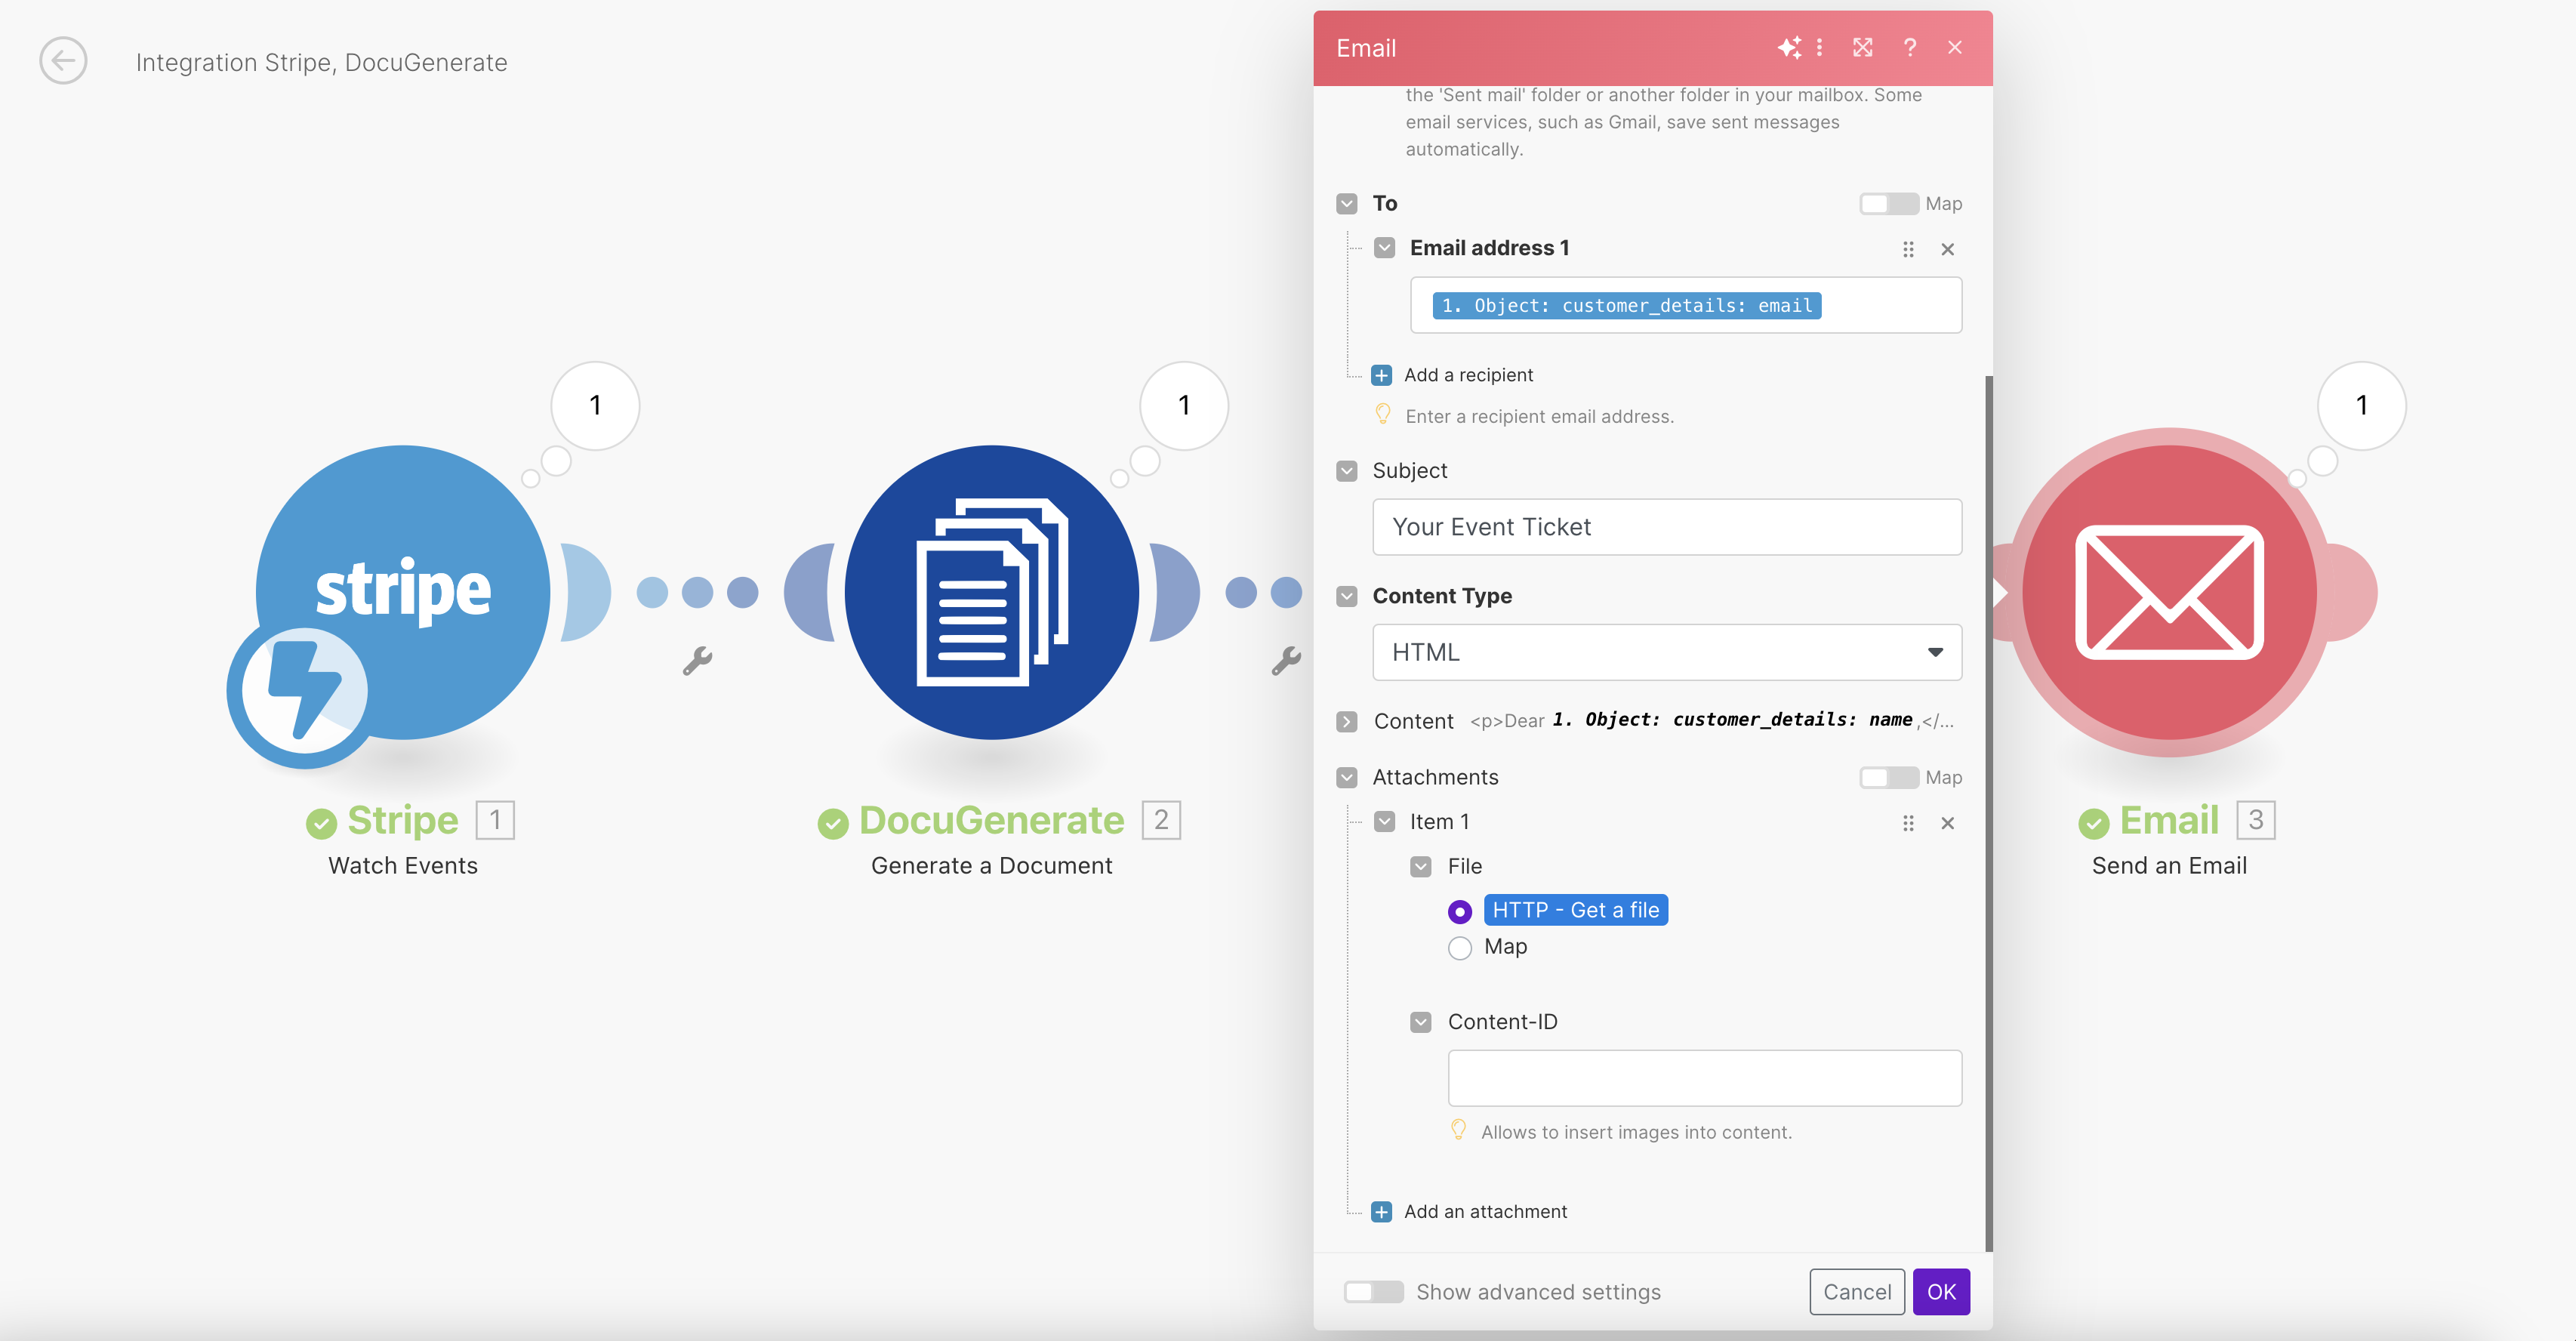
The To Email Address value is populated with the customer_details: email property from the Stripe event payload that was received by the webhook after a successful payment.
As for the Attachment, its value will be provided by the HTTP - Get a file action previously configured.
For a more advanced email marketing solution, consider using Mailmodo as an alternative to the generic Email app in Make. With Mailmodo’s Make app, you can easily create and send interactive, dynamic emails directly from your workflow. This option is particularly useful if you want to integrate features like AMP emails, tracking, or analytics.
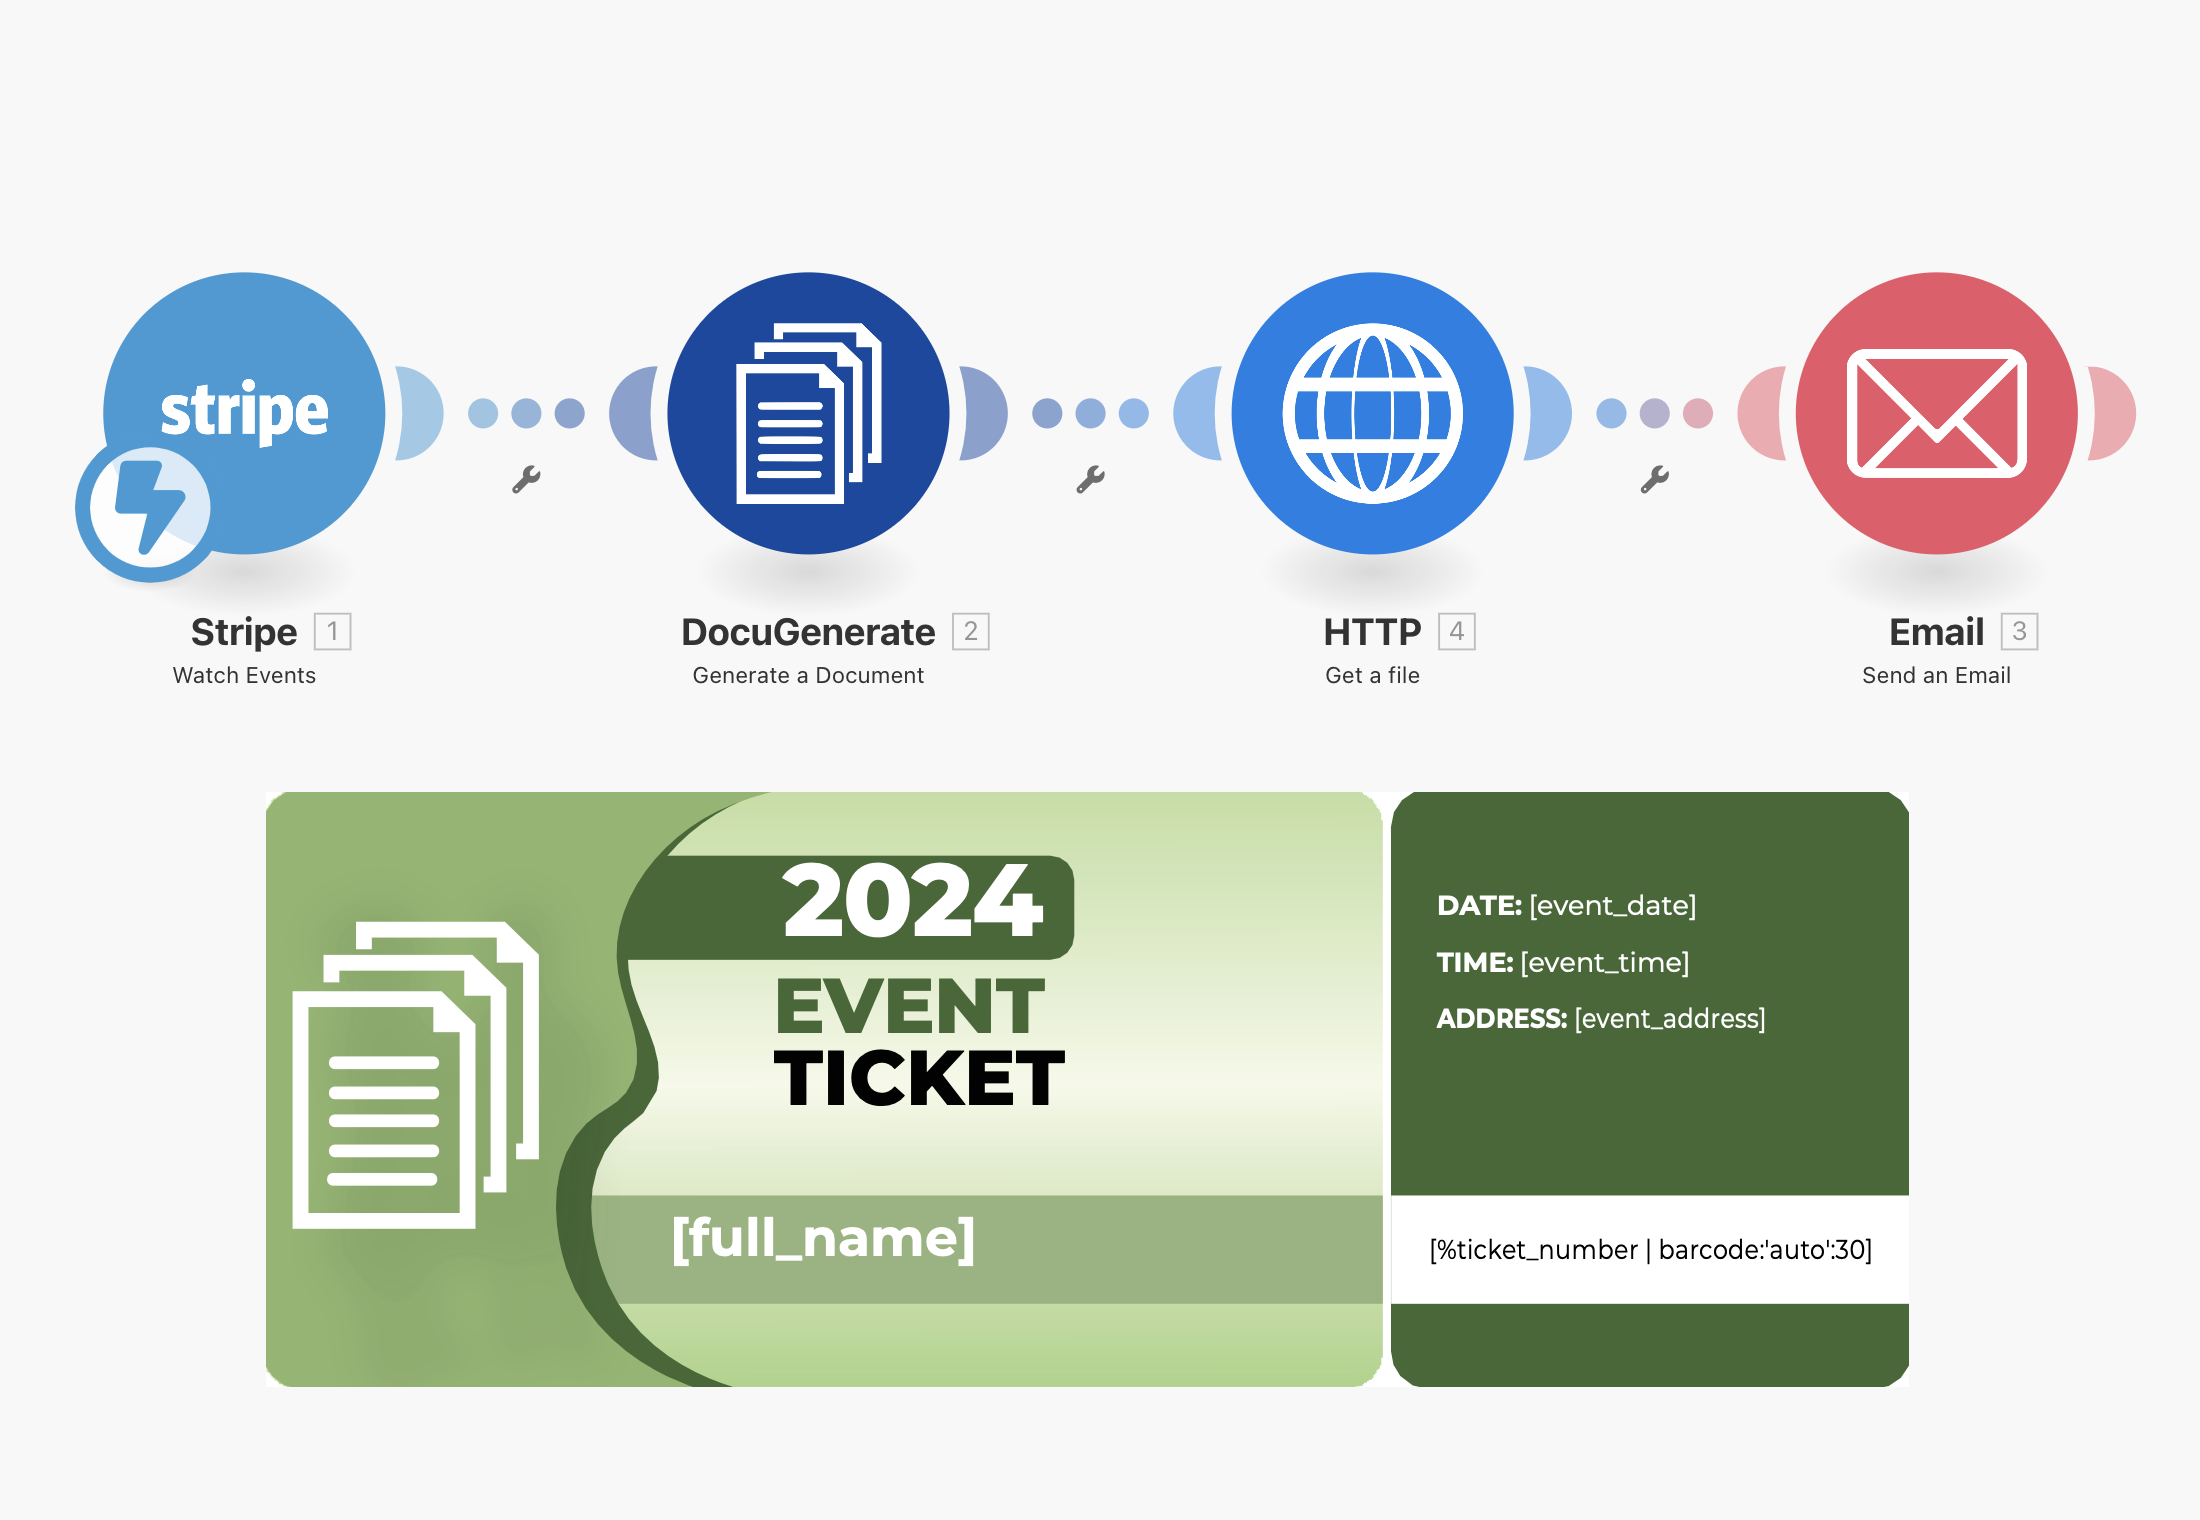
4. The Complete Make Scenario
The visual representation of the complete scenario shows how each step is interconnected, ensuring a smooth flow of data and actions. Each module in the scenario plays a crucial role:
- The Watch Events trigger monitors Stripe for completed checkouts.
- The Generate a Document action creates the ticket using the DocuGenerate template.
- The Get a File action retrieves the generated PDF ticket.
- The Send an Email action delivers the ticket to the customer.
Once the scenario is triggered and the ticket is generated, the customer will receive an email with the ticket attached. This automated process ensures that customers receive their tickets promptly and without any manual intervention.
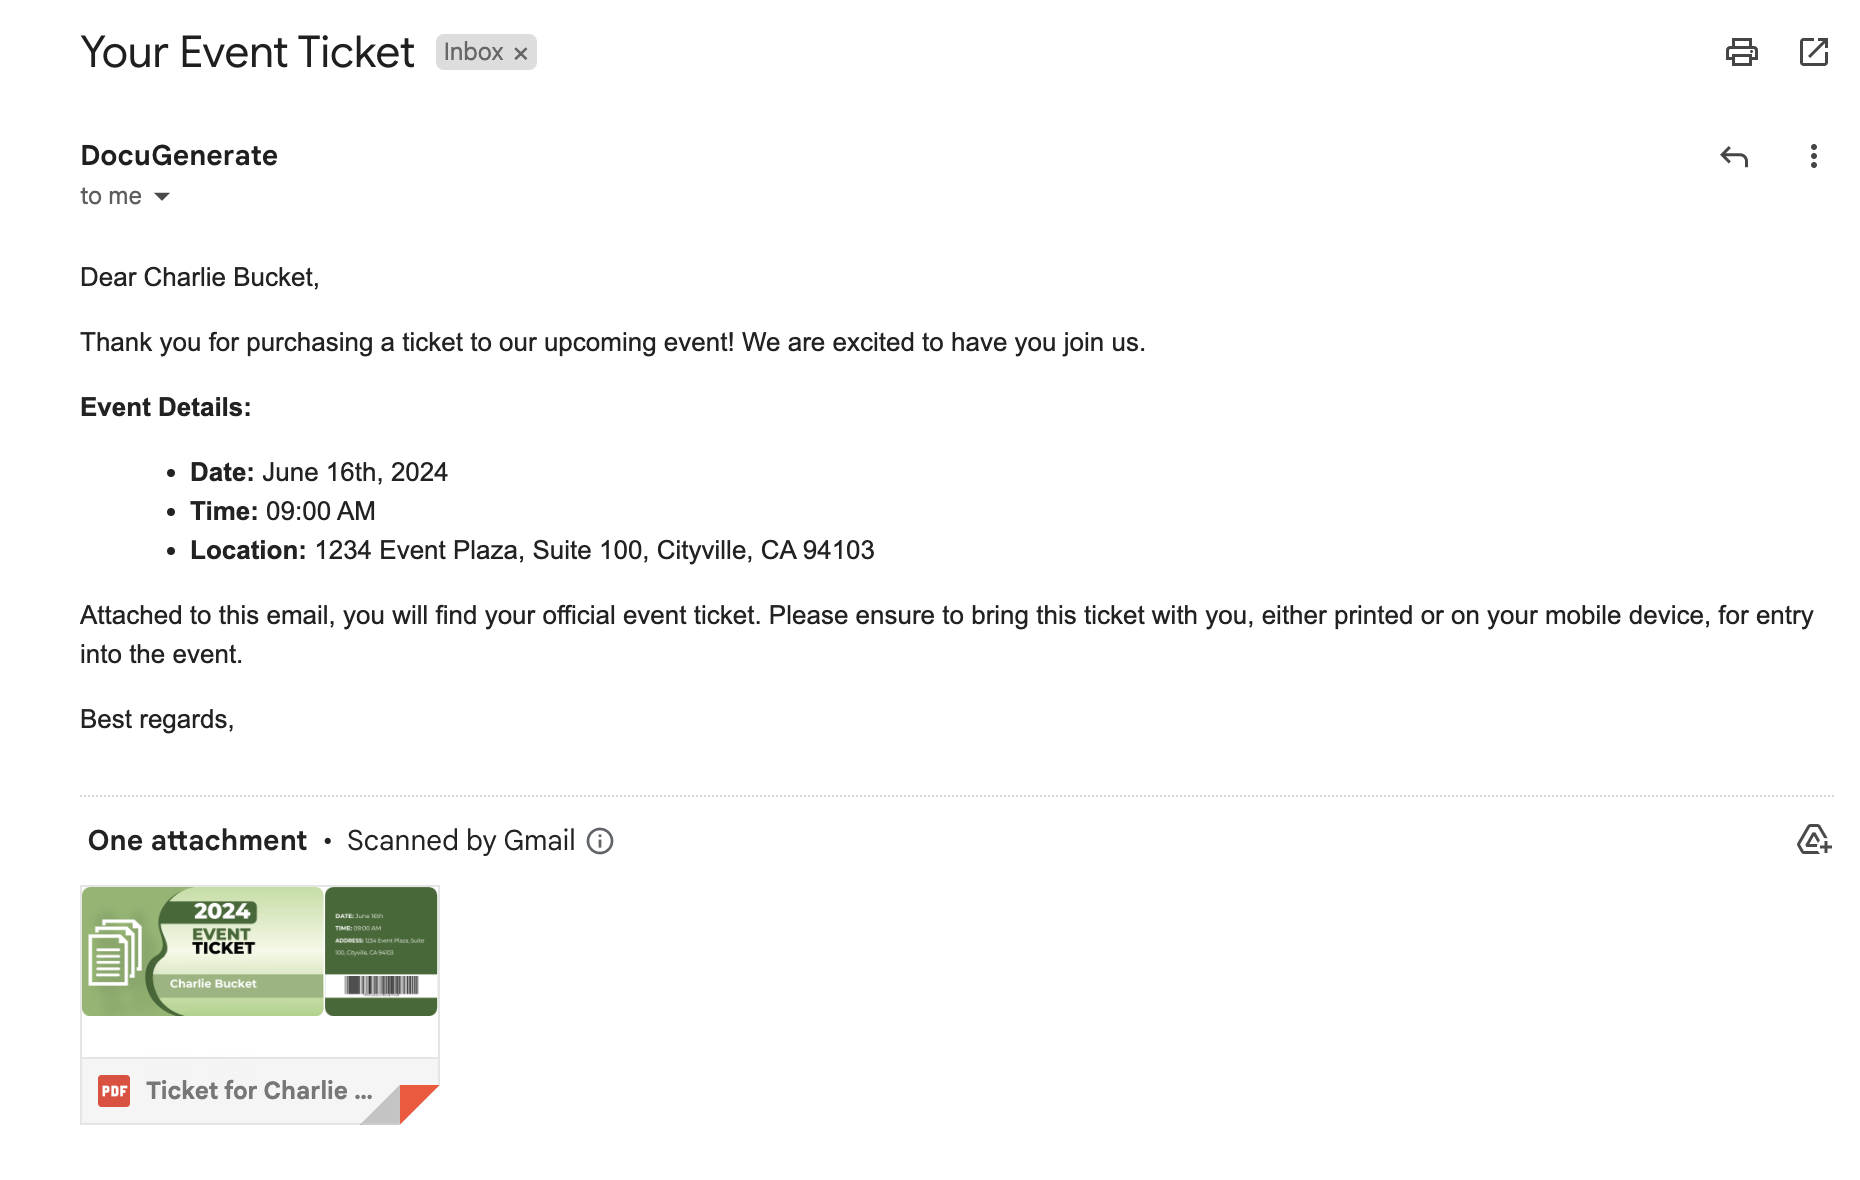
Here’s an example of a generated ticket, which you can download here if you’re interested.

Conclusion
By following this guide, you can automate the entire process of creating and sending event tickets with barcodes using Make. This not only saves time but also ensures a smooth and professional experience for your event attendees. Integrating Stripe, DocuGenerate, and Make provides a powerful solution to streamline ticket management for any event.
Automating ticket generation and delivery improves efficiency and reduces errors, making it easier for you to manage your events. Moreover, it enhances the customer experience by providing instant access to tickets and ensuring they have all the necessary information at their fingertips.
Resources